Walkthrough
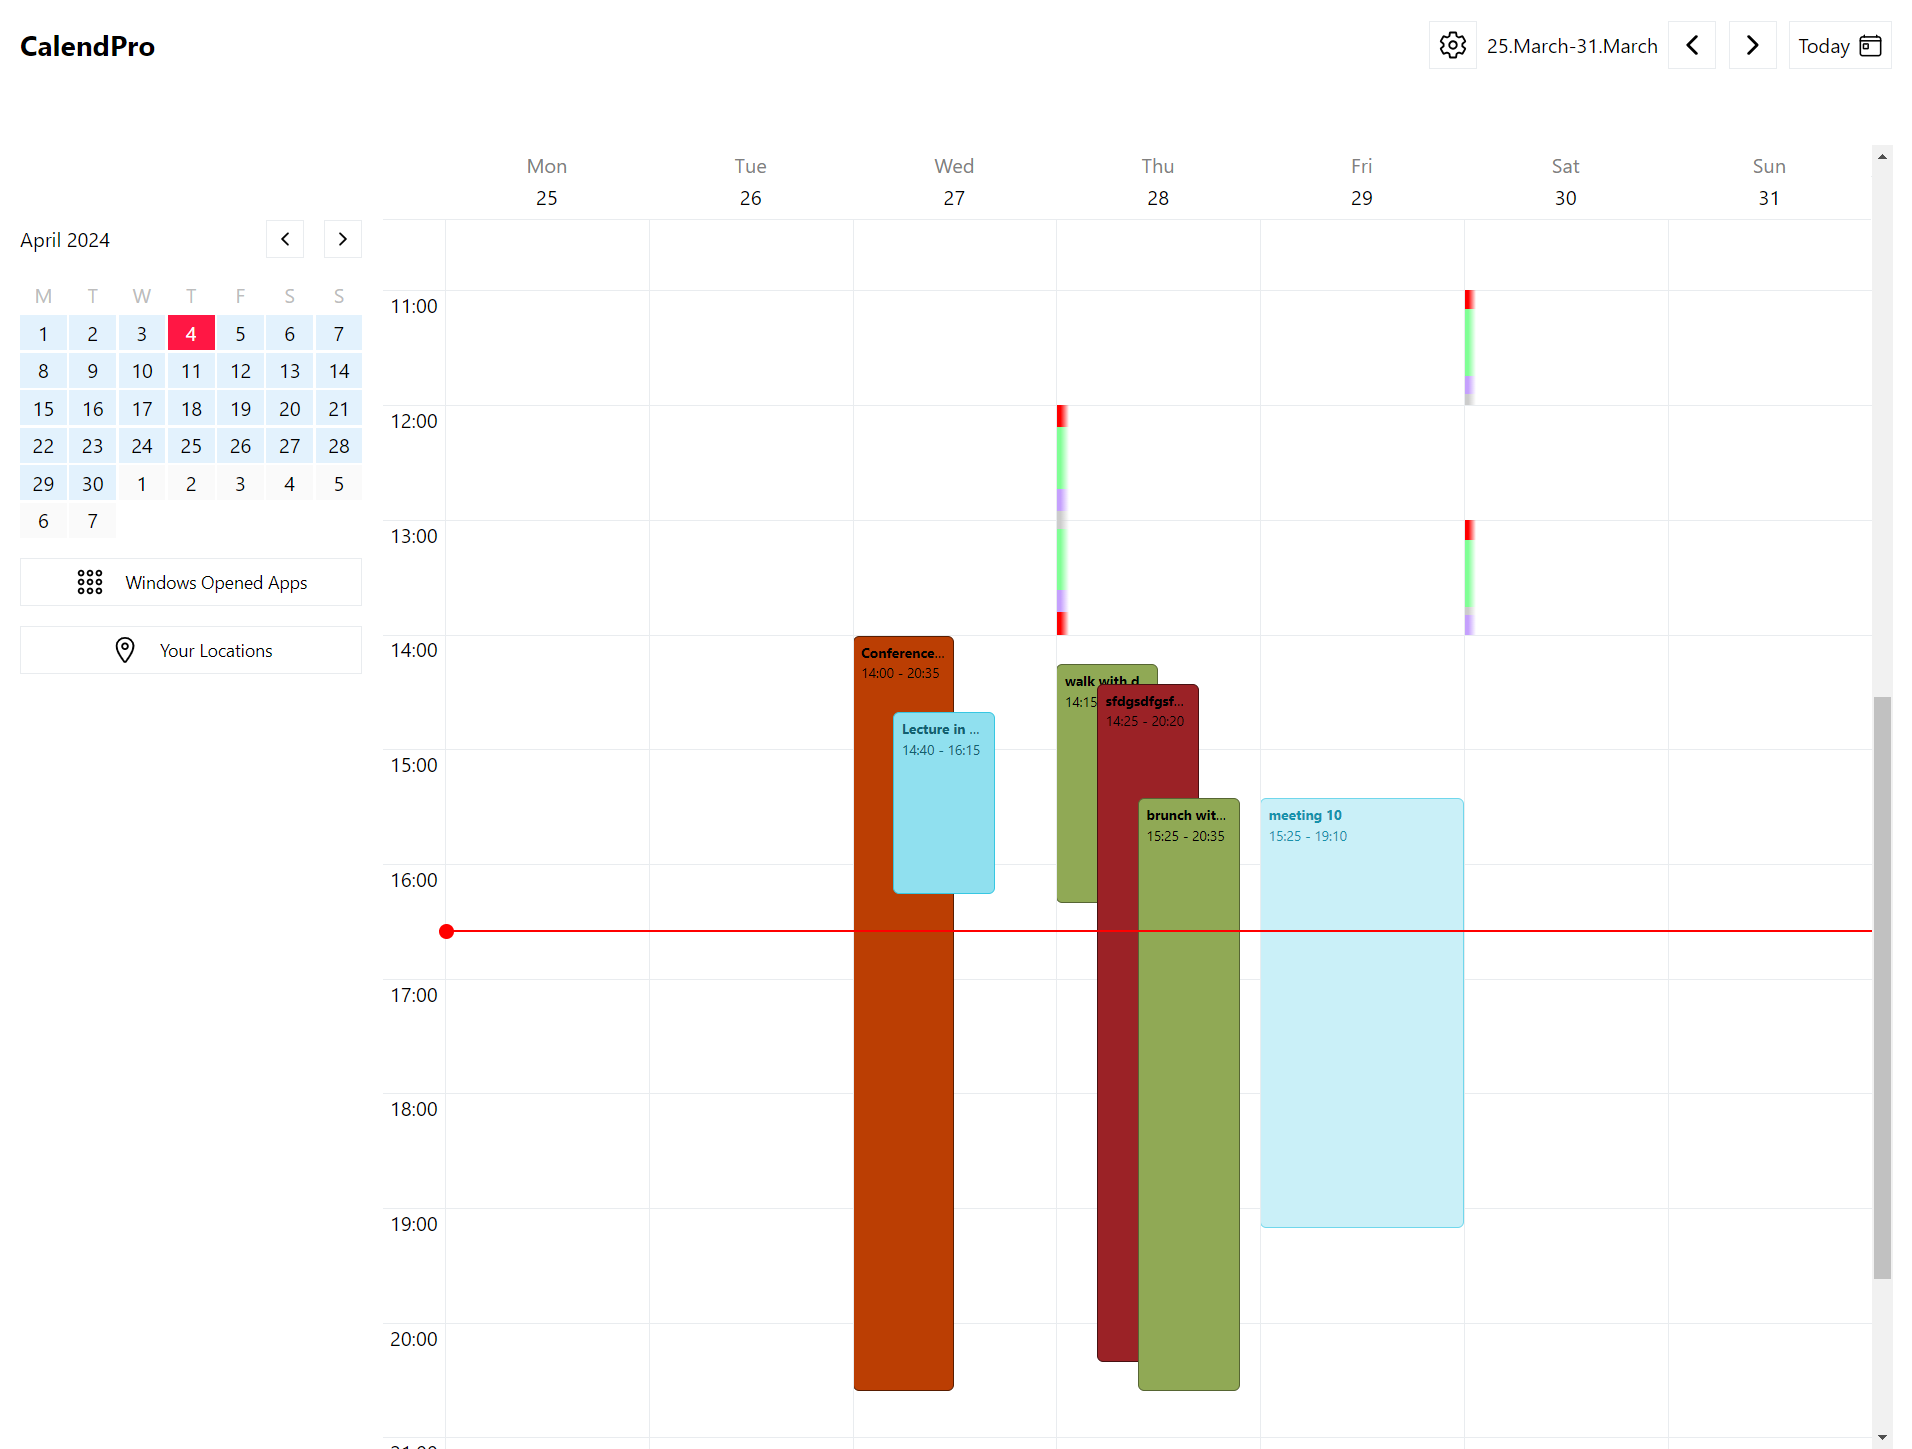
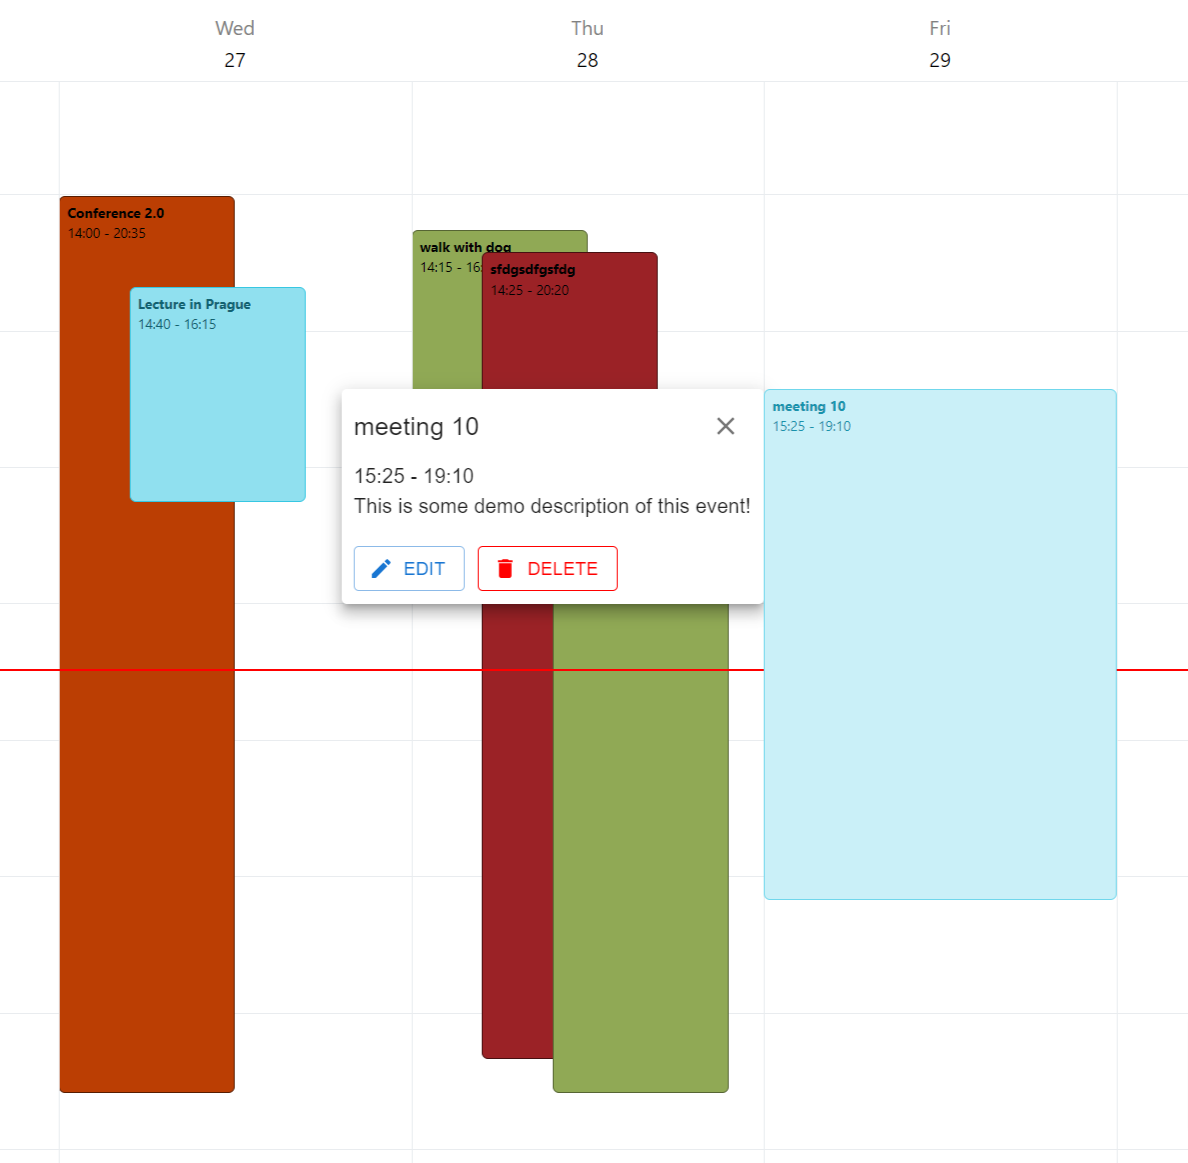
Calendar is one of the example apps highlighting the current possibilities of the system. It allows the user to perform normal crud operations.
The app is highly responsive and allows multiple events to be overlayed.
Not only does the app allow the user a comfortable management of their time but it also processes data generated from other apps, namely the location tracker ( android app ) and Windows Apps Tracker.
Profiles
This is the profile the calendar needs to register at the initialisation process.
{
    "title": "Event",
    "type": "object",
    "properties": {
        "id": {
            "type": "string",
            "description": "Unique identifier for the event."
        },
        "startTime": {
            "type": "string",
            "format": "date-time",
            "description": "The start time of the event."
        },
        "endTime": {
            "type": "string",
            "format": "date-time",
            "description": "The end time of the event."
        },
        "color": {
            "type": "string",
            "description": "A string representing the color associated with the event."
        },
        "title": {
            "type": "string",
            "description": "The title of the event."
        },
        "description": {
            "type": "string",
            "description": "A detailed description of the event."
        }
    },
    "required": [
        "startTime",
        "endTime",
        "title",
        "description",
        "color"
    ],
    "additionalProperties": false
}
User Setup
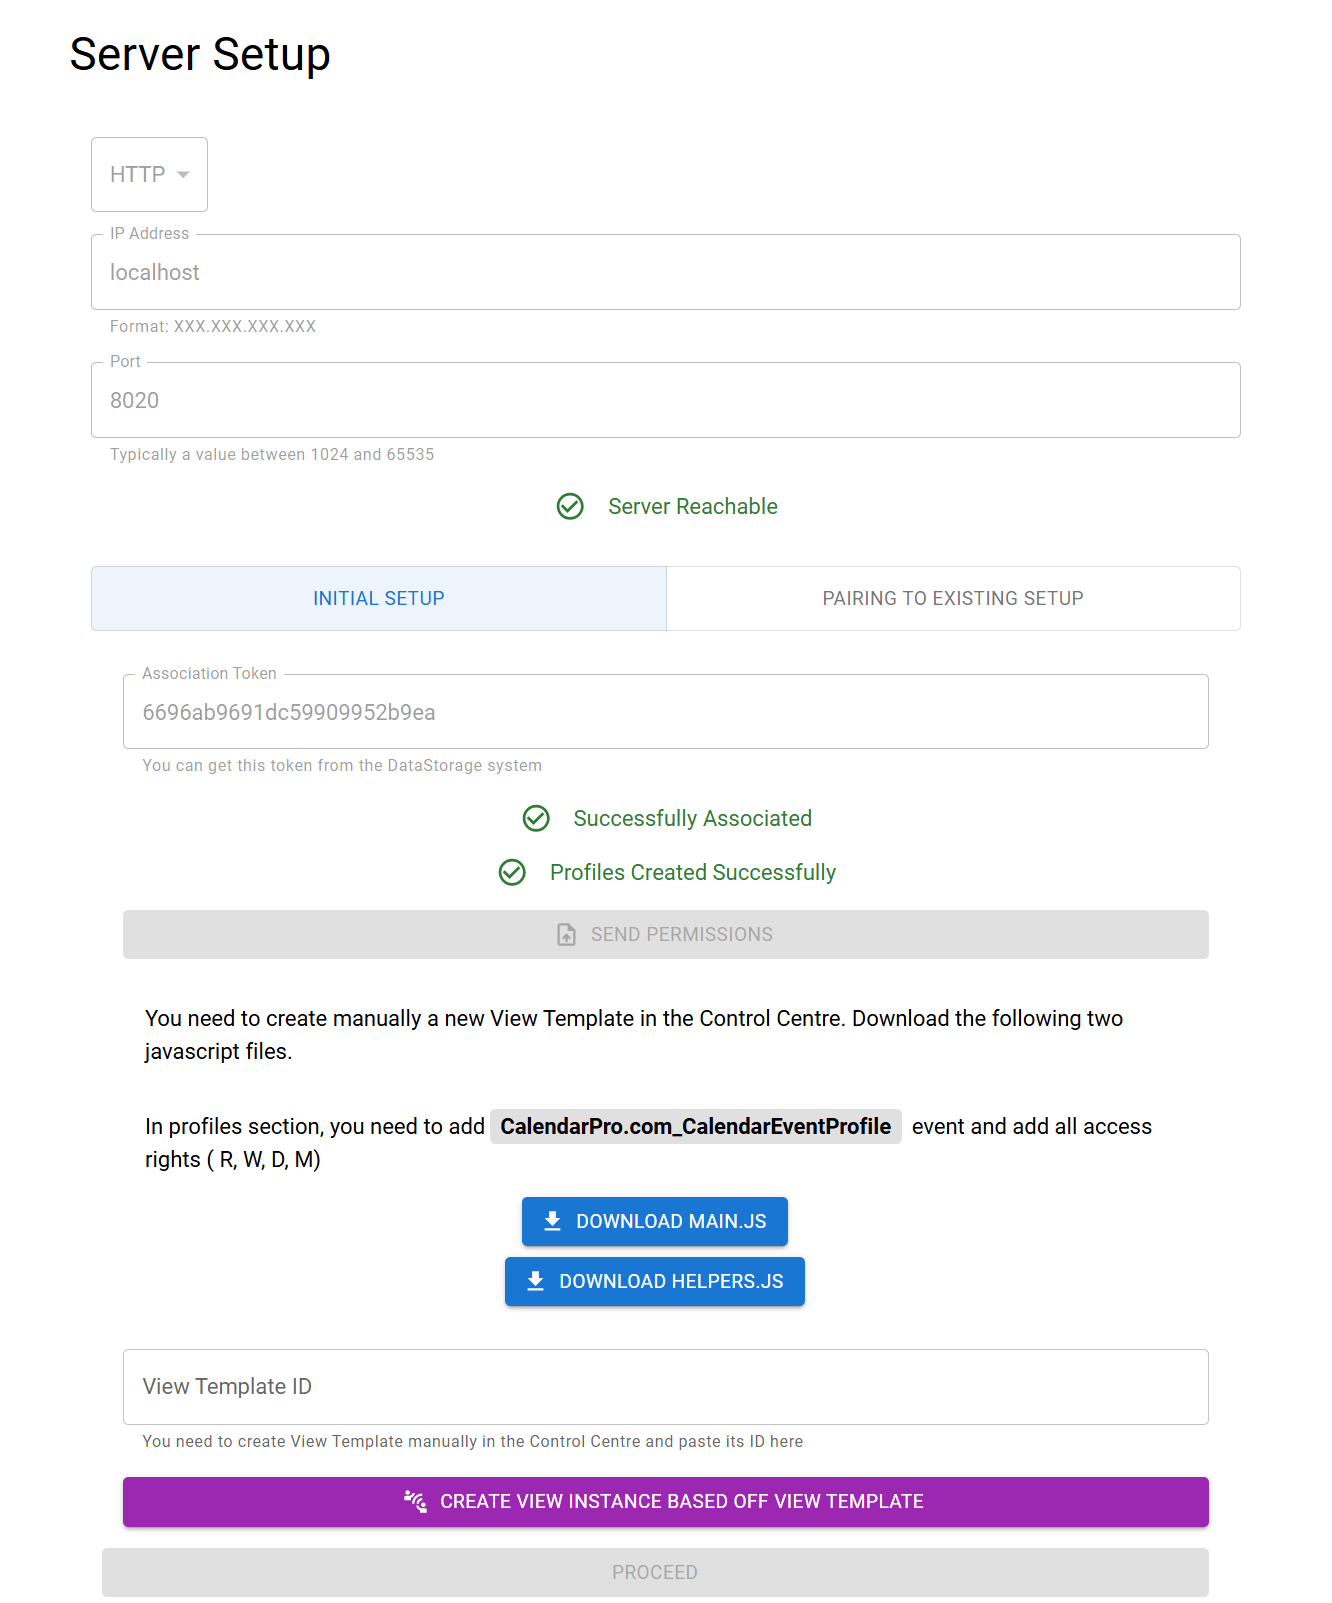
When the user wants to start using this calendar, they need to first locate Storage System. Once it's located, the setup process allows the user to type in Association Token which the user gets after creating new App Holder (either in the Control Centre or by using raw api endpoints).
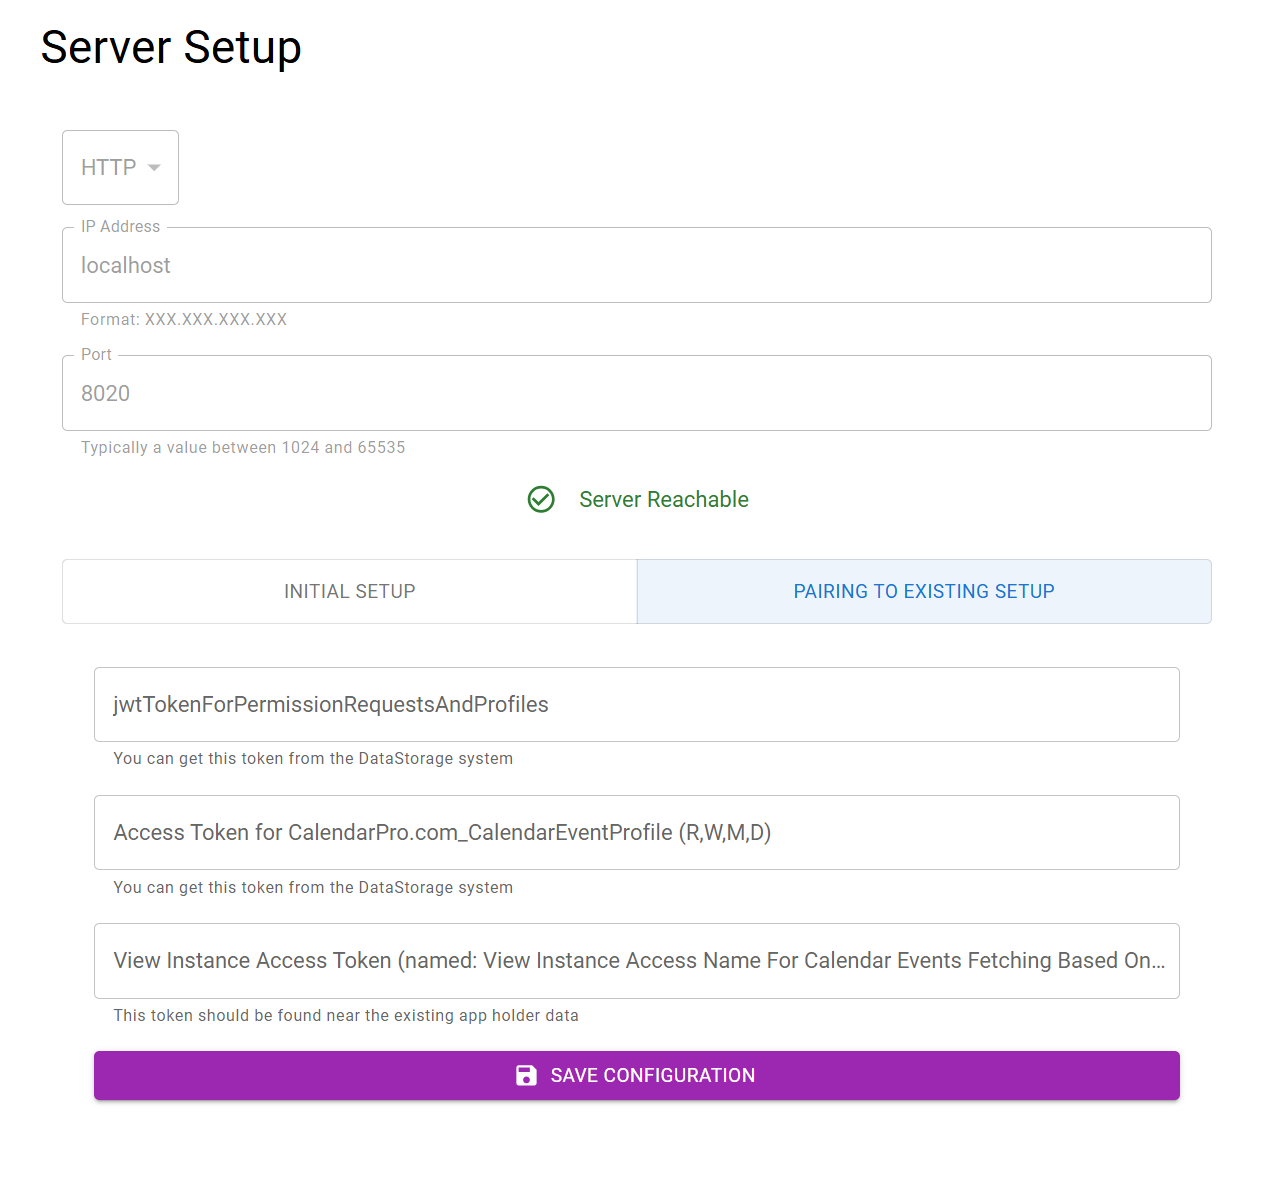
If the app has been already set up in the system, user can just copy needed tokens from the storage system. All necessary information is in the Control Centre app.
Calendar Settings
In the Calendar Settings, there are multiple things to modify.
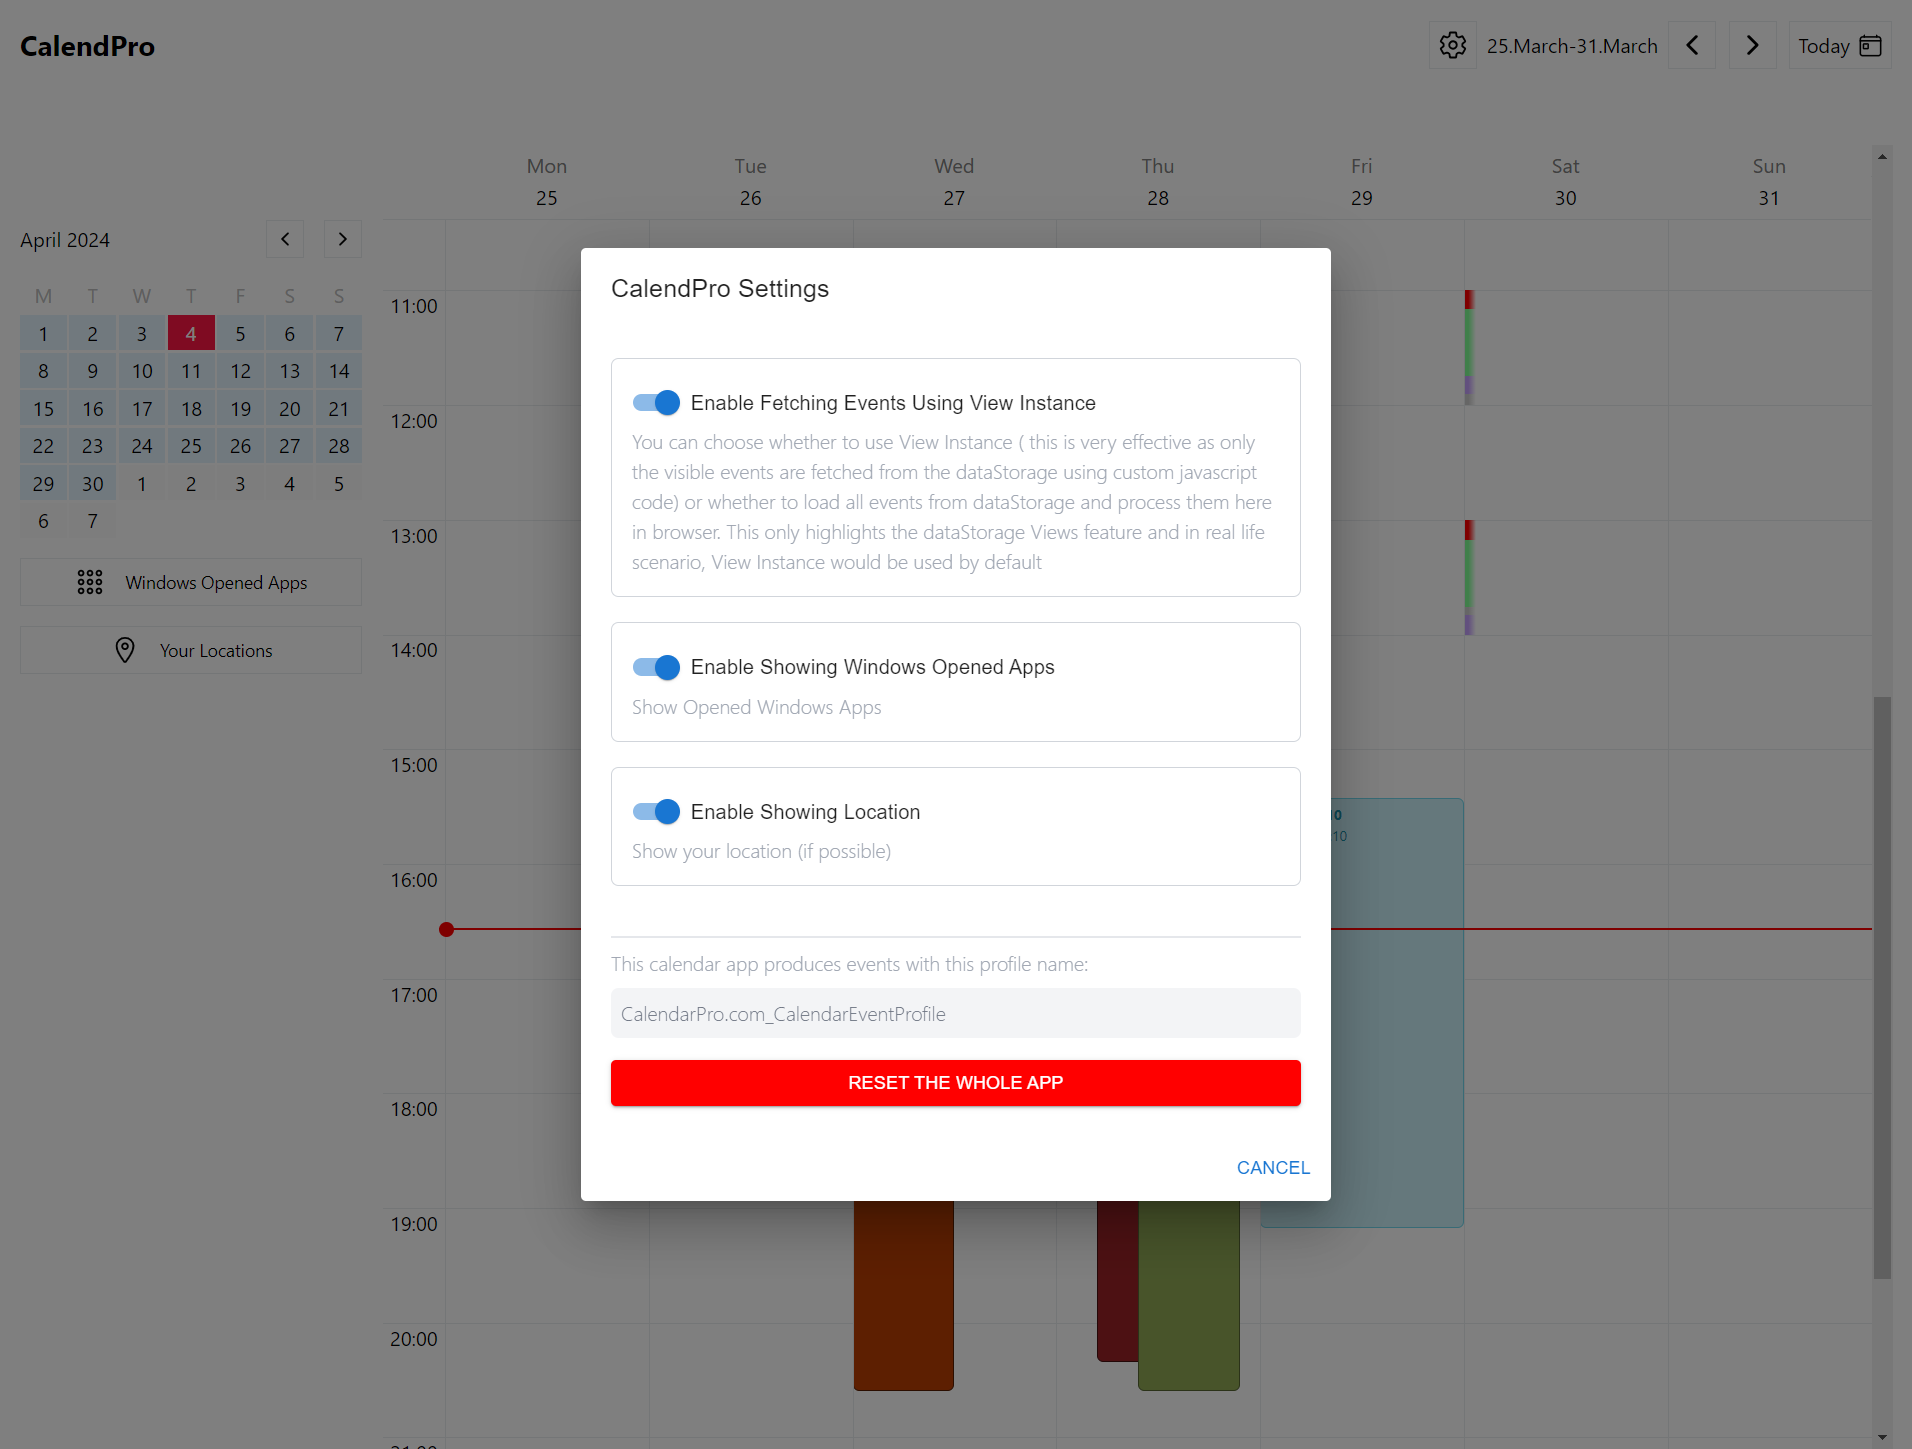
Firstly, the user can toggle the switch for using View Instance for fetching calendar events instead of using the raw token for calendar events. The difference is that if the raw token (obtained after requesting permission for a given profile) is used, the calendar needs to request all events (which is ineffective as the user is only interesting in the currently displayed week). View Instance is on the other hand passed dynamically information about which week to fetch and only the neccessary information is therefore being sent back from the backend system.
Secondly, there is a switch for showing windows apps. As you may know, one of our example apps gathers information about the currently opened apps on the Windows operating system. More on that here.
Thirdly, there is a switch for showing location gathered from the Location Tracker Android app. More on that here.
Procesing of Windows Opened Apps
Calendar app highlights the possibility of the storage system. There may be multiple apps generating large quanta of data about the user while other apps are processing those pieces of data.
Calendar allows the user to setup displaying of Windows Opened apps by first allowing the user to set it up. When the user toggles the Windows Apps Showing in the Calendar's settings, a new button "Windows Opened Apps" appears below the month's minimap.
This button takes the user to a new screen used for setting it all up and then creating categories for various apps.
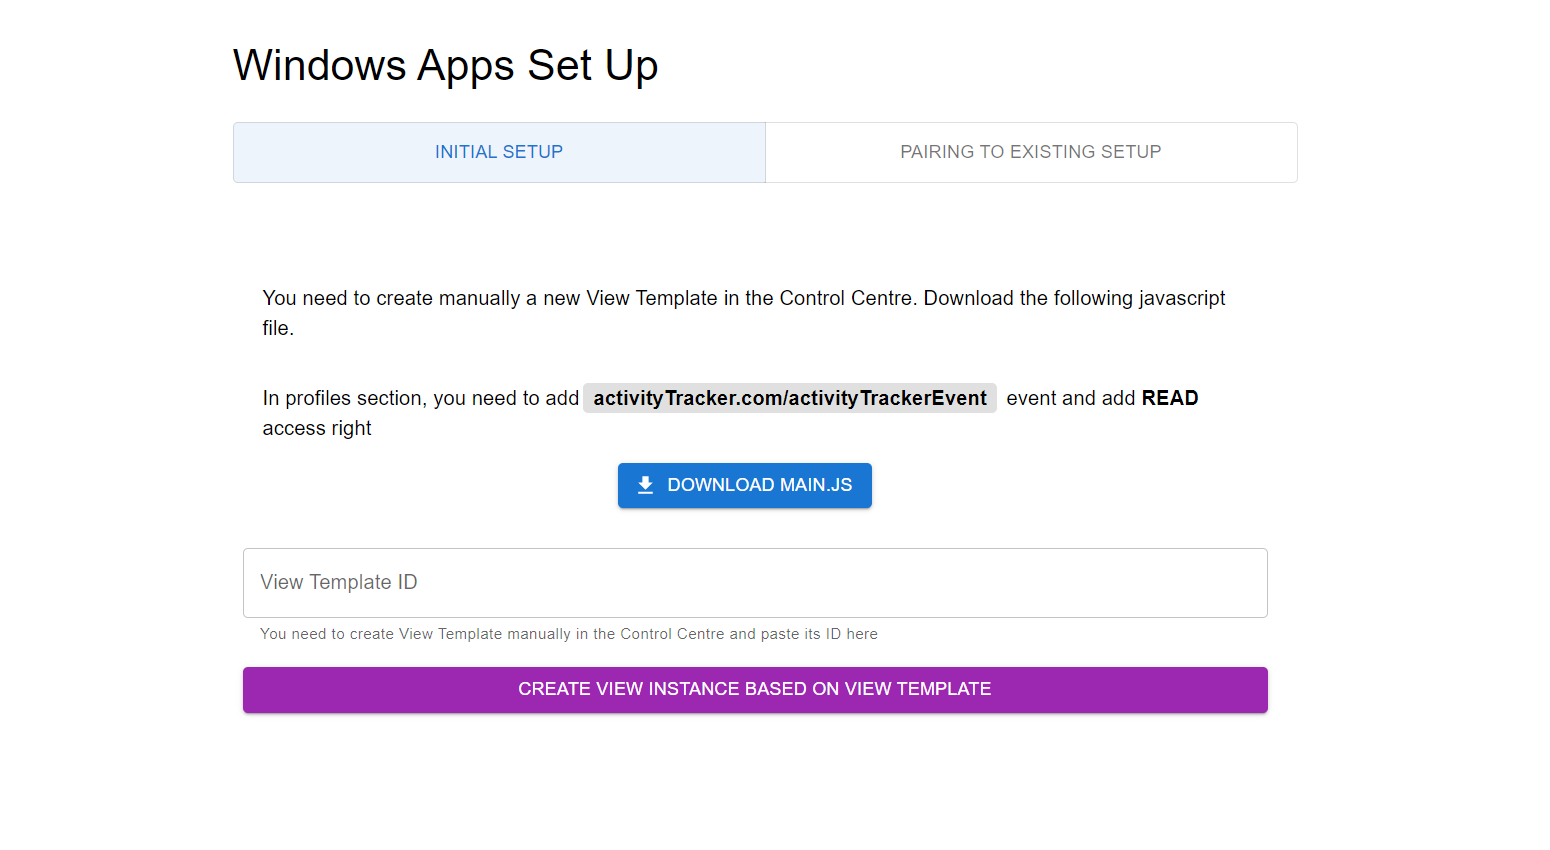
Setup requires the user to create new View Template in the system. It instructs the user to download the necessary code. After the user verifies the code does not do any harm ( of course it does not do any harm ) and creates the template, they need to copy the template's id and paste it here.
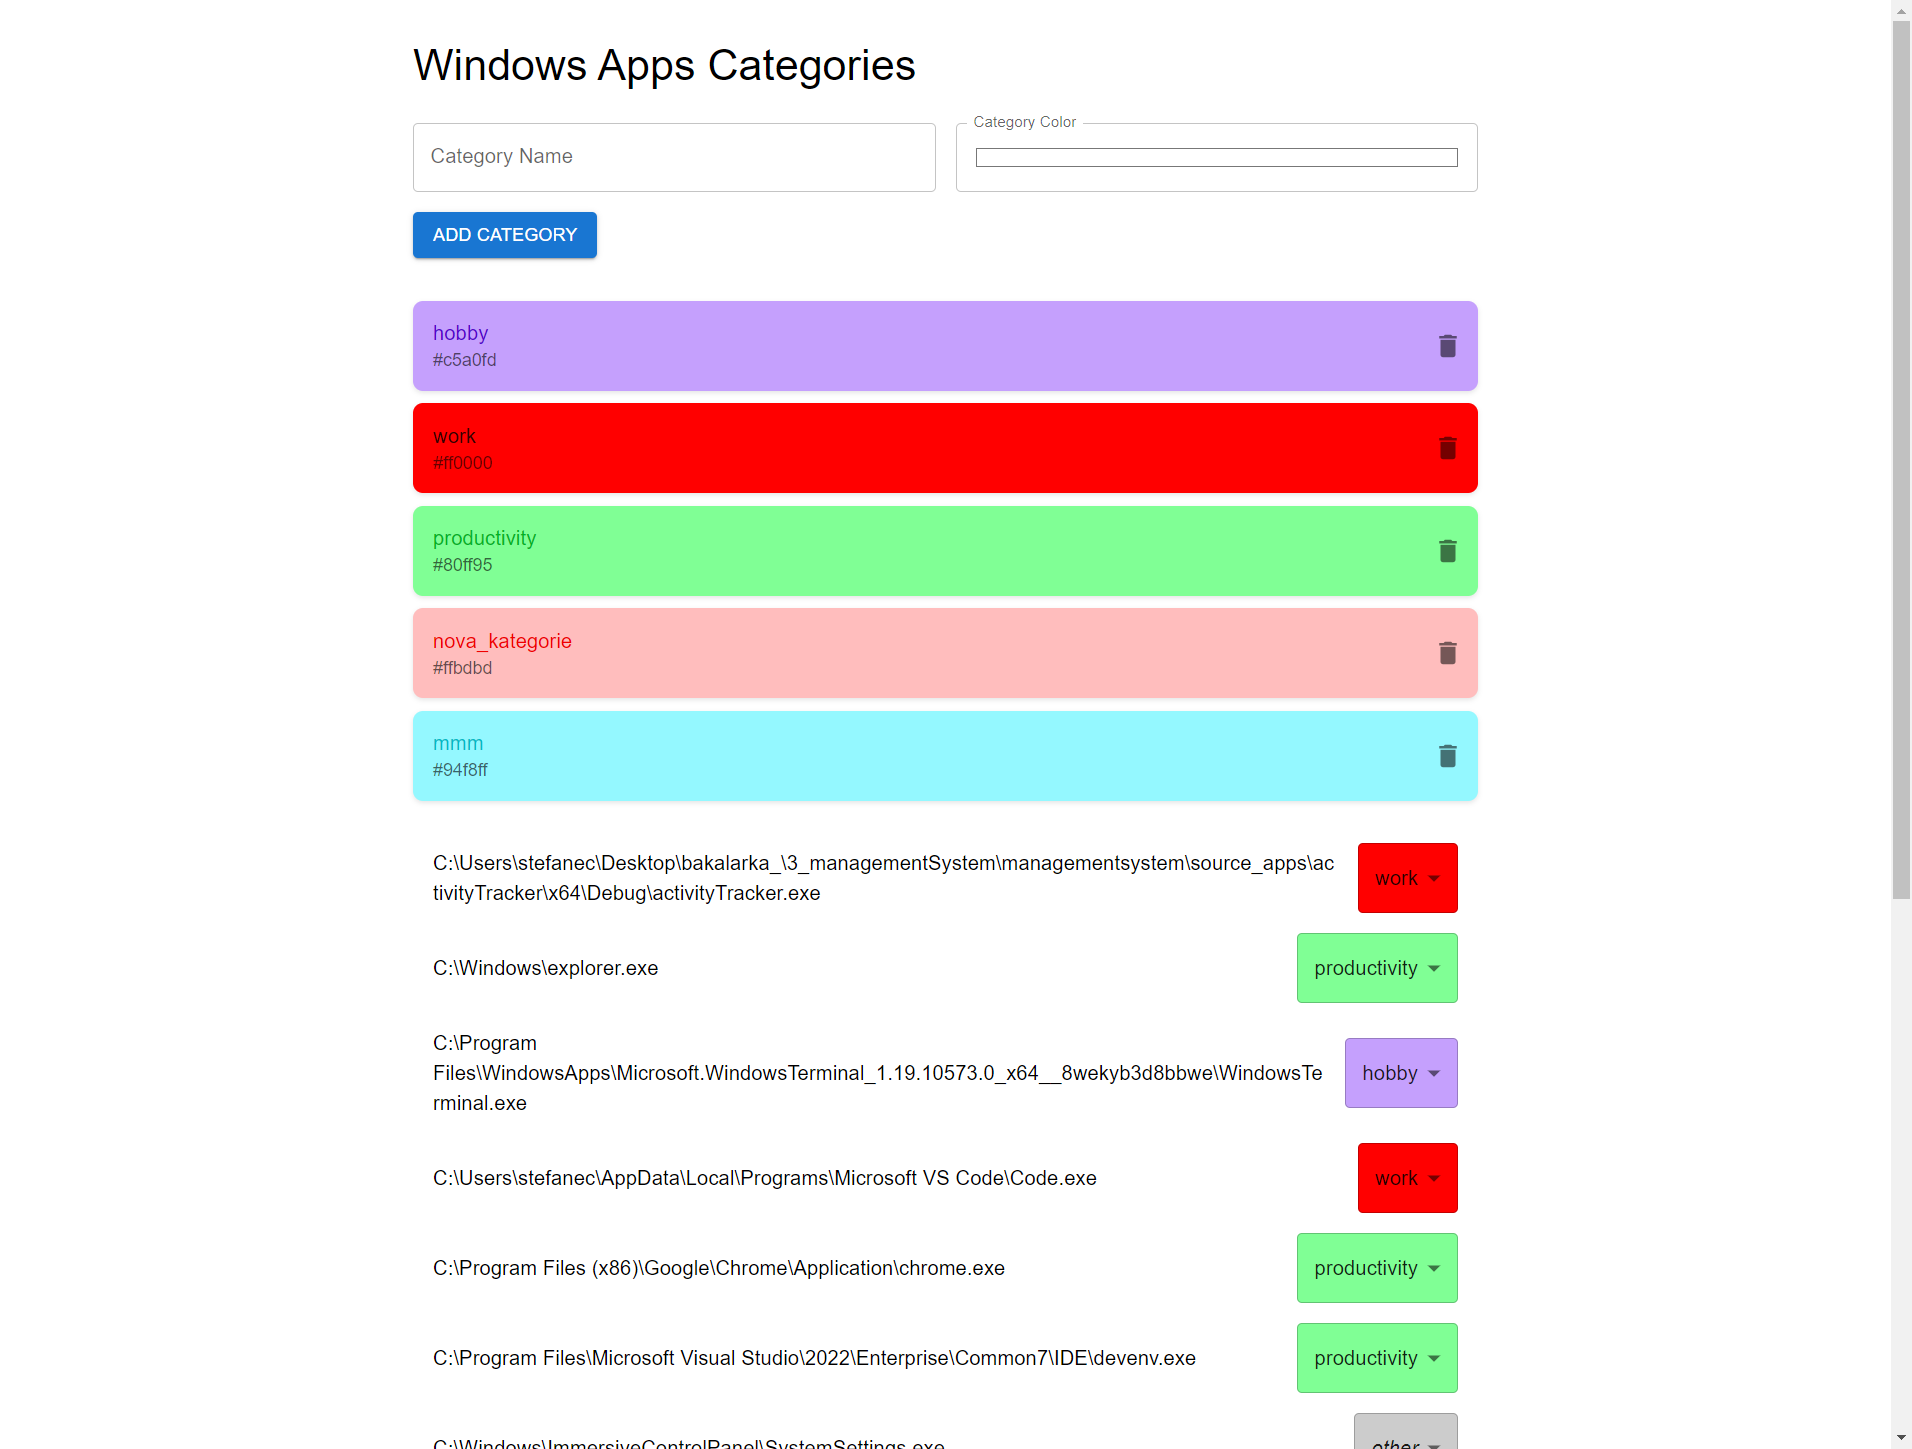
User can now create new categories, assign unlimited amount of colours to them and then assign individual apps to the categories.
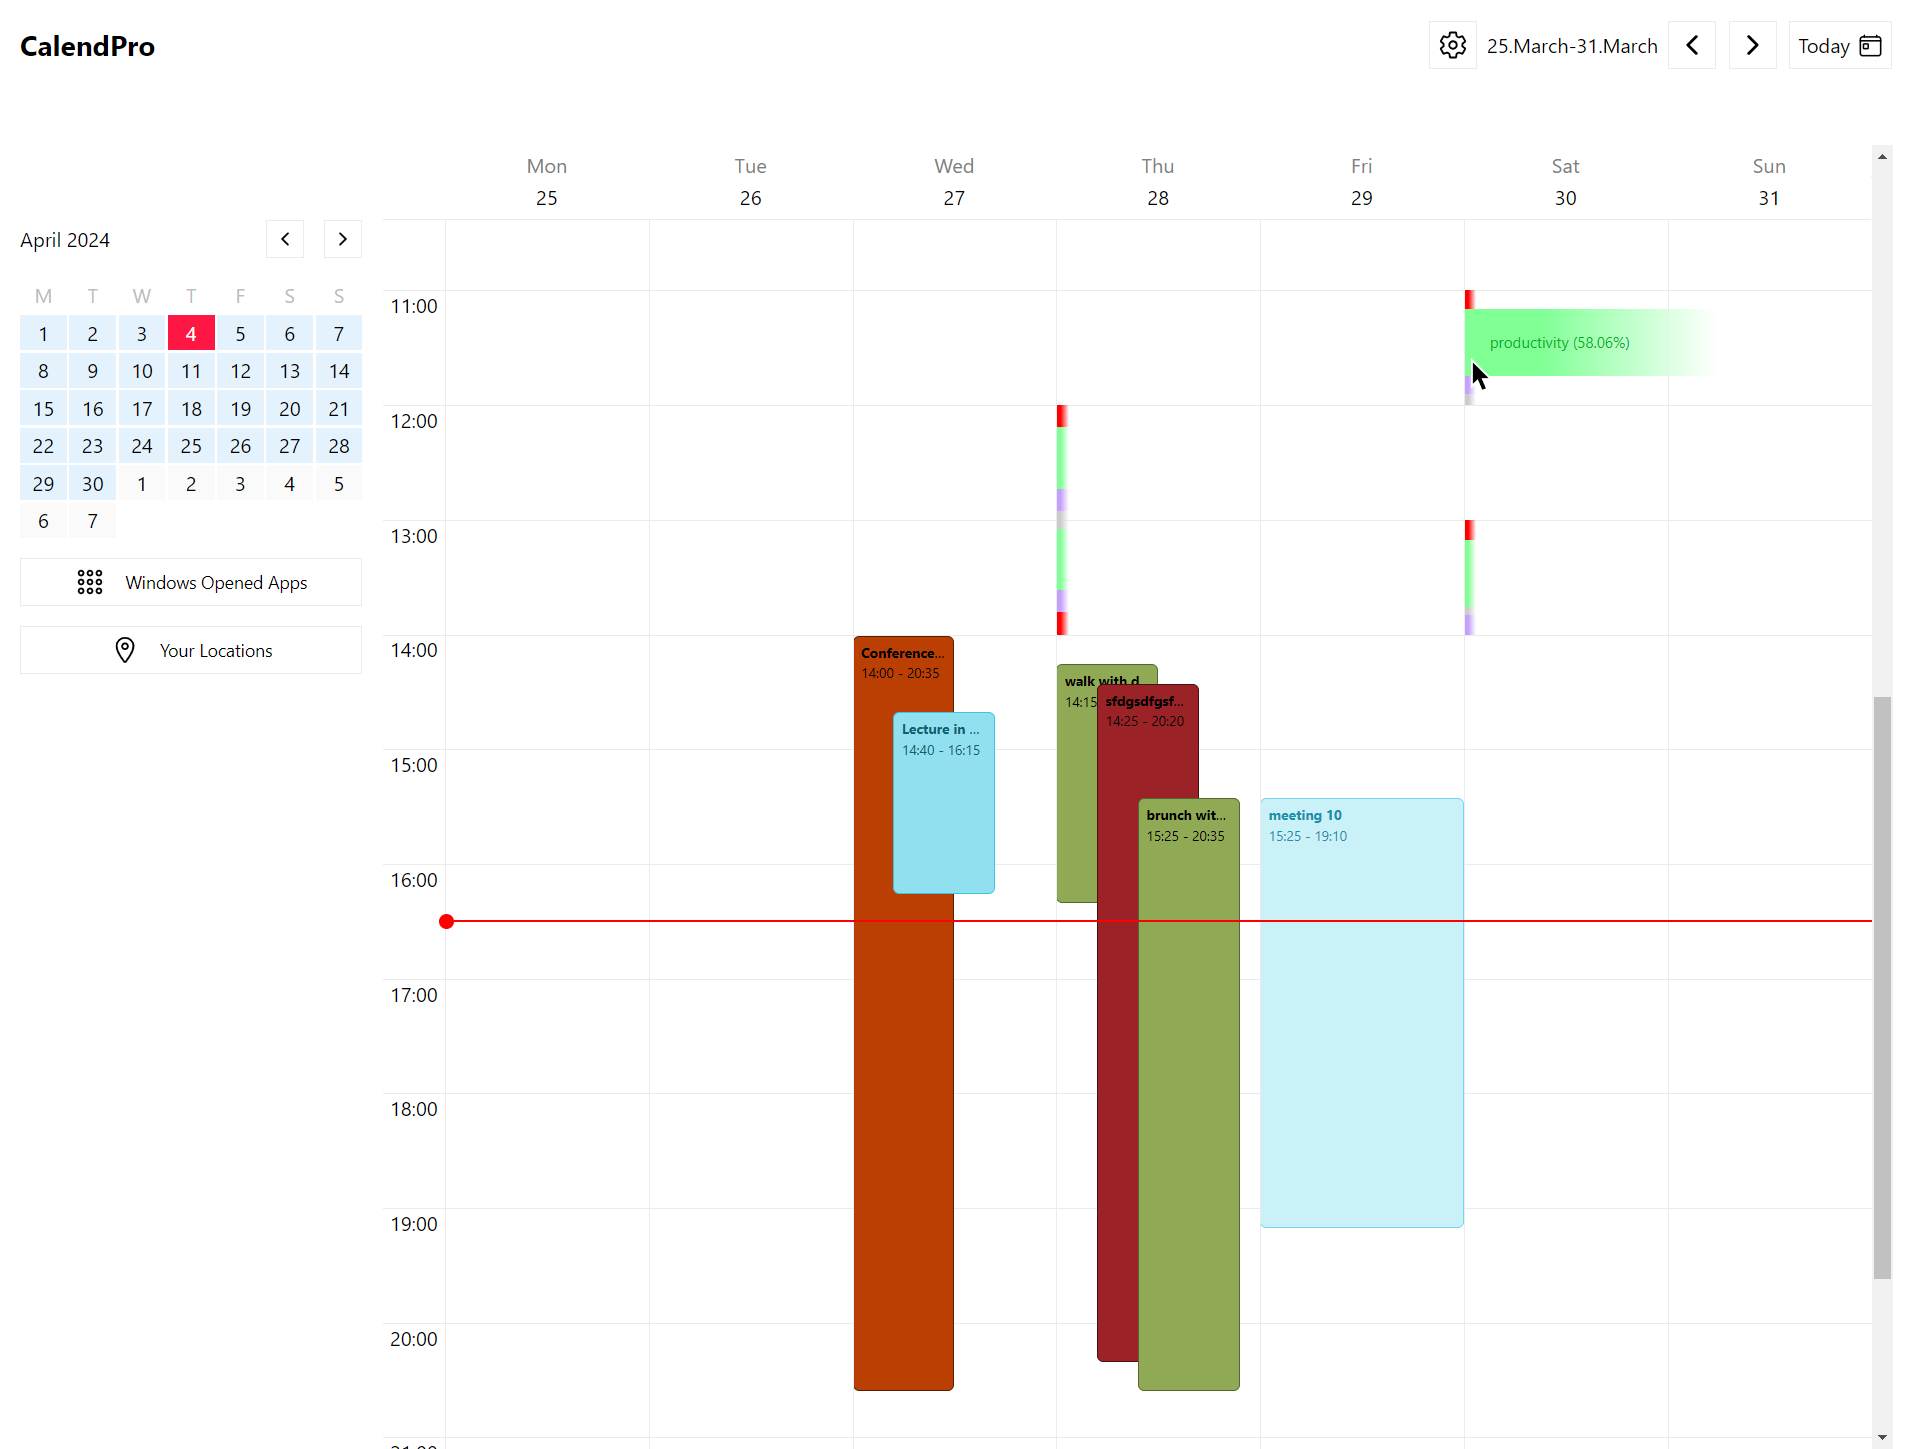
Now, when the user navigates to the main week's view, they can see how productive/lazy they are as the calendar shows hourly stats about which apps were opened on the computer.
By hovering over the left vertical colourful bar ( shown on the picture below - look where the pointer is ), the category name appear with a nice smooth animation.
Calendar also displays data about location tracking.
Processing of User Location from Location Tracker
Setup is similar to the setup of Windows Apps. "Your Locations" button appears below the month's minimap.
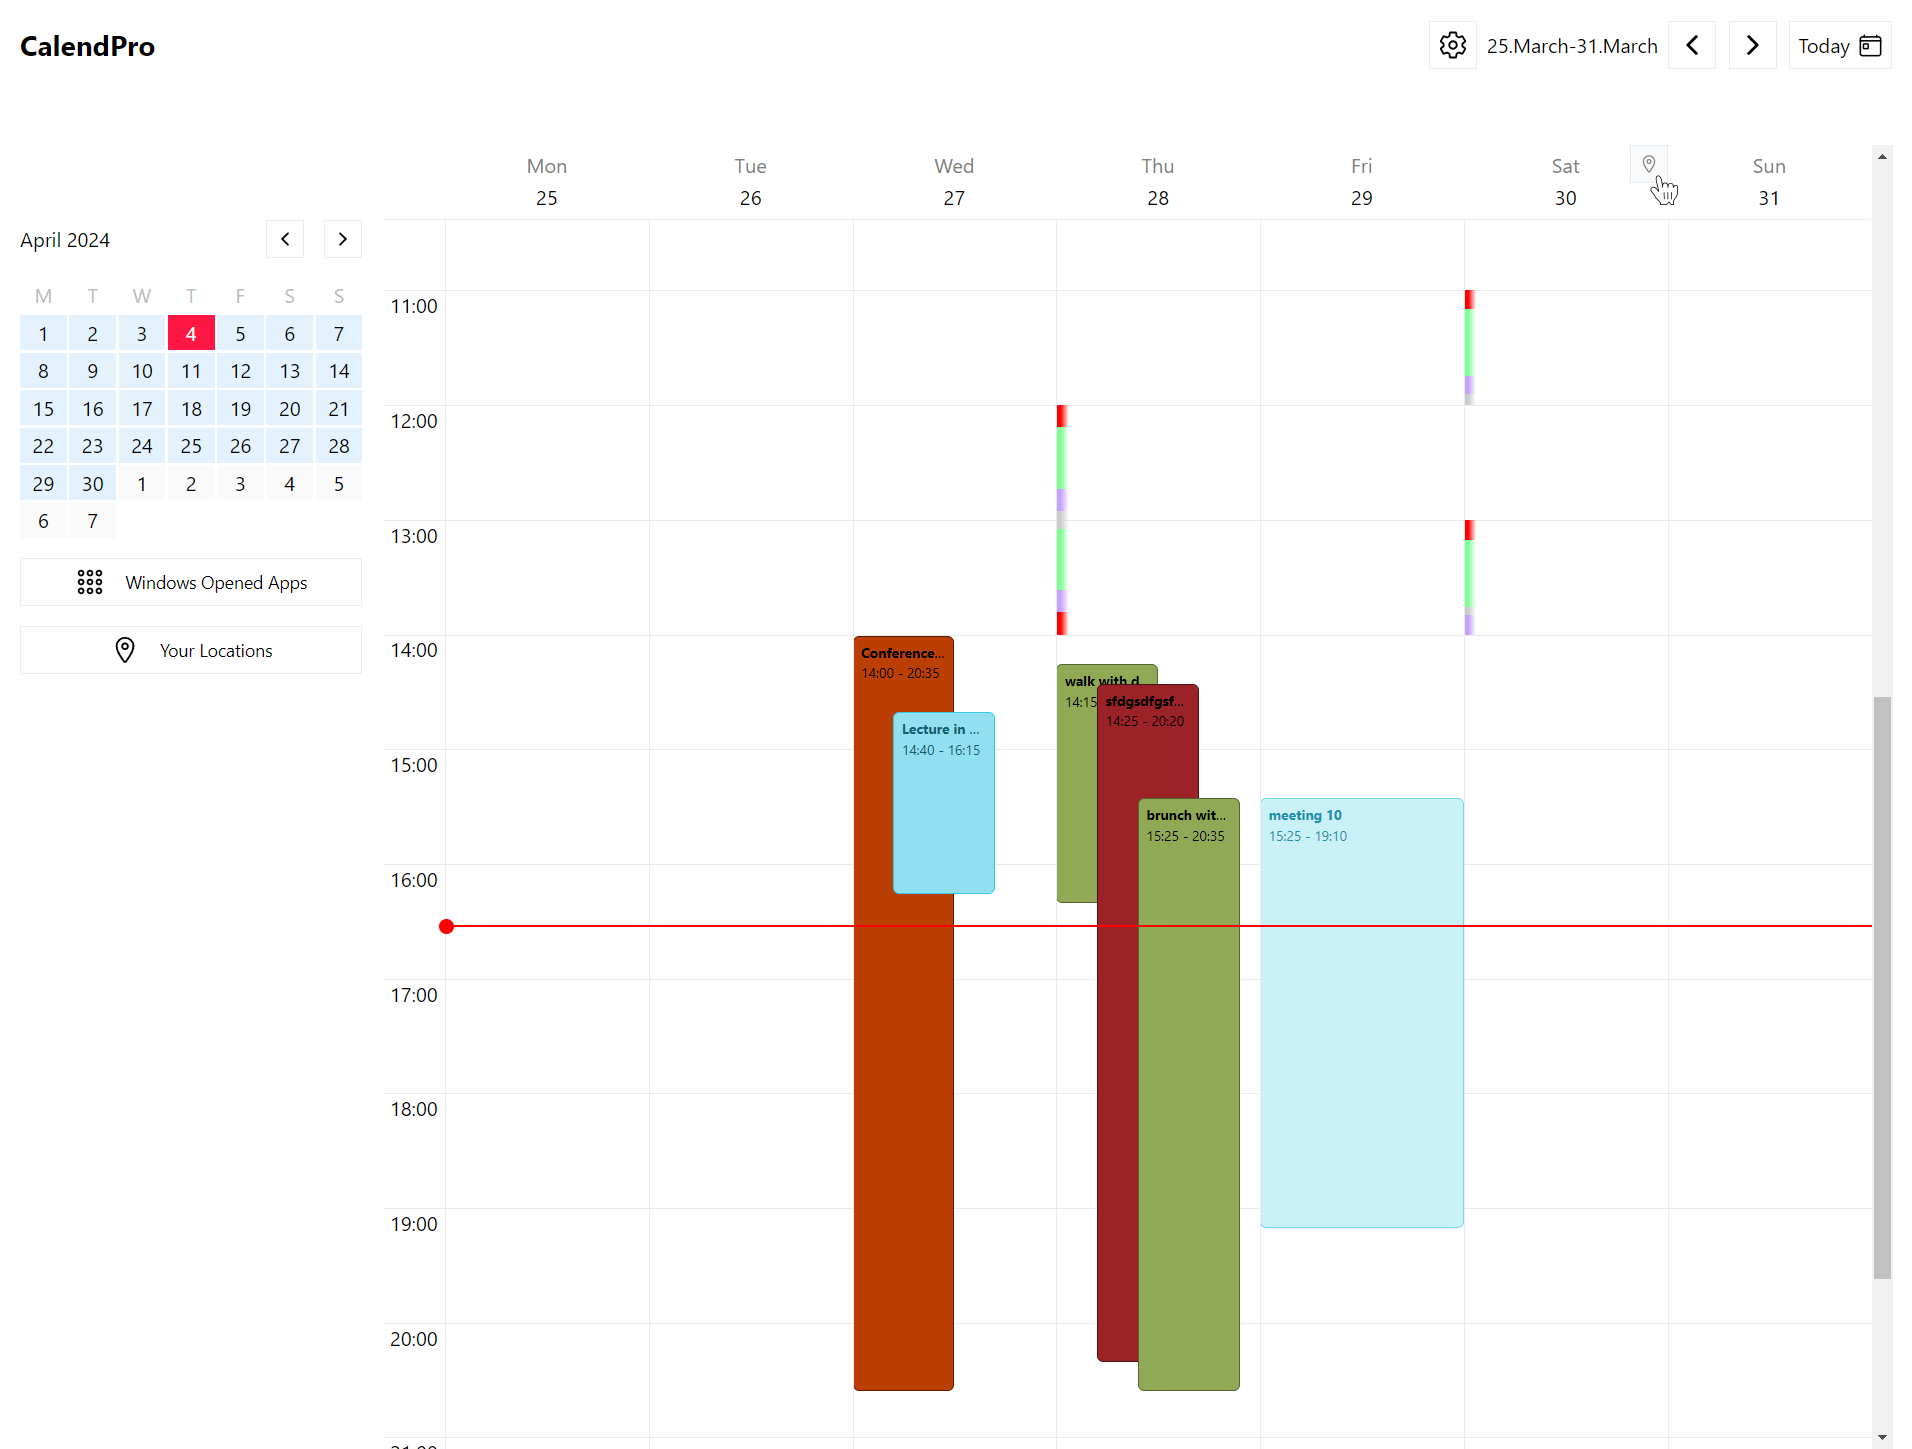
When the setup is successfull and the user navigates back to the main Week's view, new hidden buttons appear. The user needs to hover over the day's name for the little location button to appear (look at the photo below).
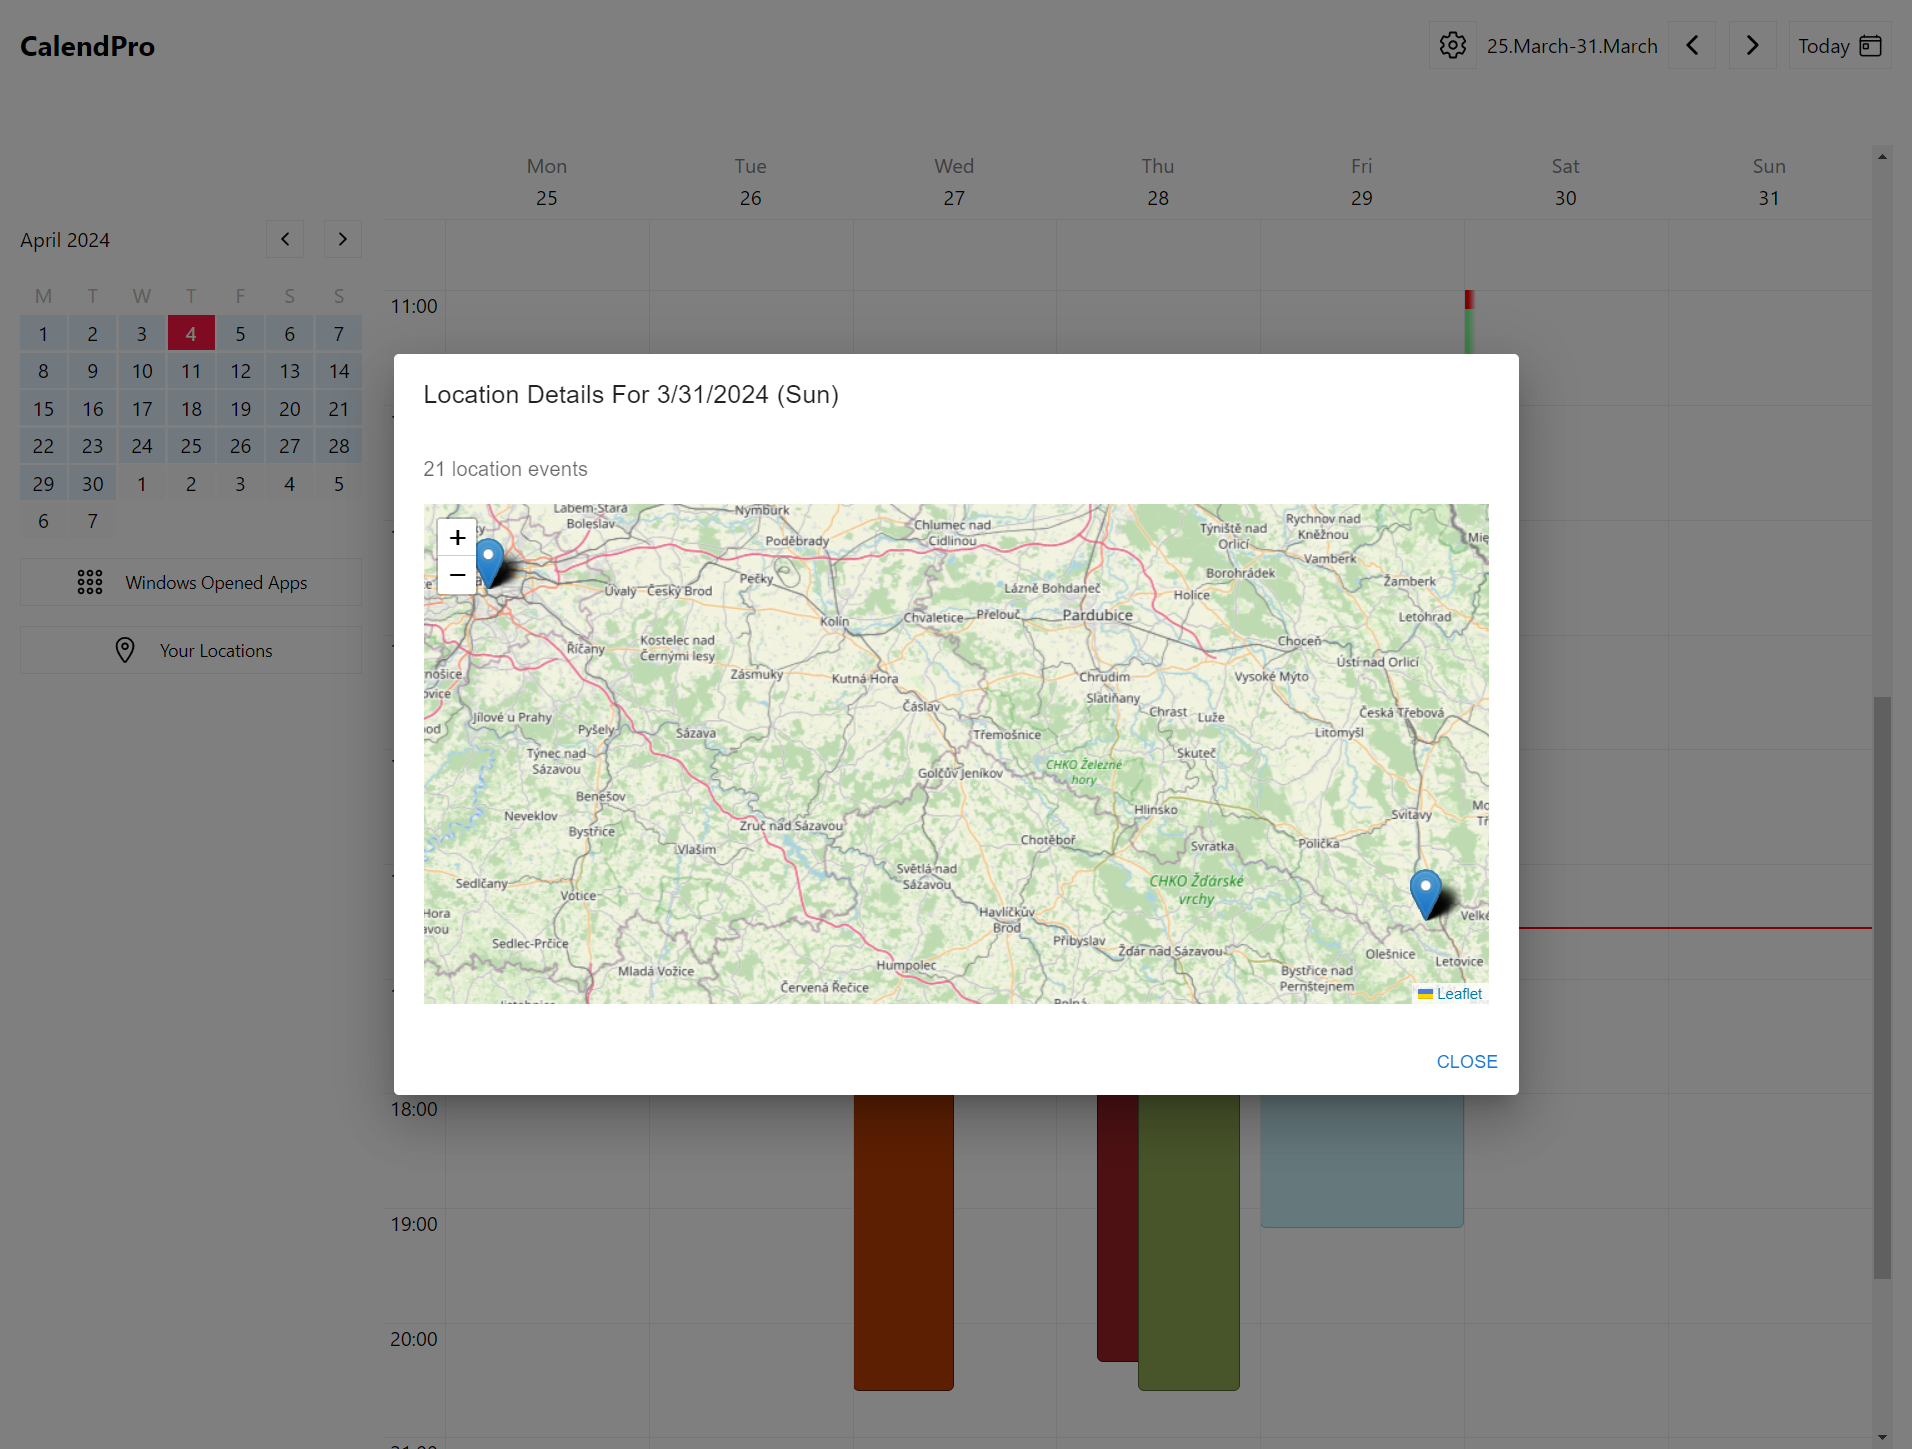
When the user clicks on the button, new location modal appears showing a map of all locations data from that given day.
That's all from Calendar app for now!