Location Tracker App
This Android Kotlin Application is part of the bachelor project - Decentralised Data Storage.
The app is able to do the following:
- request appropriate permissions from the system
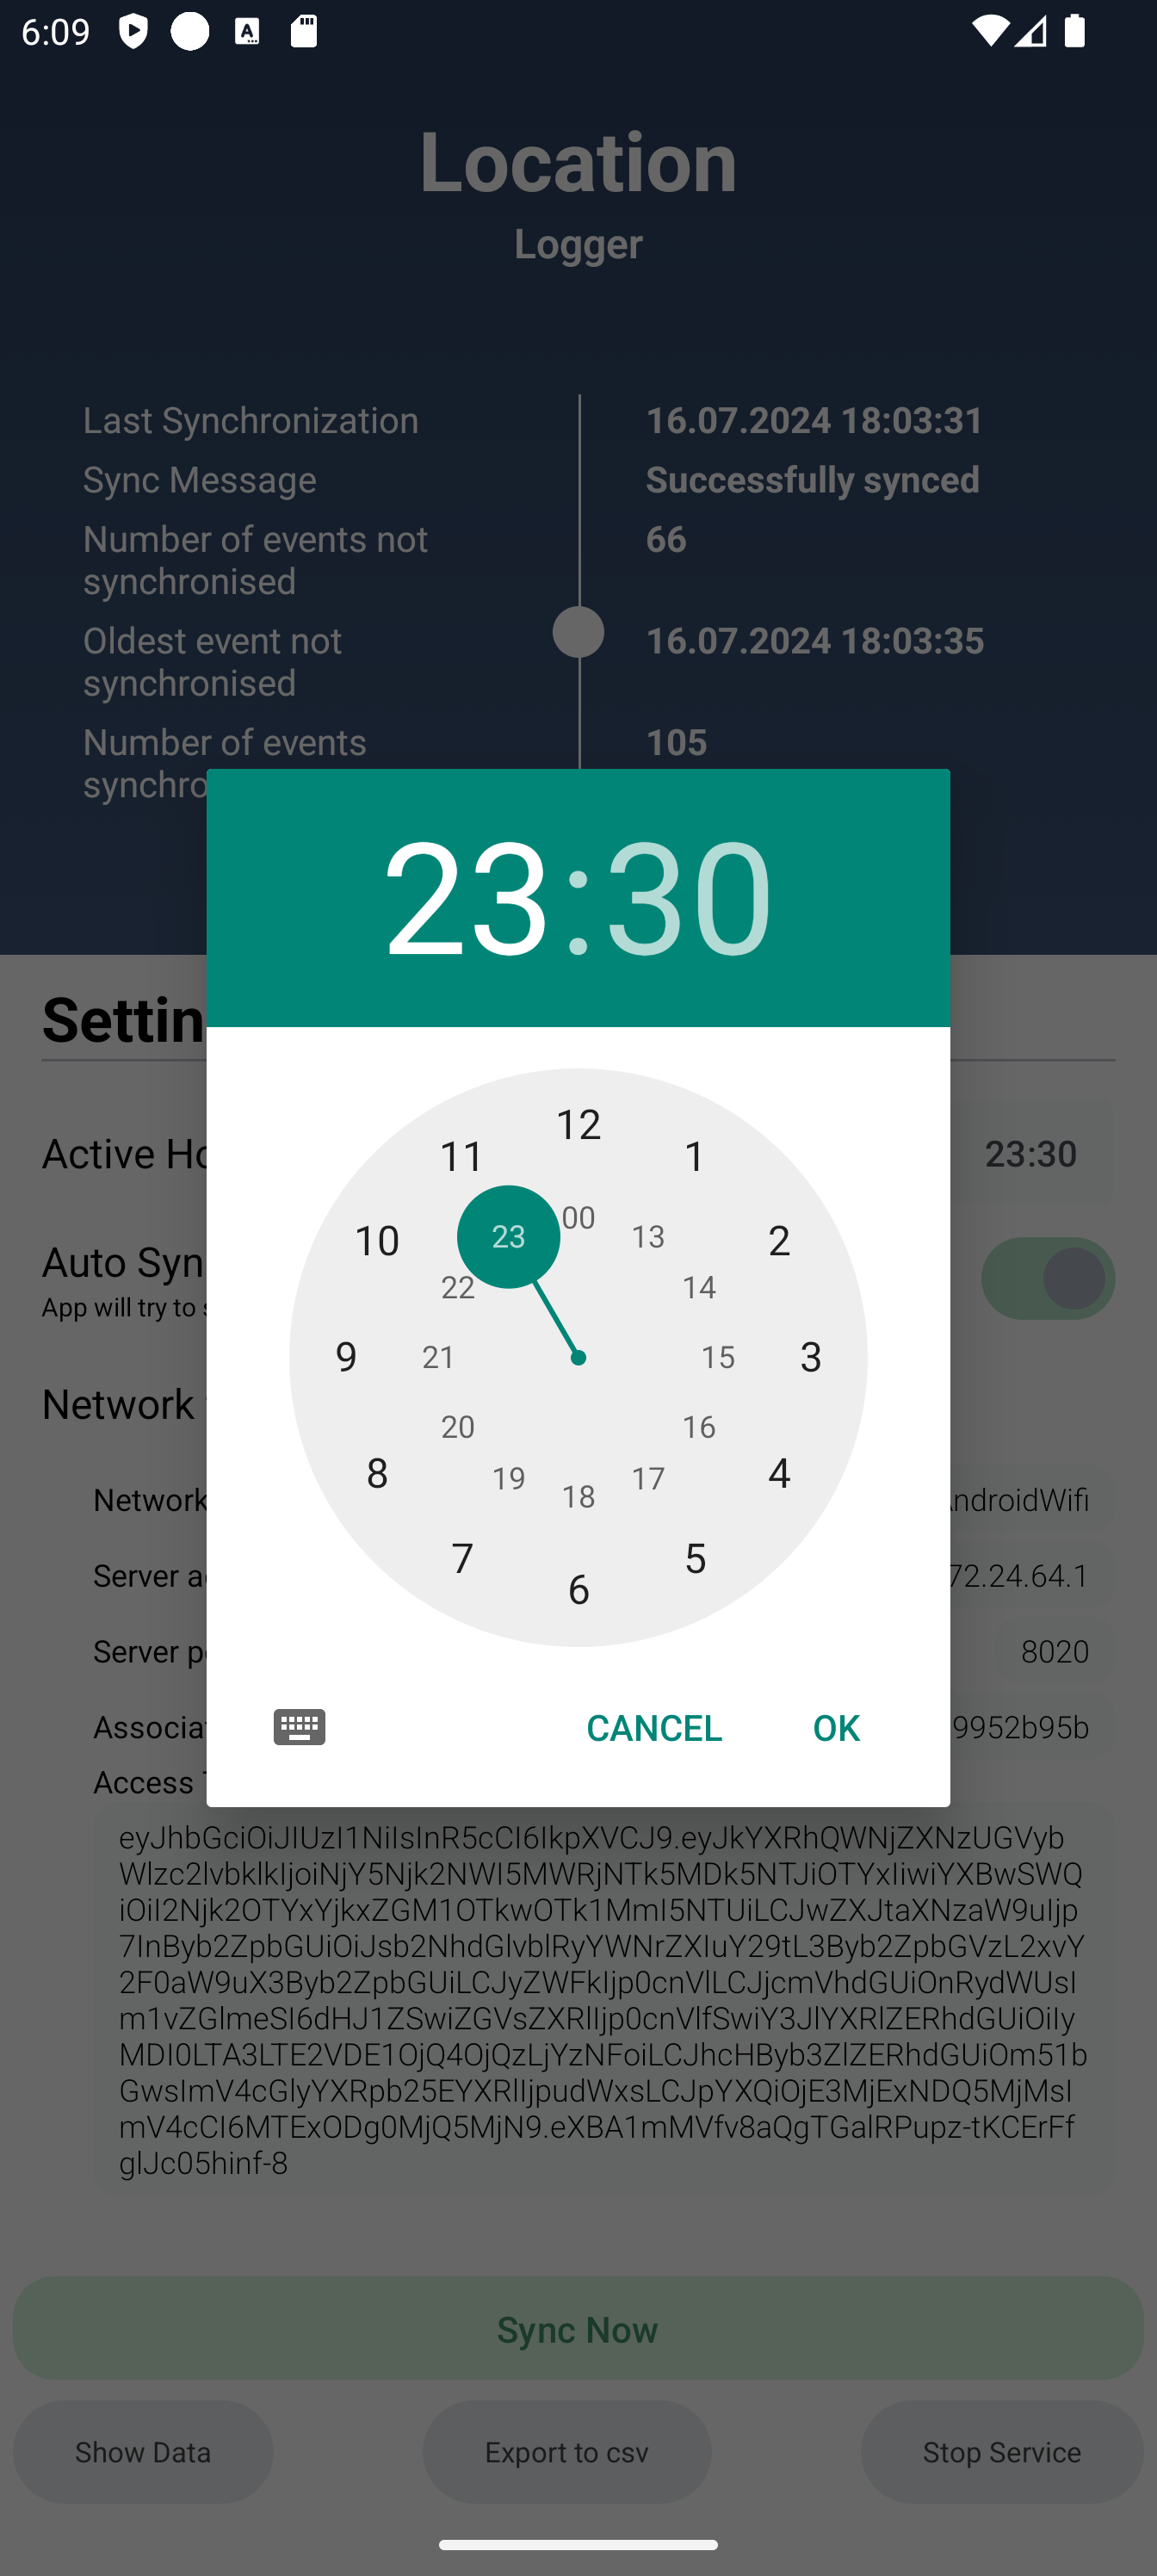
- let the user to set active hours: Users can specify the times during which they wish to collect location data.
- set automatic synchronisation of data: The application automatically detects a home network and initiates data upload, even when the application is closed, using a continuously running foreground service.
- set foreground service for location gathering: The Application launches custom foreground service that remains active even when the user or the Android operating system decides to kill the main UI application.
- export data to
csv
Flow of the whole app from the very first opening
Association
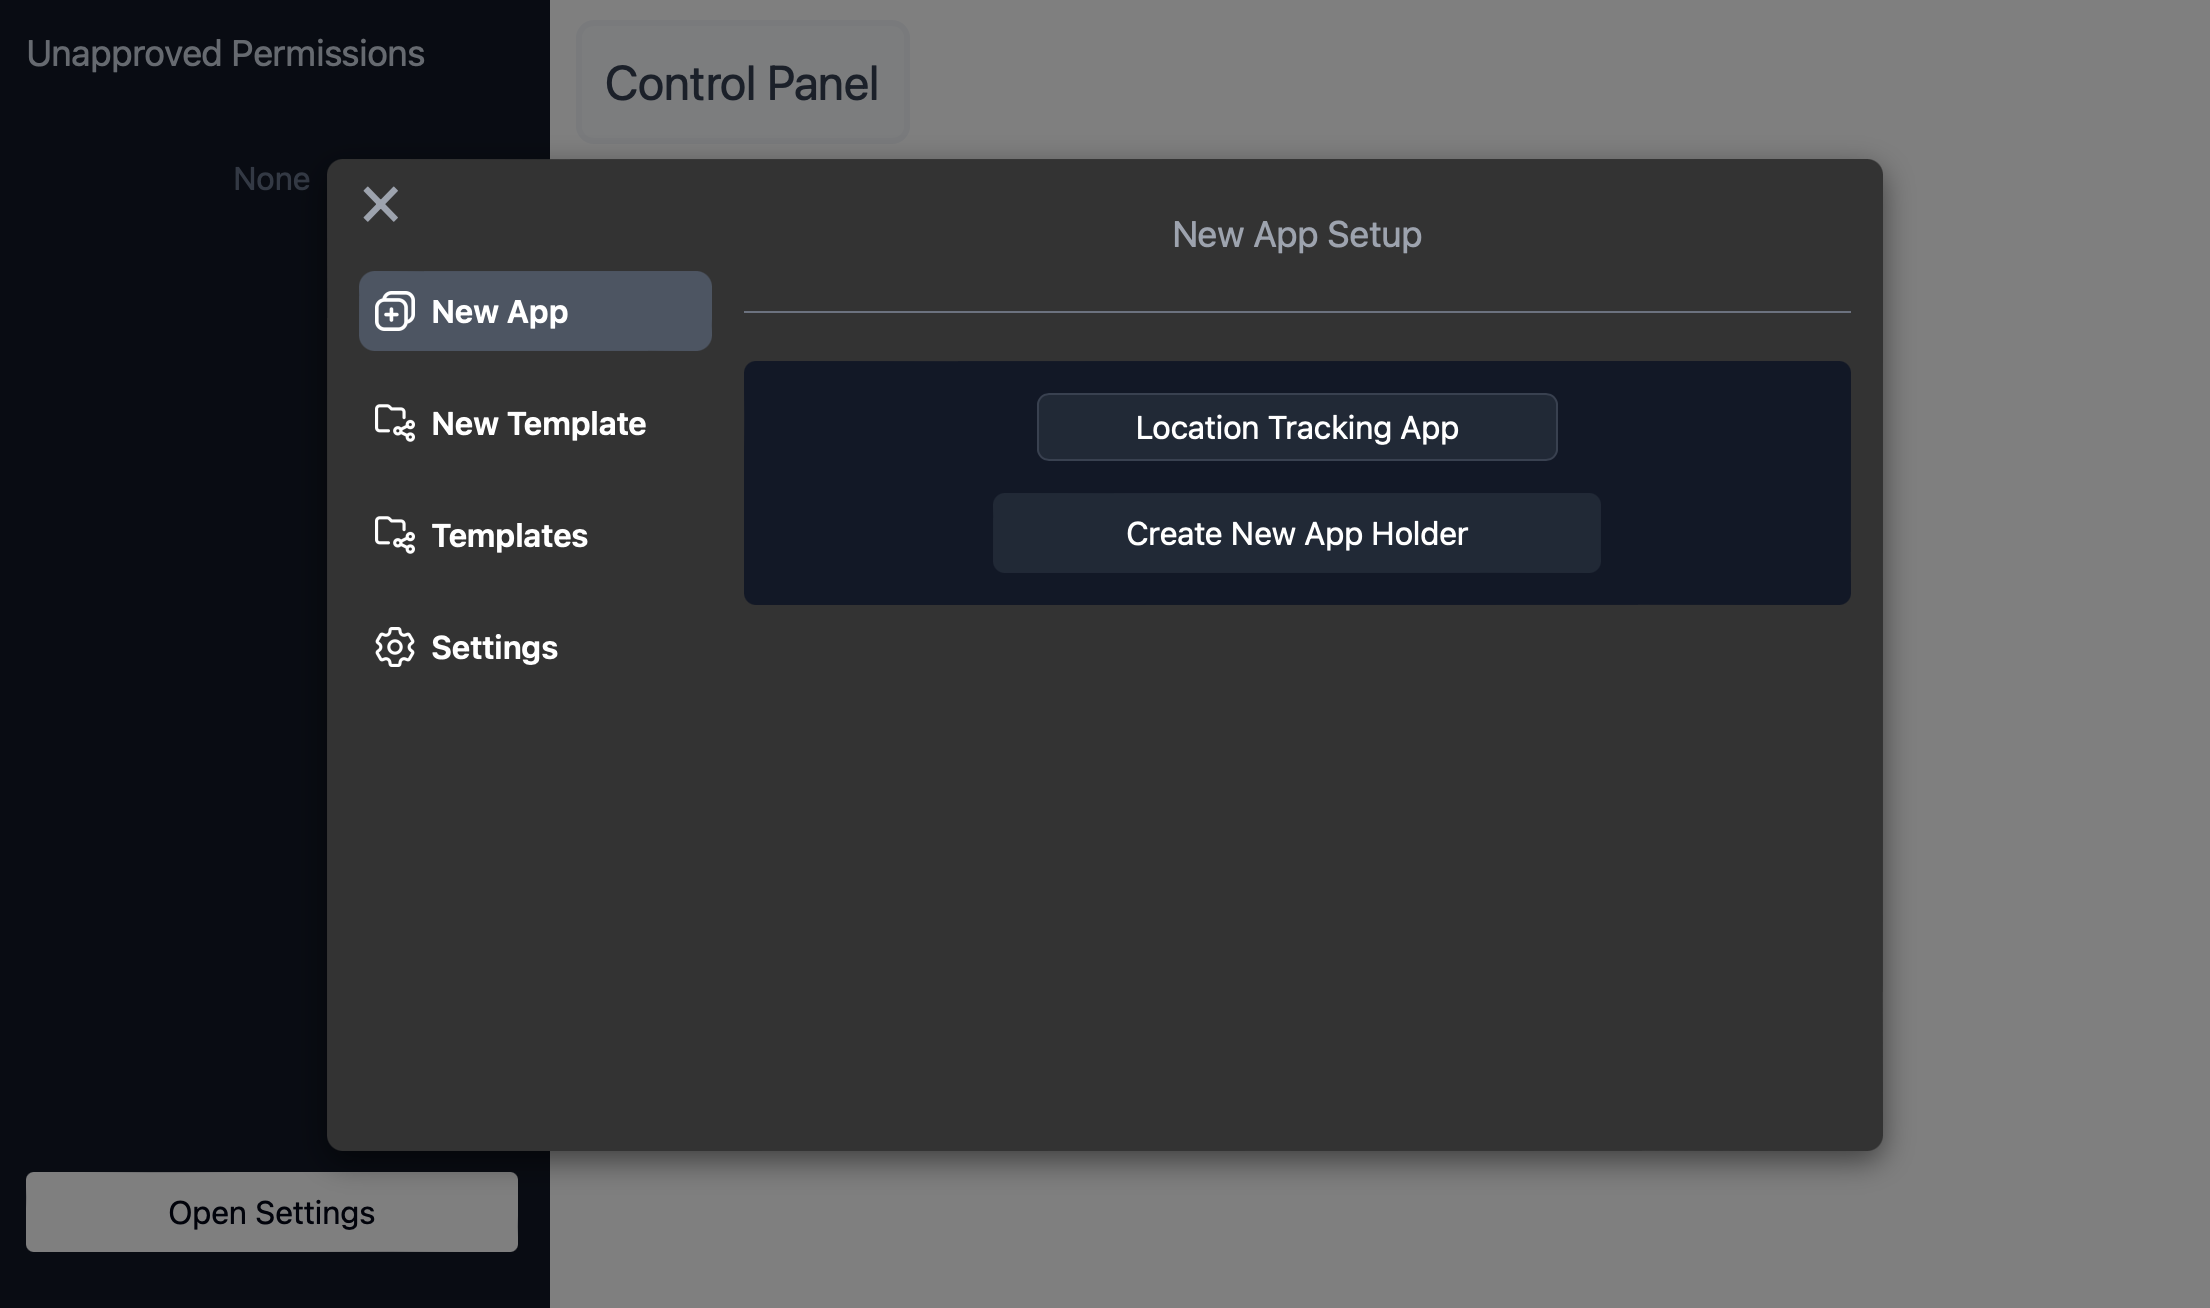
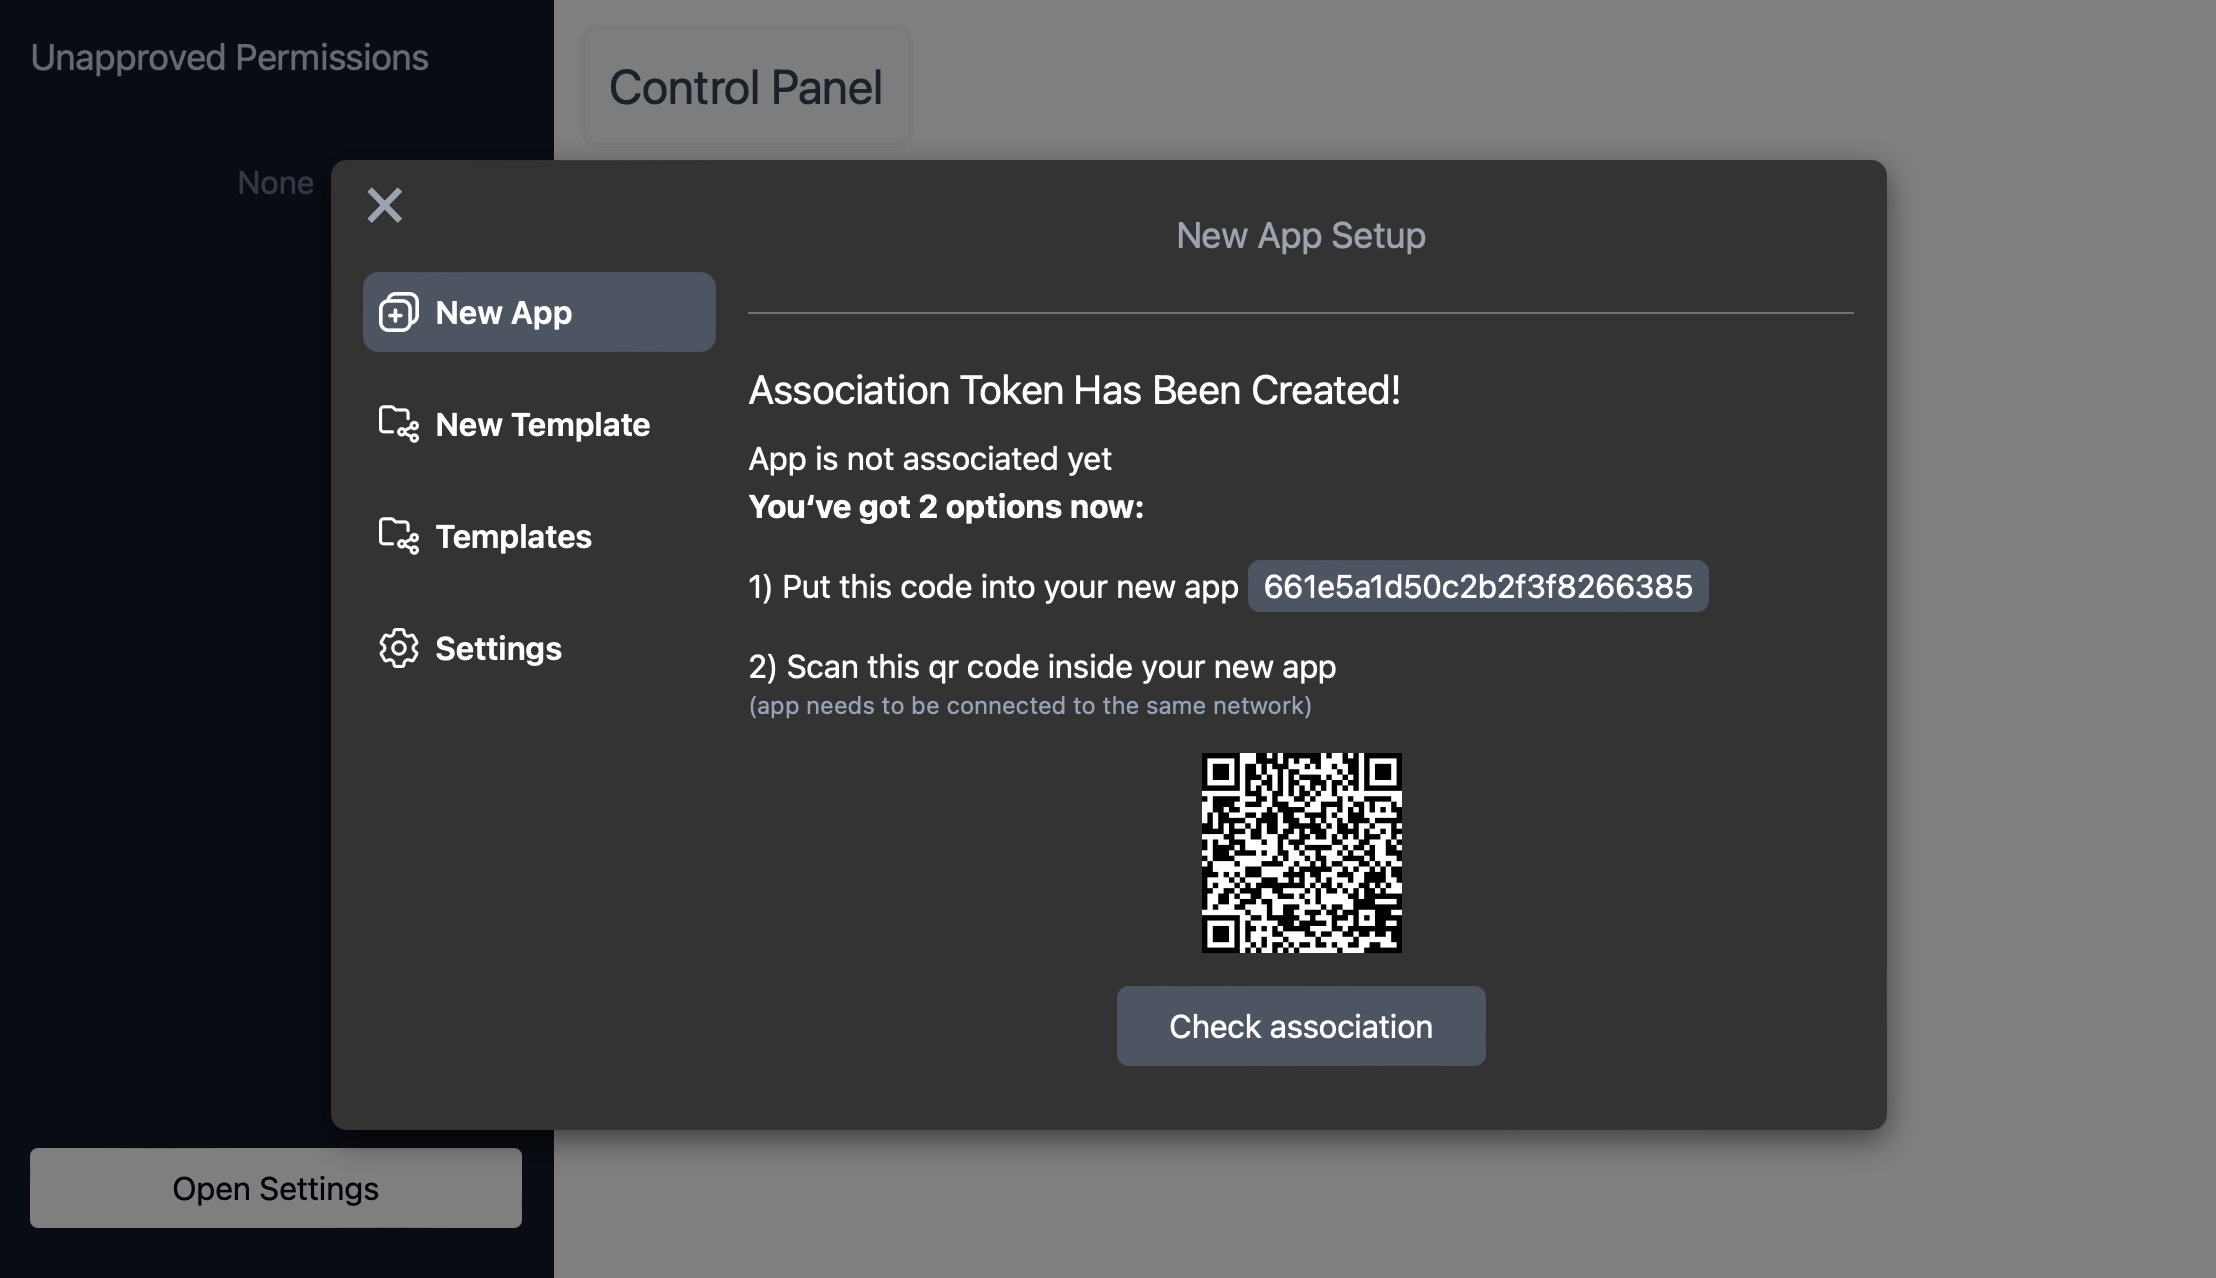
Before opening the Location Tracking application, user needs to create a new App Holder for this new application in the main storage system via the Control Centre component which can be seen in the following images. They assign a name to it and obtain an association token, which is then used to associate this location tracking application with the holder.
User can open the Location Tracker. Application requests all kinds of permissions. User needs to approve the application to send notifications. Application then requests to be allowed to run in background and be excluded from the list of apps that the operating system restricts to save battery. If the user wants to make this app work correctly, they need to allow it. Afterwards, approximate location is requested, followed by a request to use precise location and finally the application asks to be allowed to use the location all the time, even in the background. Due to the more invasive nature of background location tracking, which continues even when the application is not actively used, user is automatically redirected to the smartphone's settings to change it, specifically, they need to click on Allow all the time.
If the application did not request an exception for battery saving, background location tracking would occur infrequently. Based on our extensive testing, it would not occur at all for prolonged periods of time. This request, however, goes directly against the principles of the Android Play Store, and therefore such an app has trouble being published. Now, the application has all device specific permissions successfully obtained.
Our user then enters the IP address of the system along with the port in the Location Tracker. This application is implemented so that the user must first check if the main storage system is accessible before actually allowing them to enter the association token.
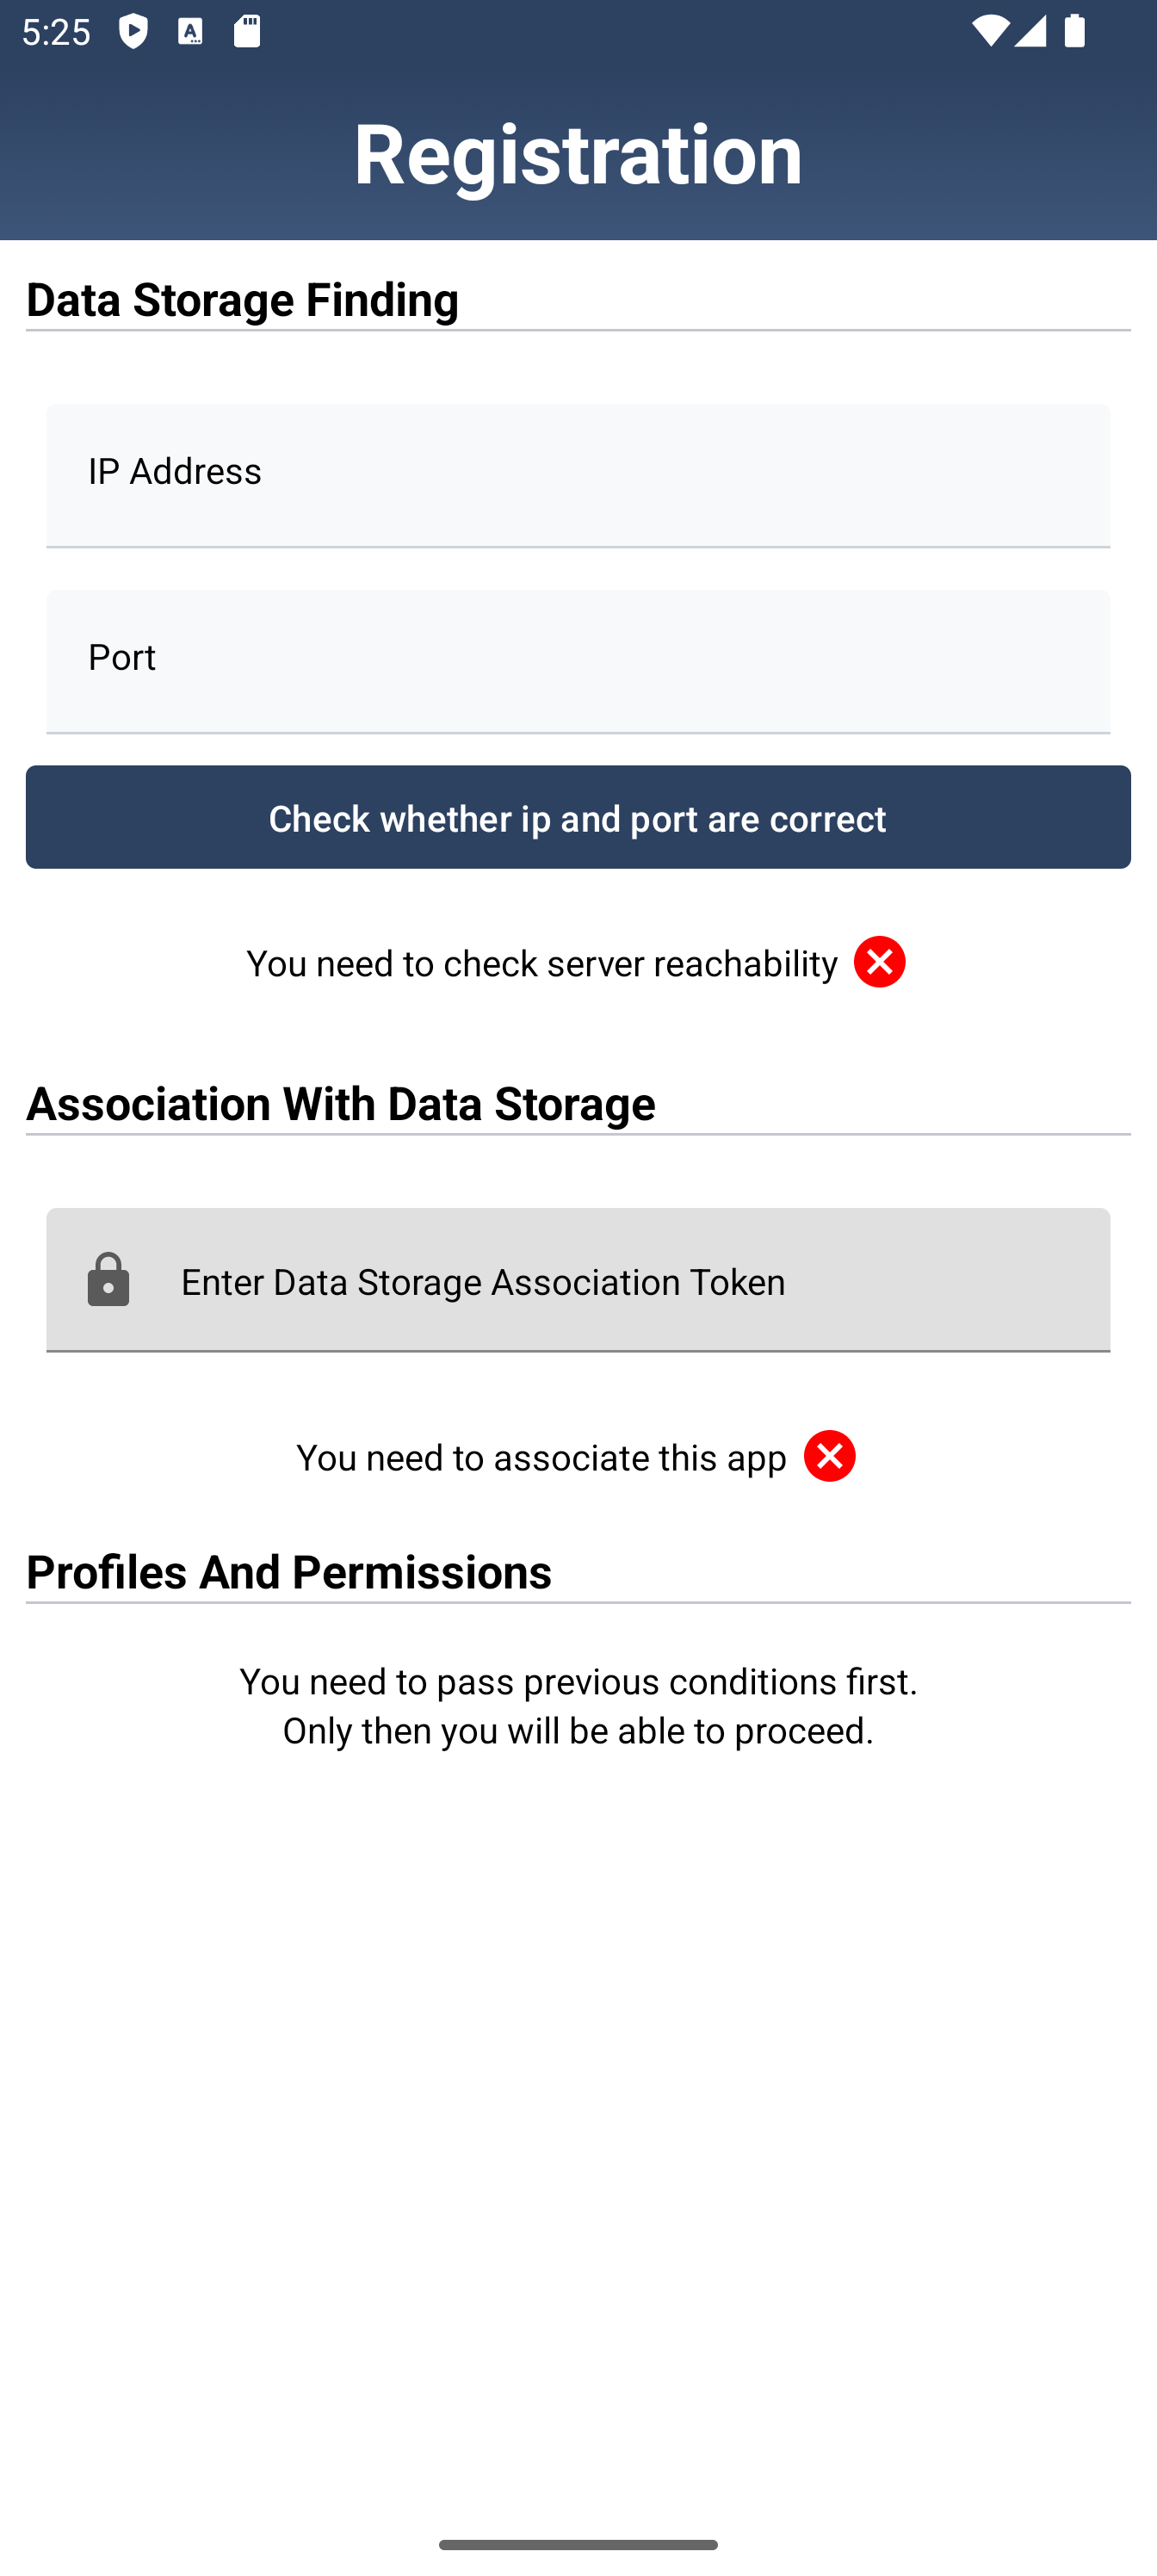
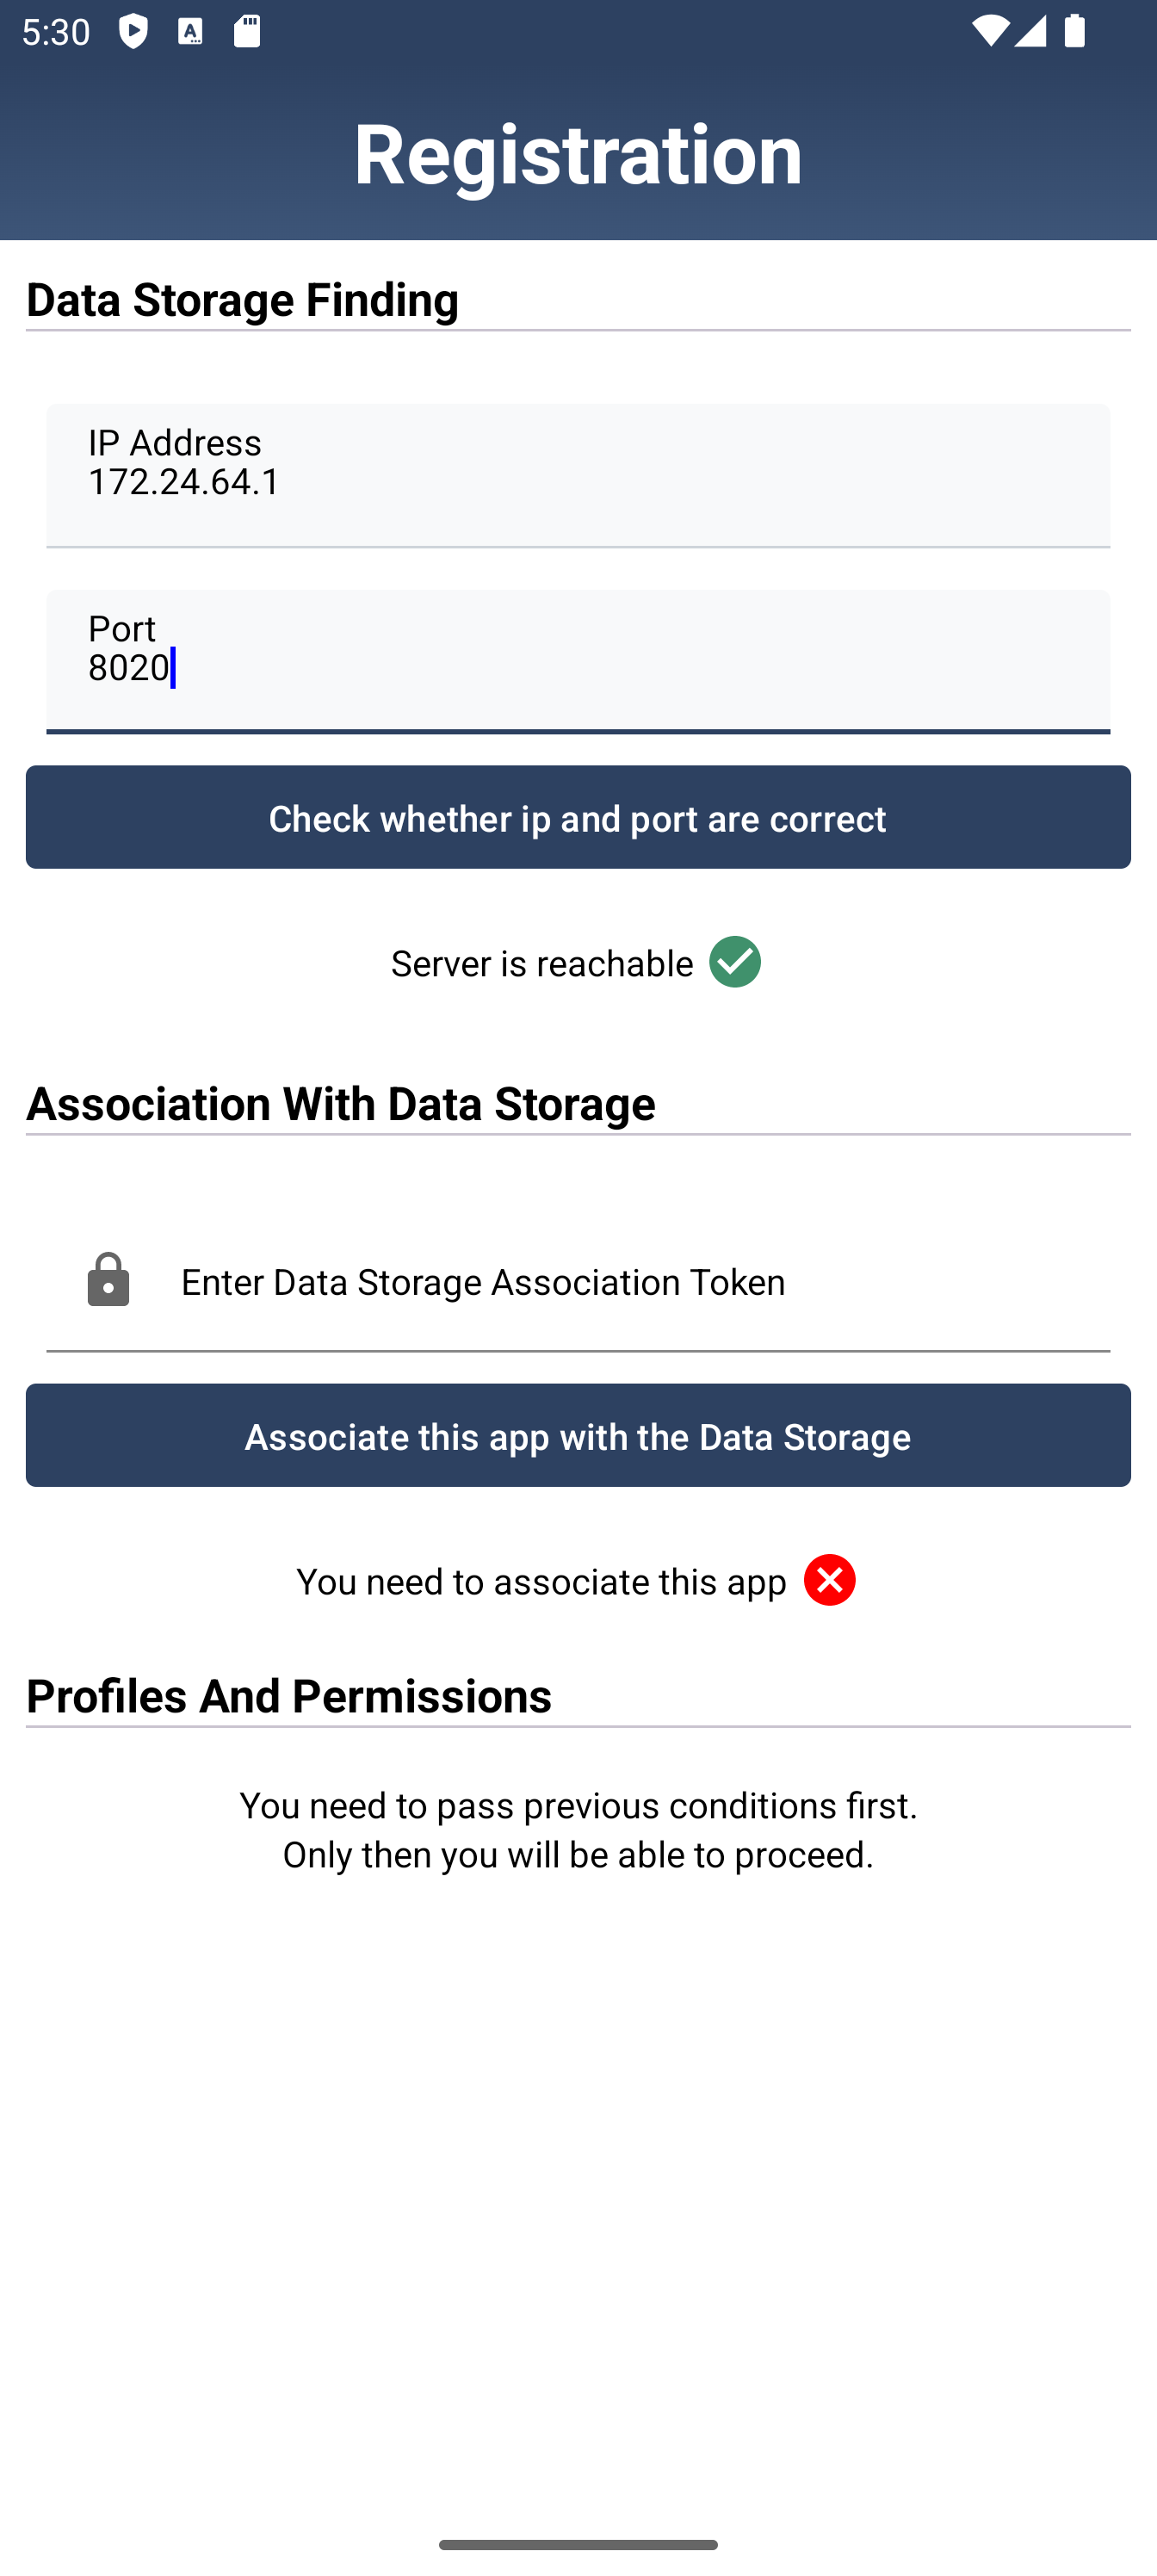
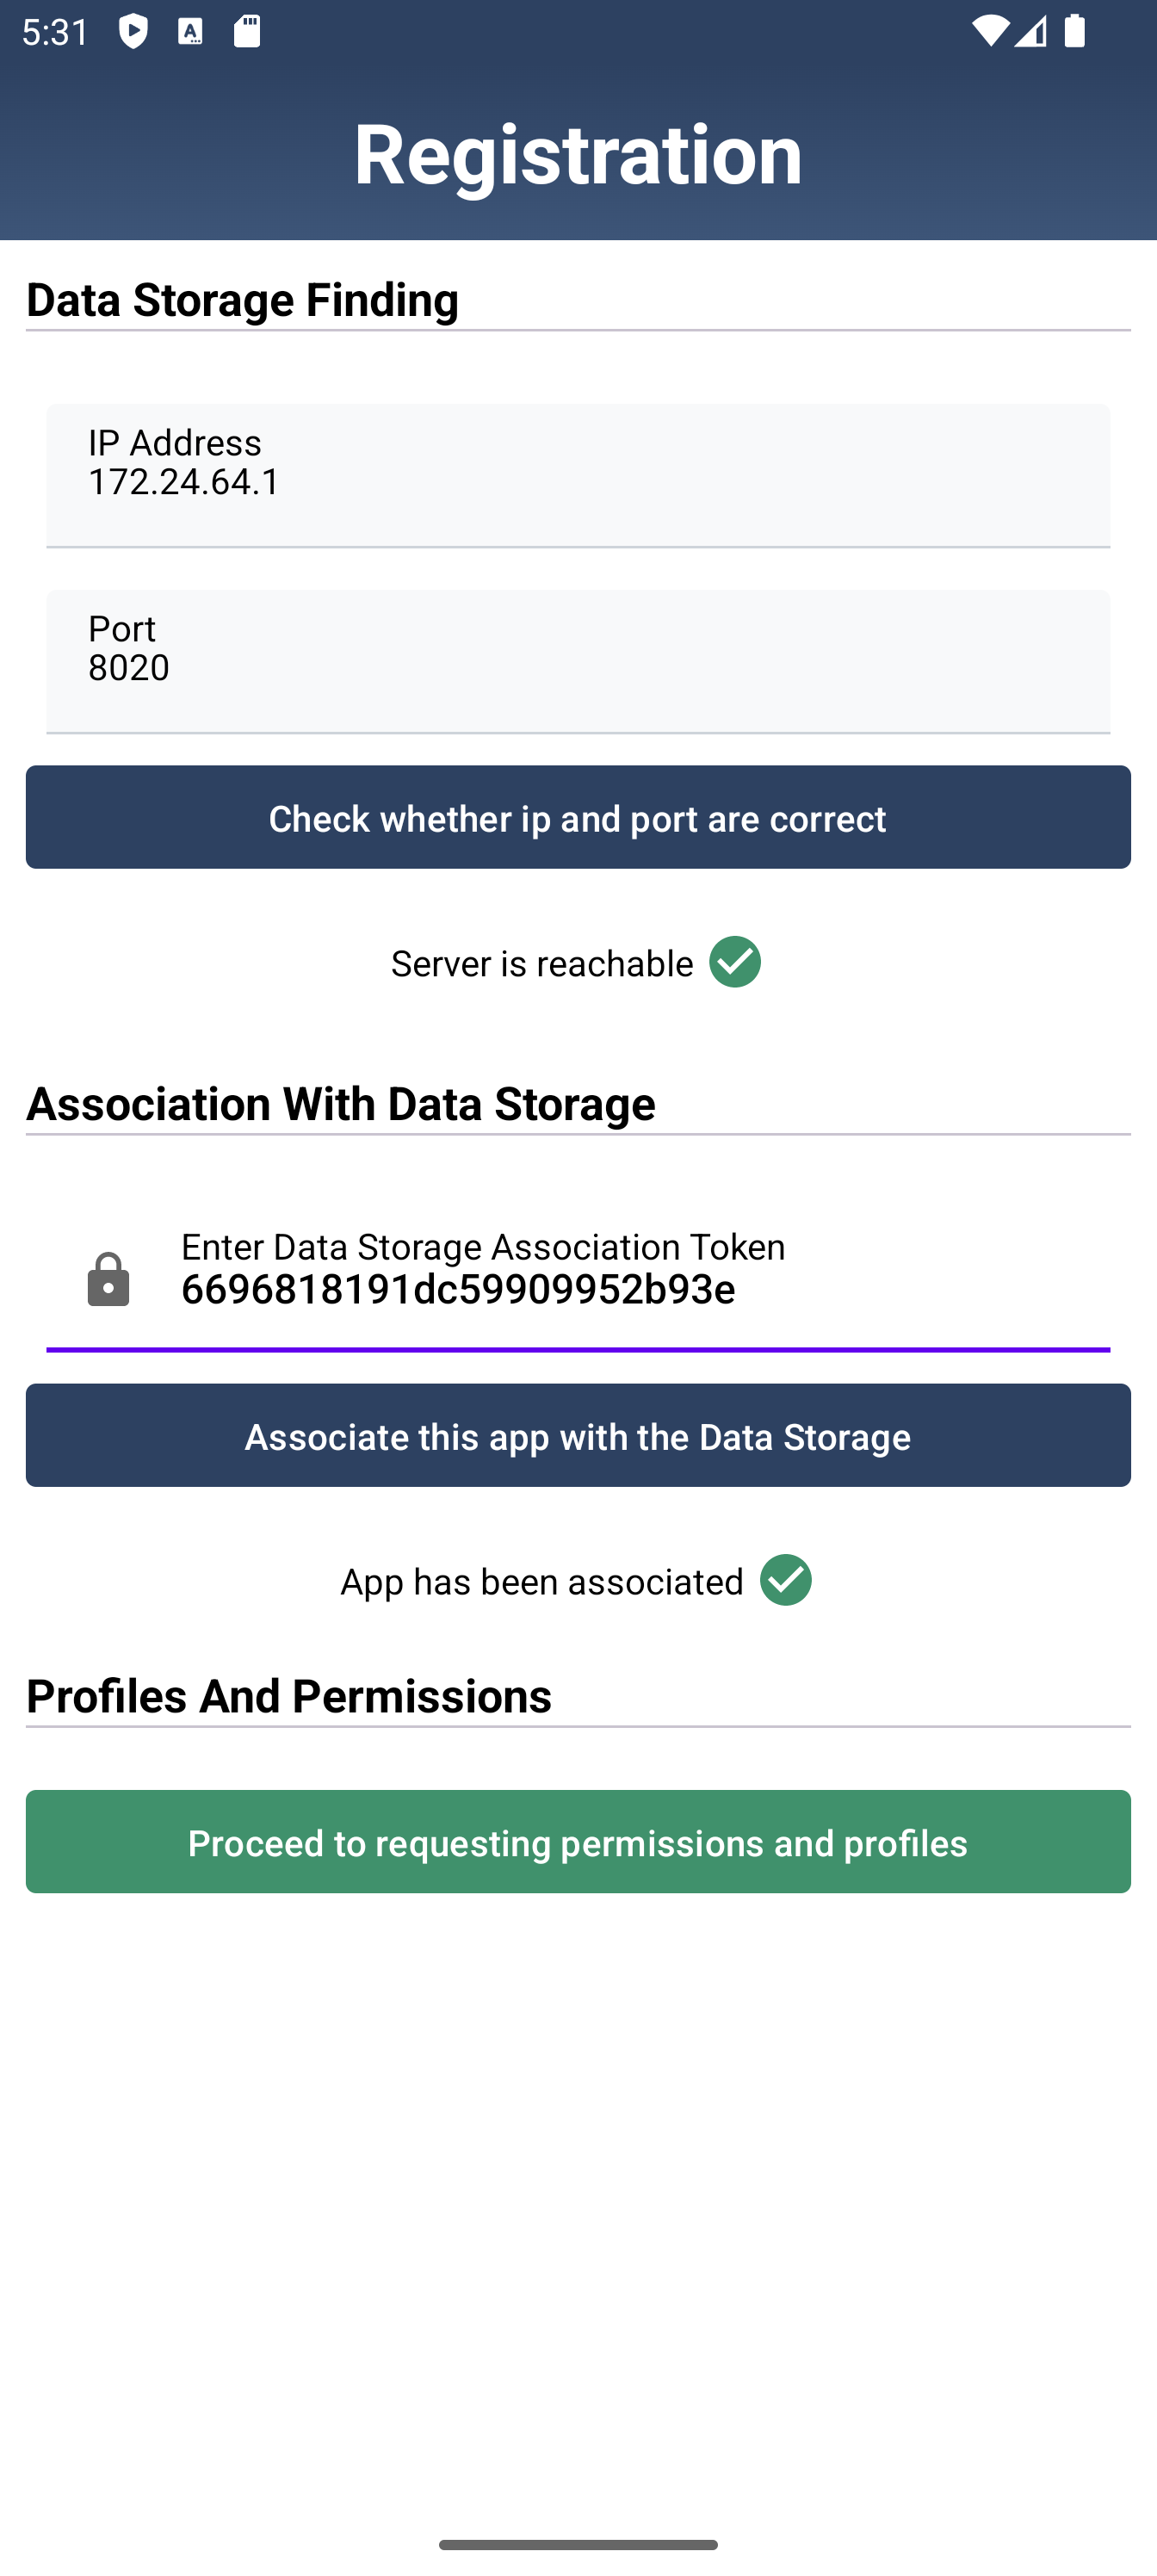
After successful association with the system, the application receives a token (to be precise jwtTokenForPermissionRequestsAndProfiles), which will be used to create profiles and request permissions. This successful association also leads to a new button revealed for continuing with registration.
Registering Profile and Requesting Permissions For This Profile in Data Storage
Profile
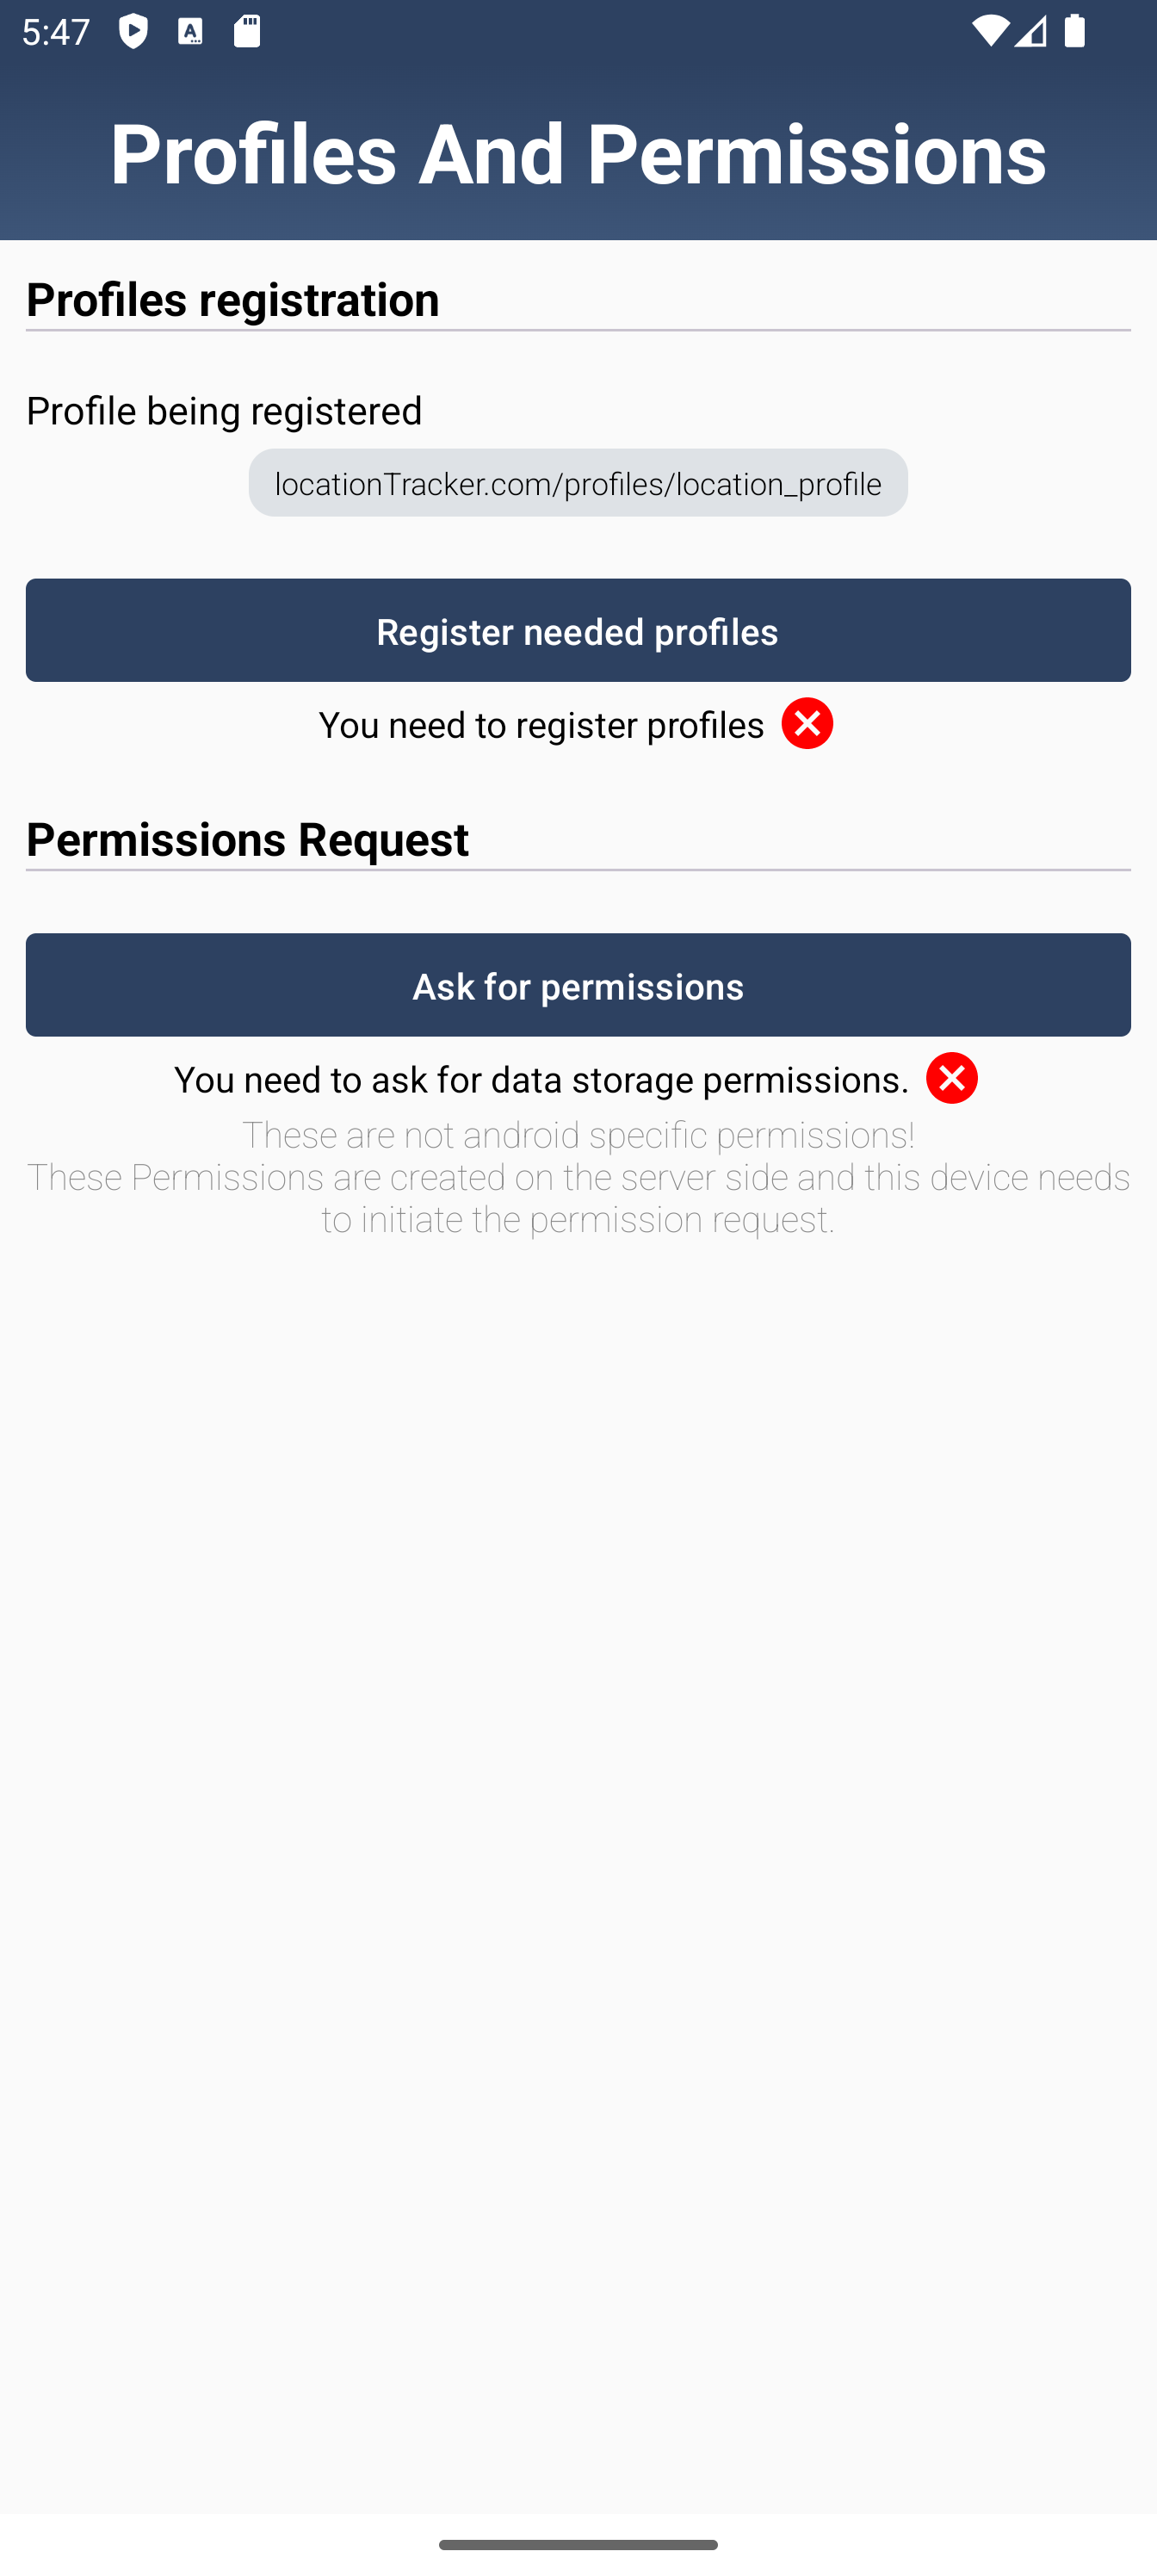
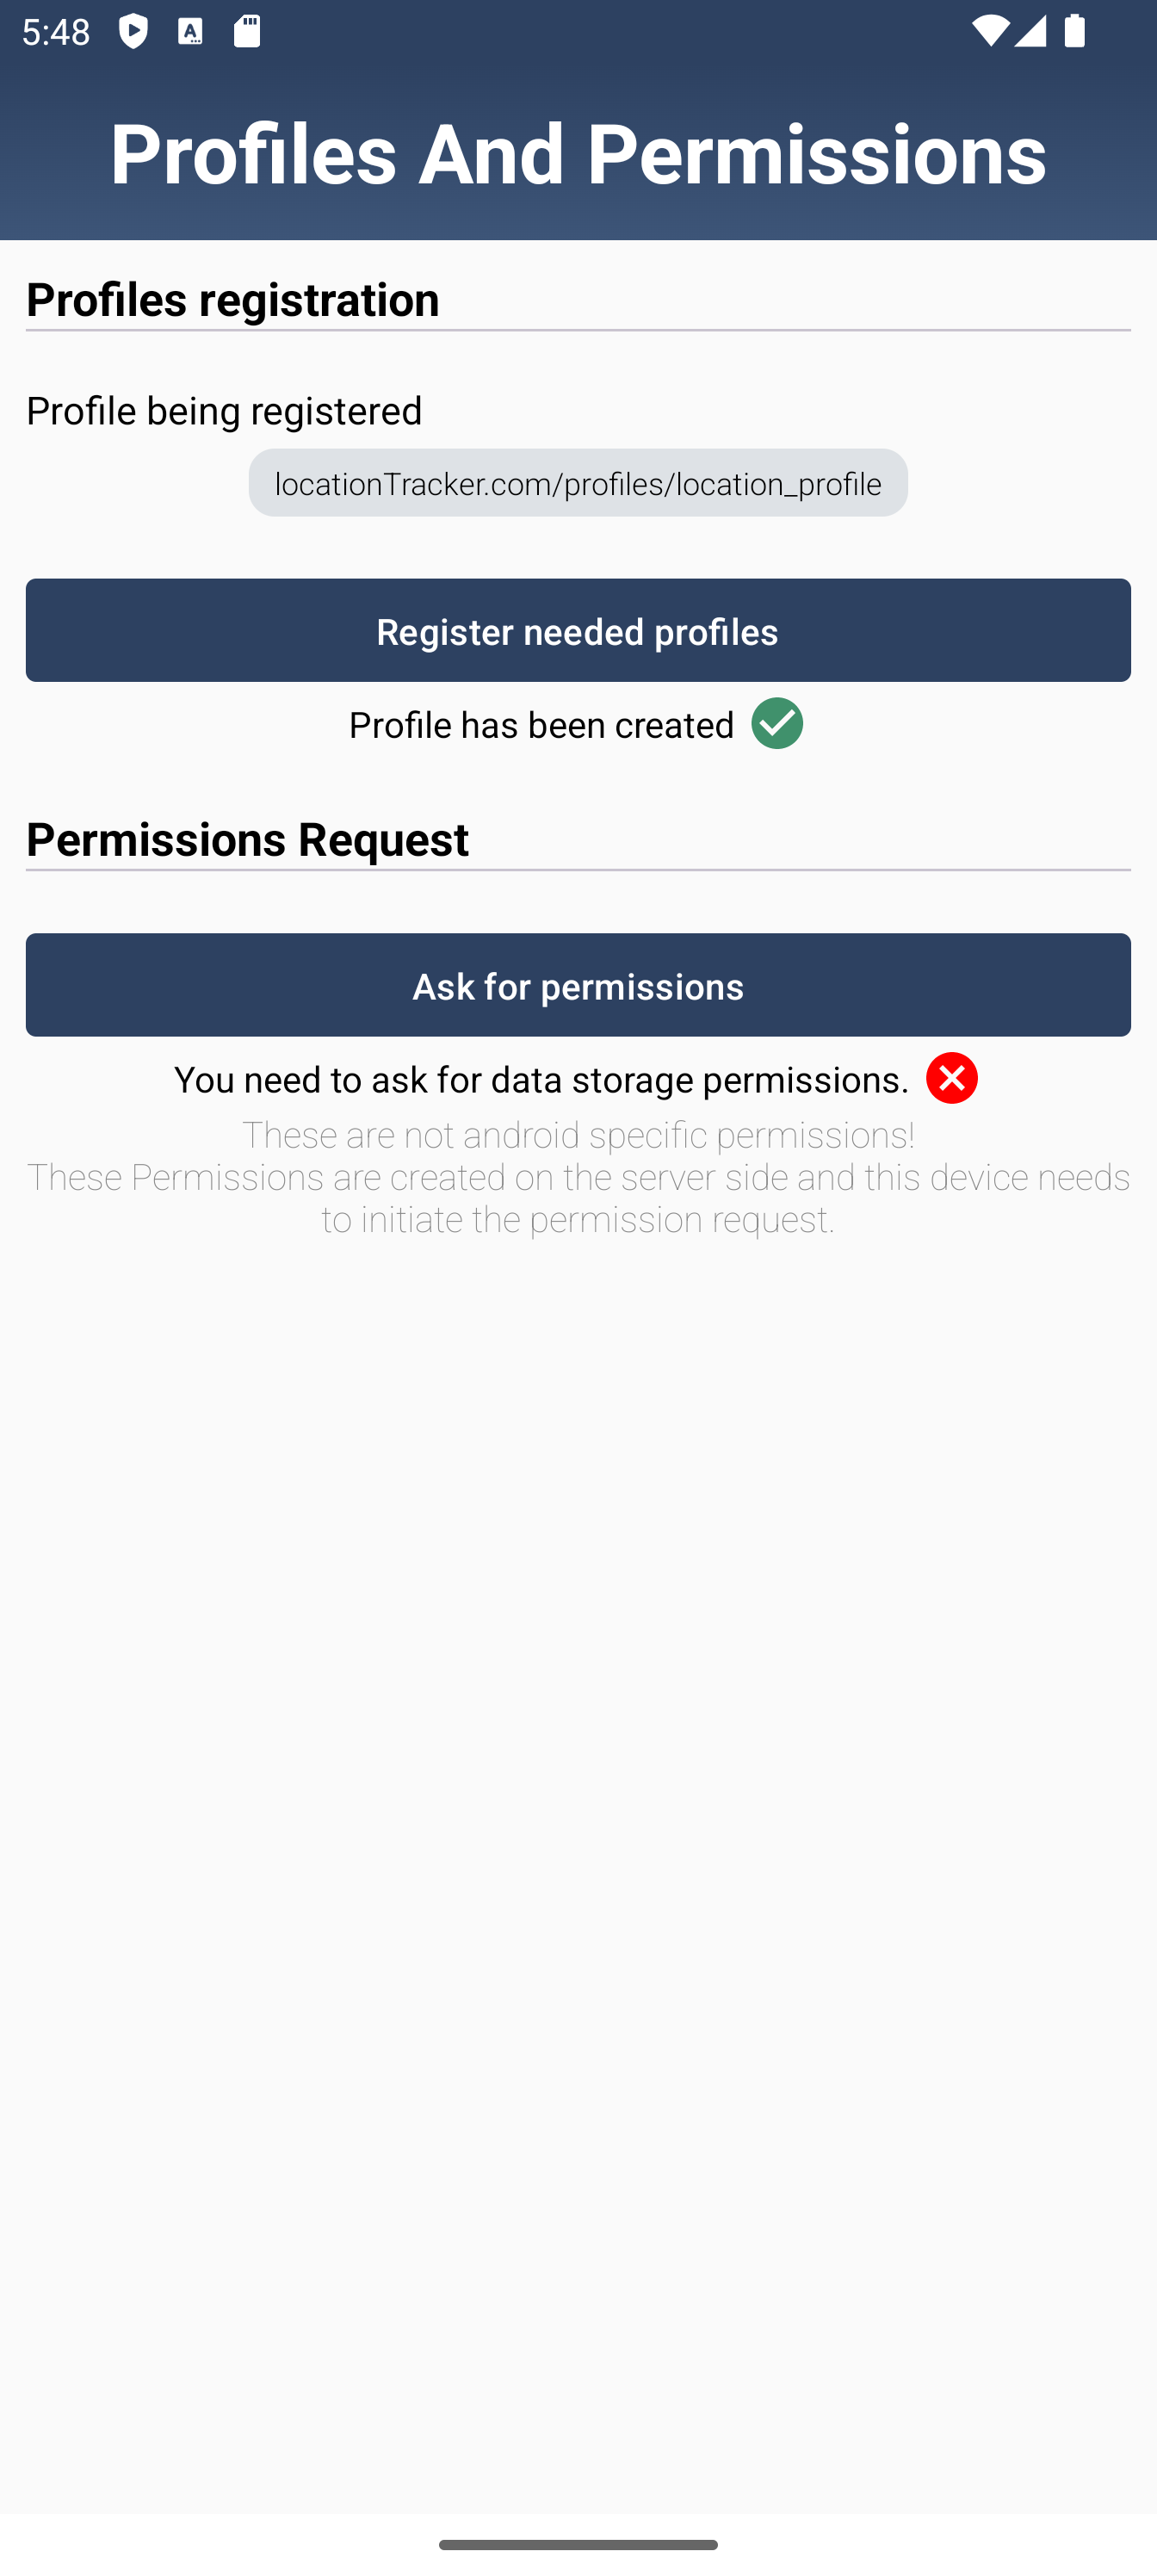
The application then must register a profile in the system using the given token obtained after association. The profile contains a JSON schema showing what a generated data will look like. Each event, based on the schema, contains latitude, longitude, accuracy, altitude, speed, time, among others.
{
  "type": "object",
  "properties": {
    "latitude": {
      "type": "number",
      "minimum": -90,
      "maximum": 90
    },
    "longitude": {
      "type": "number",
      "minimum": -180,
      "maximum": 180
    },
    "accuracy": {
      "type": "number"
    },
    "altitude": {
      "type": "number"
    },
    "speed": {
      "type": "number"
    },
    "speedAccuracyMetersPerSecond": {
      "type": "number"
    },
    "time": {
      "type": "string",
      "description": "Time in ISO 8601 format"
    }
  },
  "required": [
    "latitude",
    "longitude",
    "time"
  ],
  "additionalProperties": true
}
After the profile is successfully created, the app needs to send permission request for being able to produce events of this type (i.e. of this profile).
Permission Request
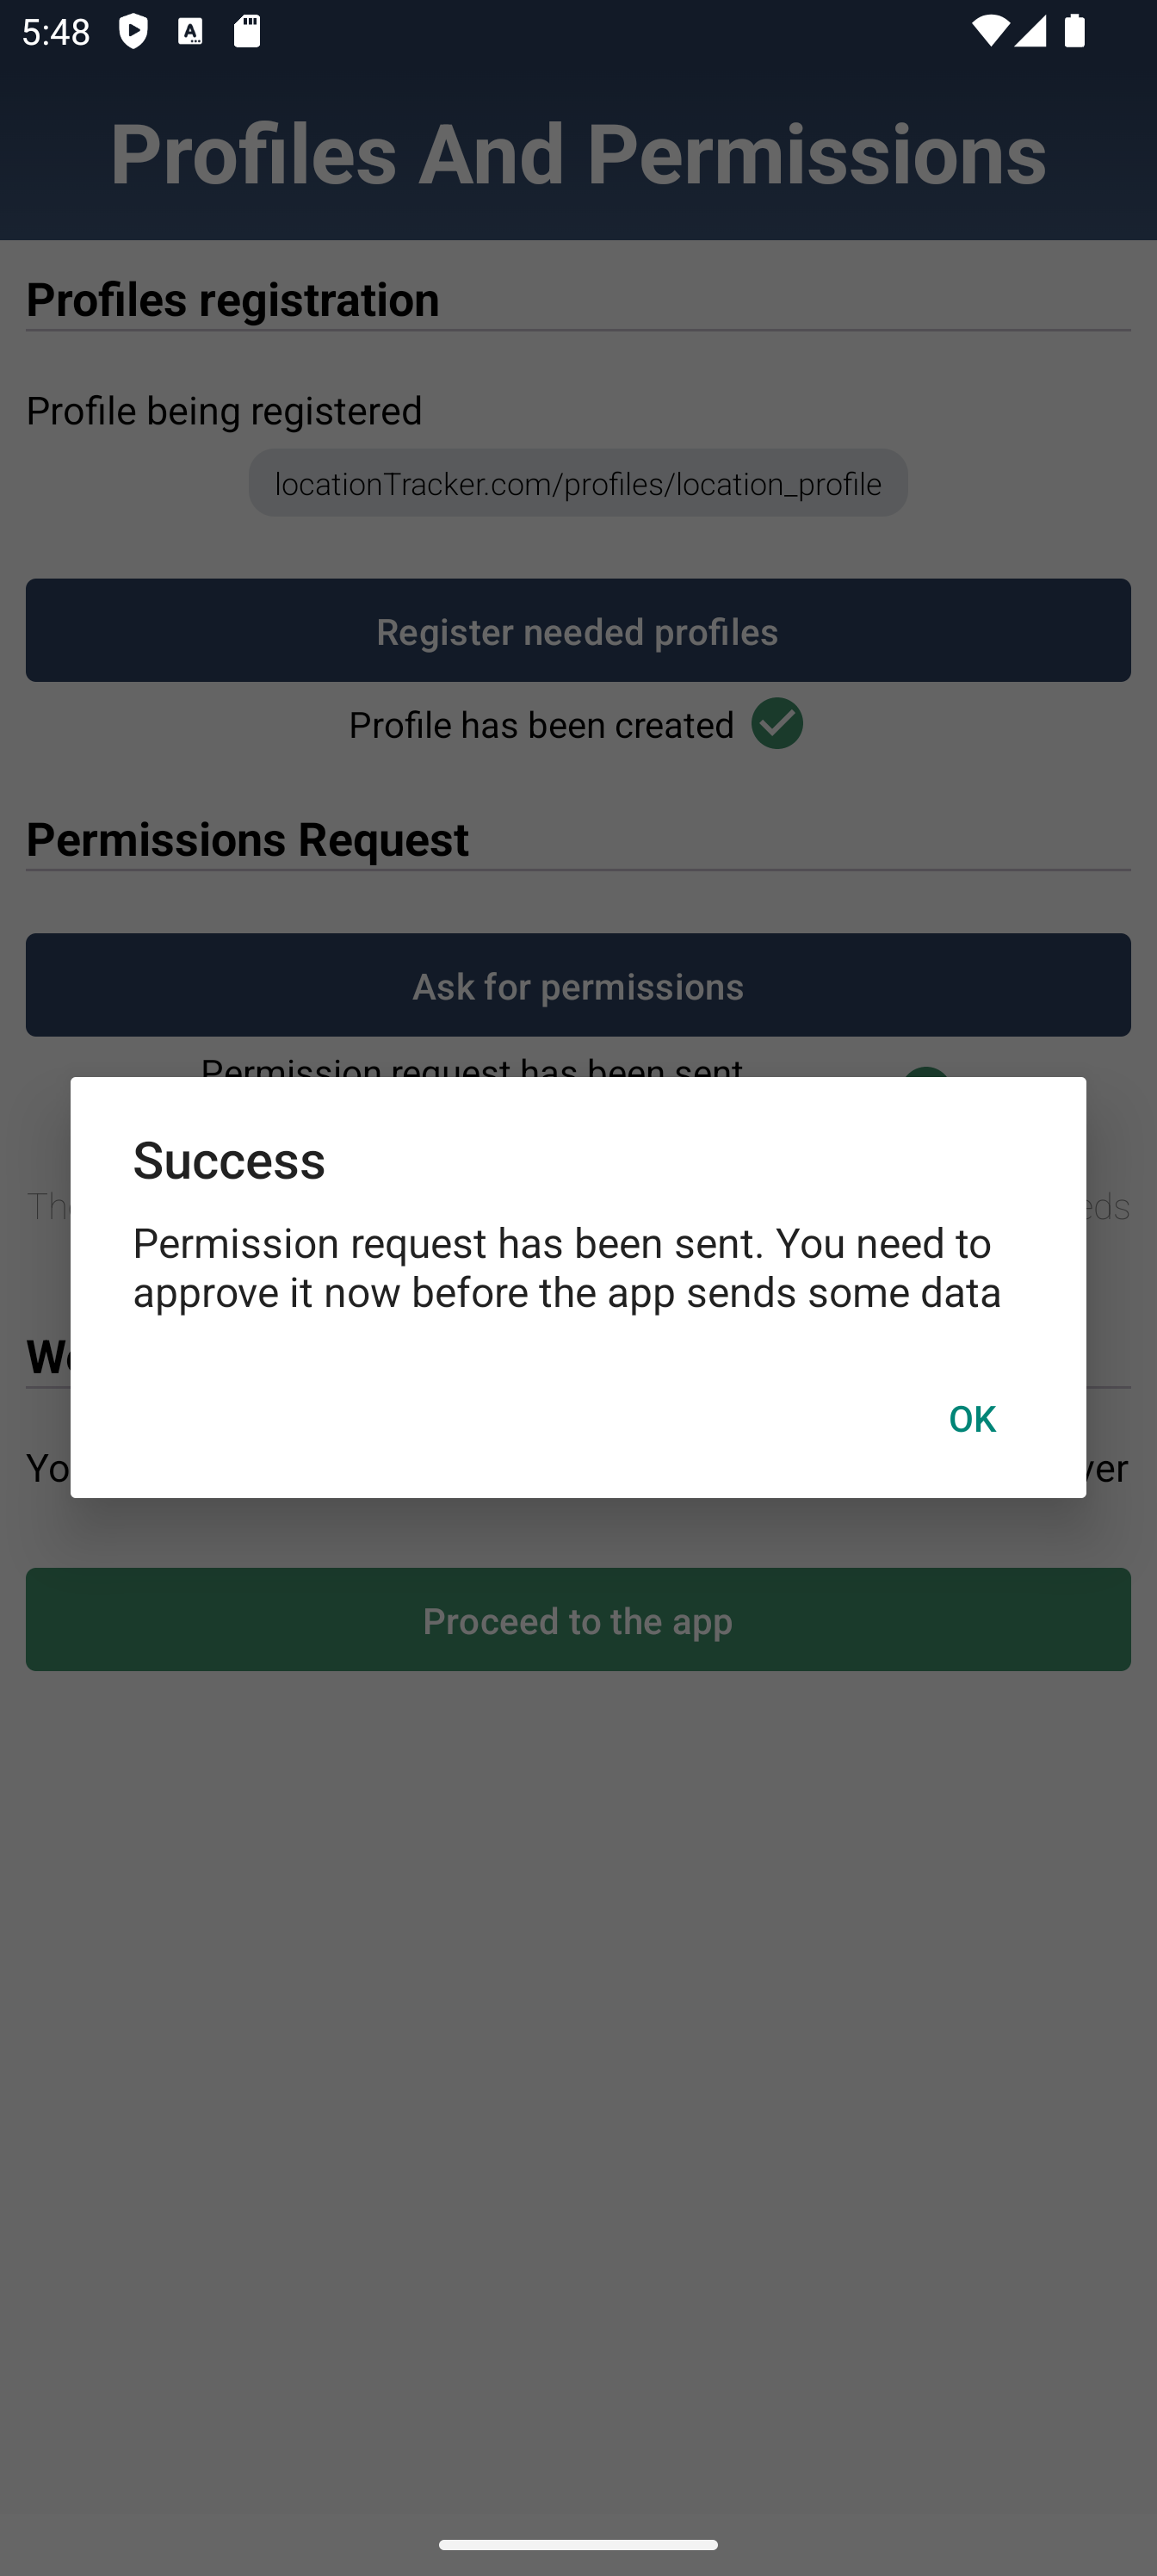
After the profile is successfully created, the app needs to send permission request for being able to produce events of this type (i.e. of this profile).
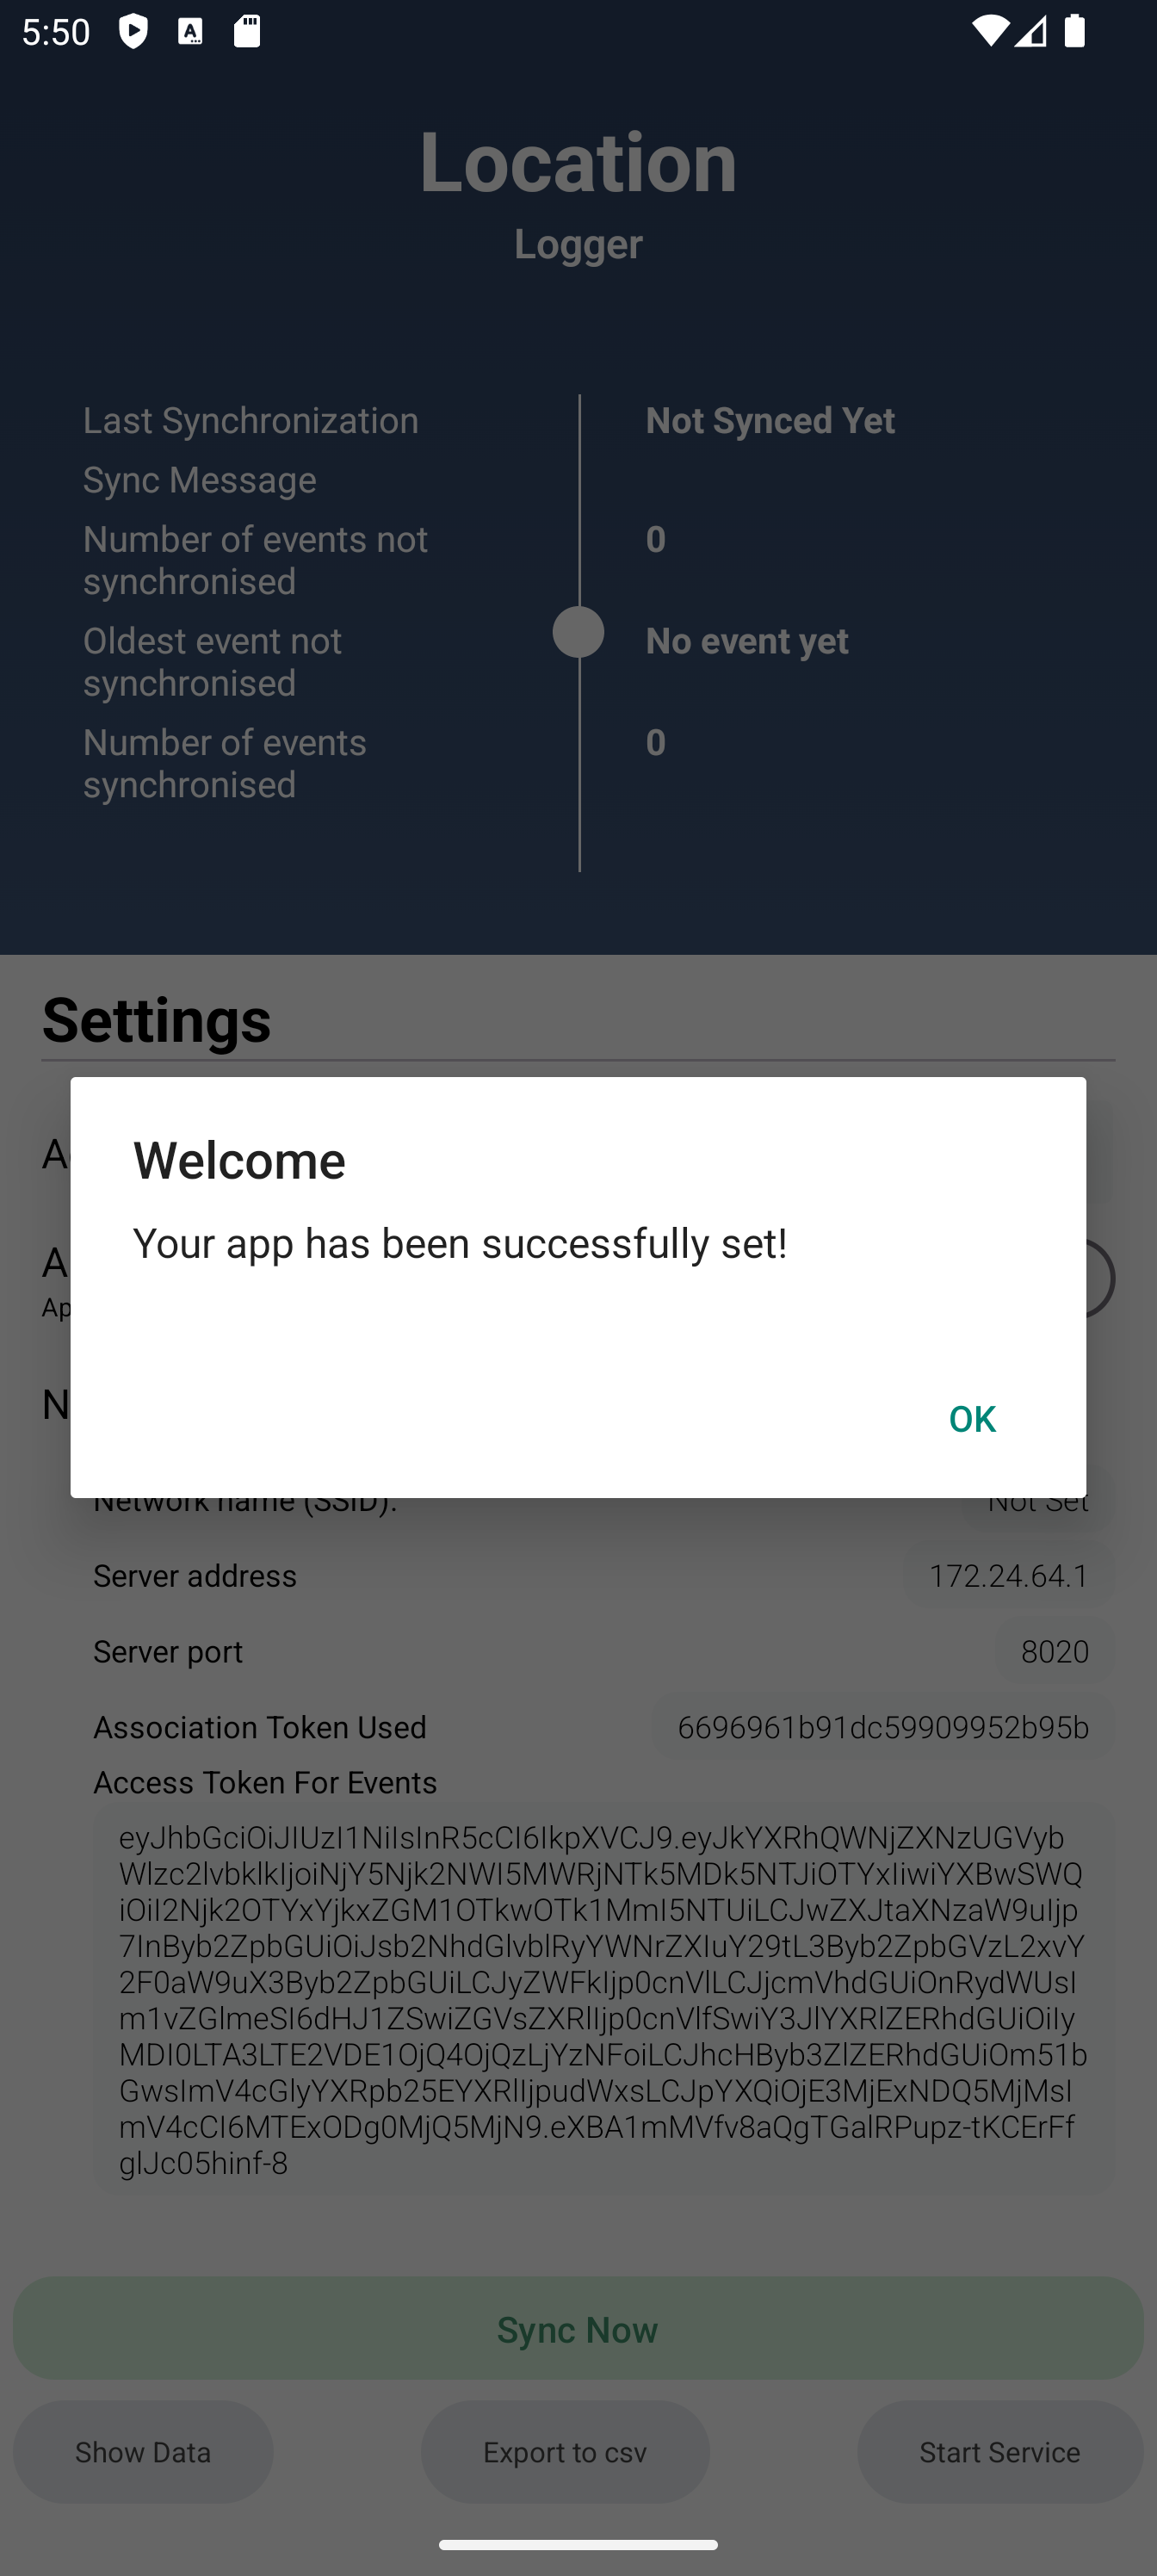
When the request permission is registered in the system, the application notifies the user about the need to approve the permission. Permission is approved just like already explained in Control center. Otherwise the application won't be able to start synchronising the gathered data with the system.
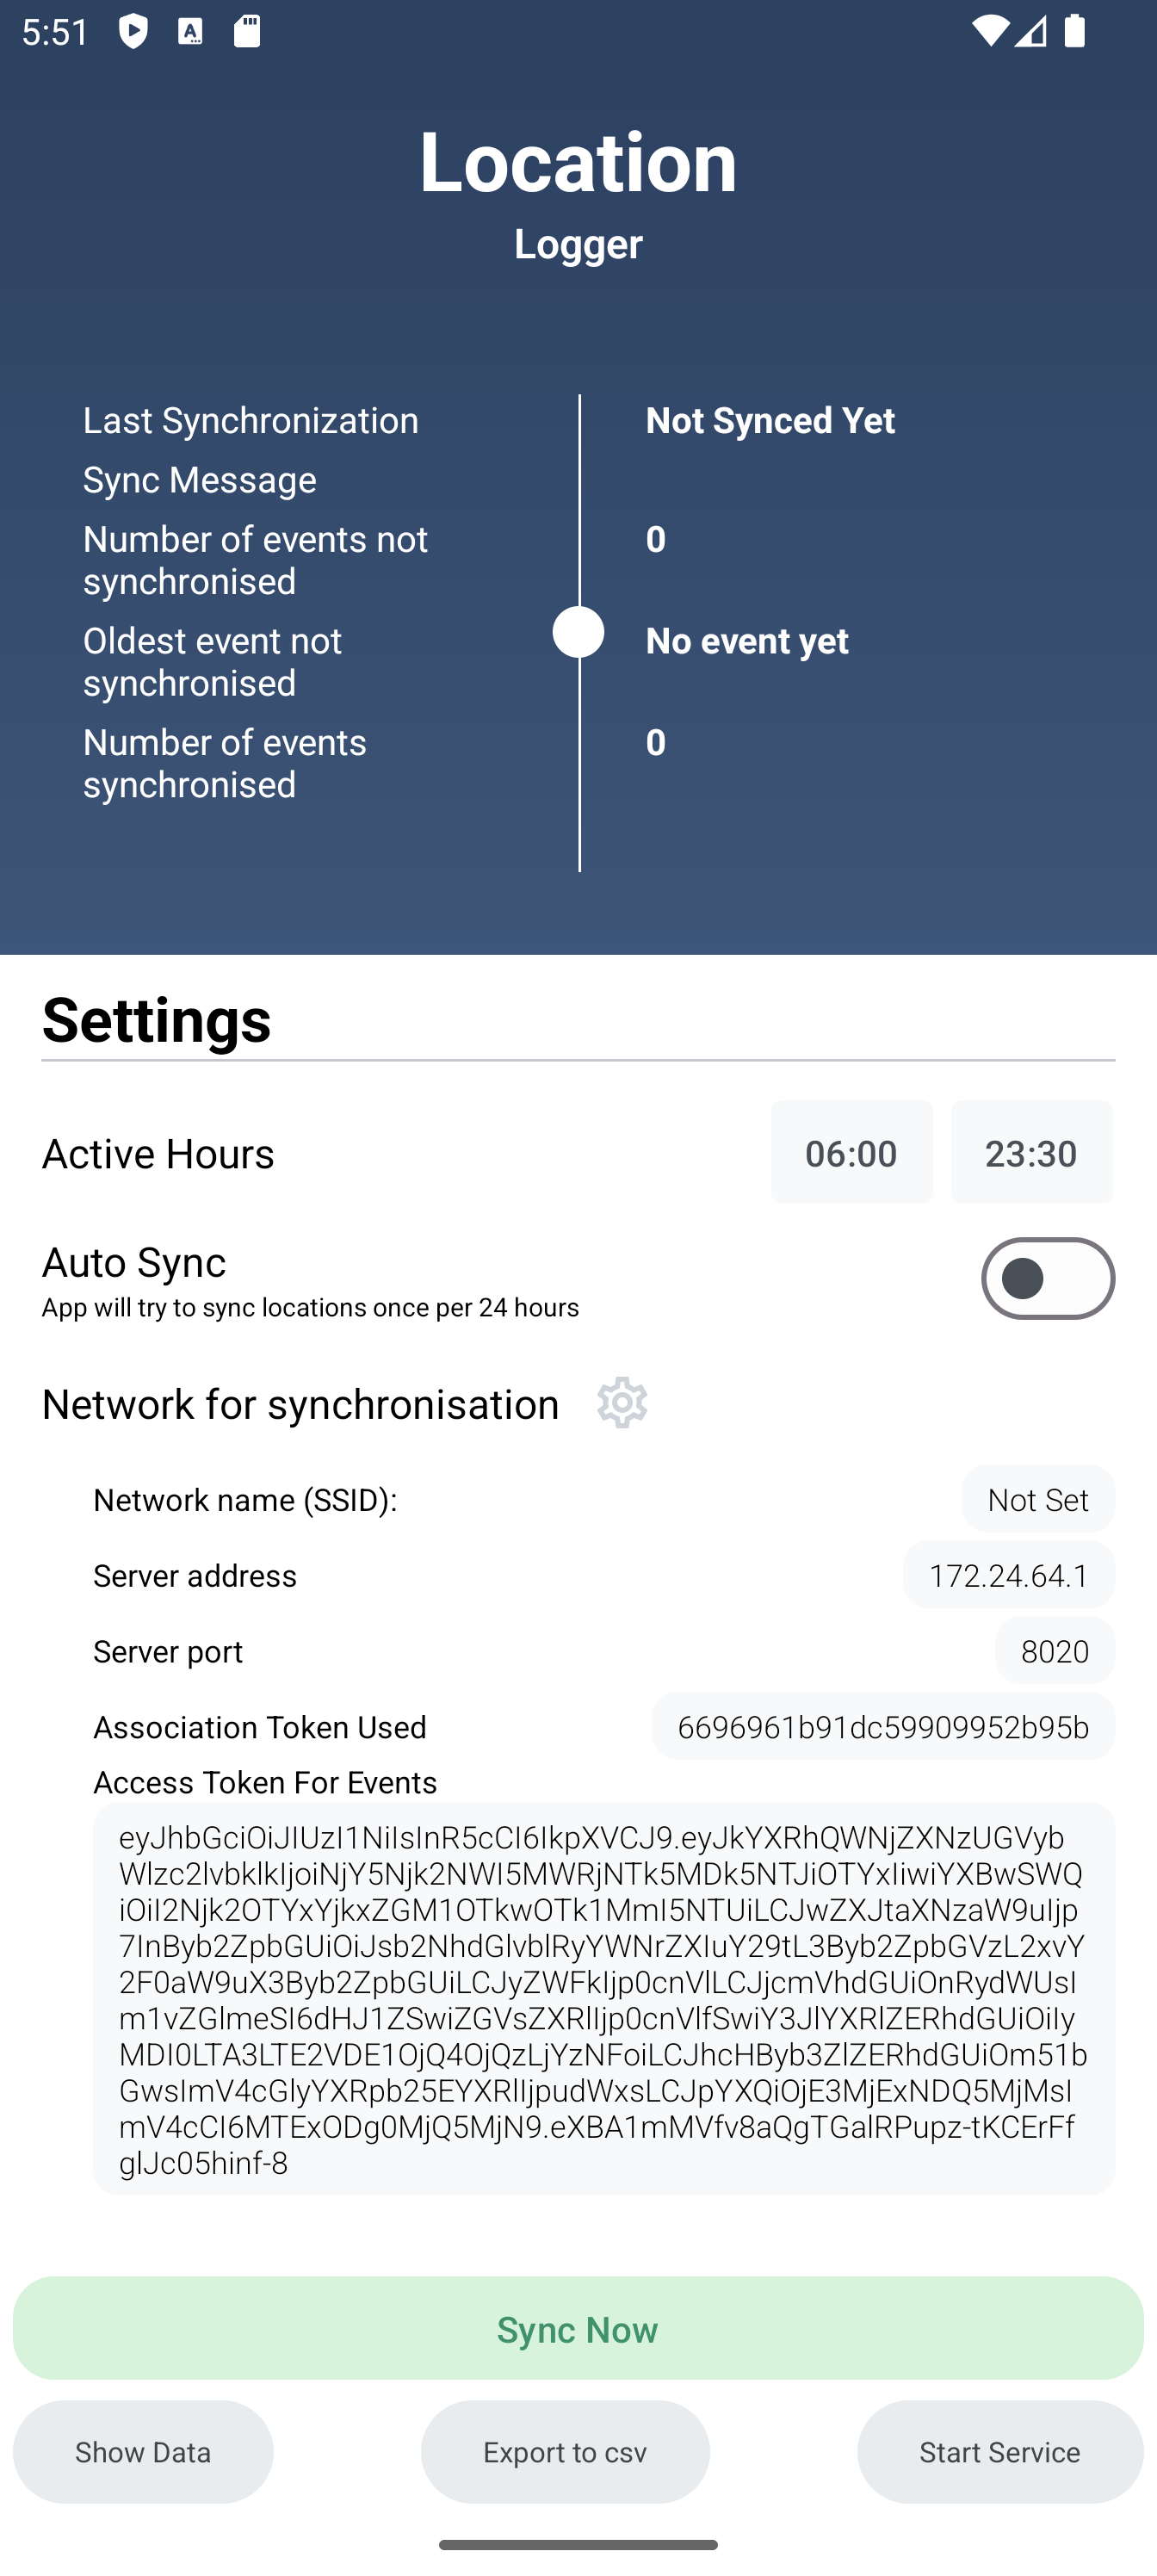
At this point, the Location Tracking application is fully setup.
Main features
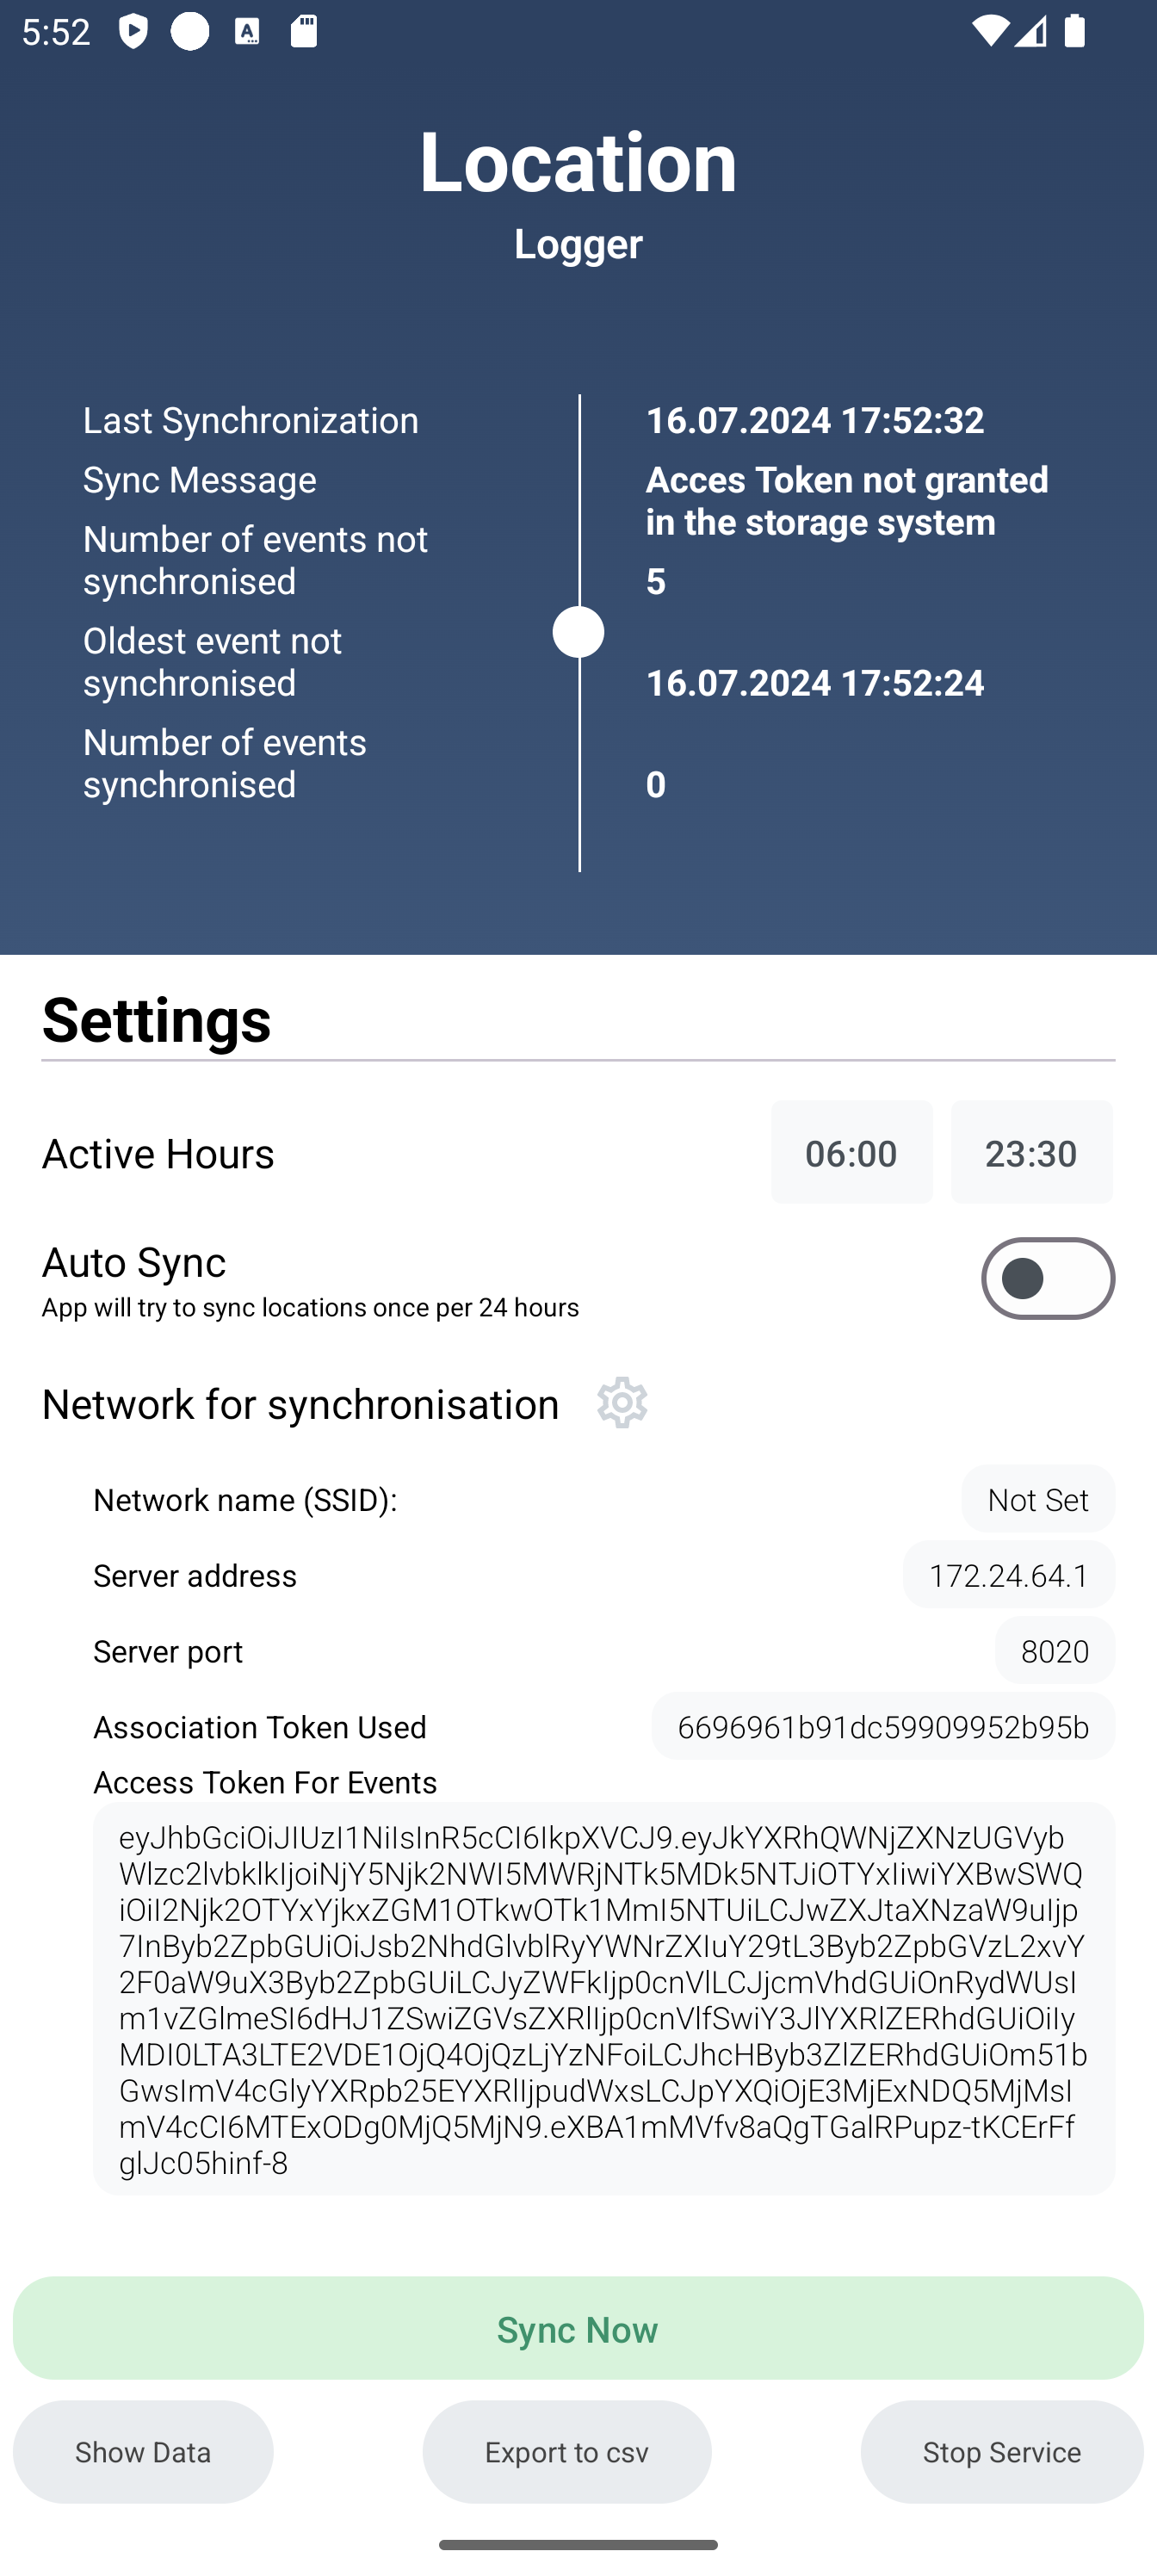
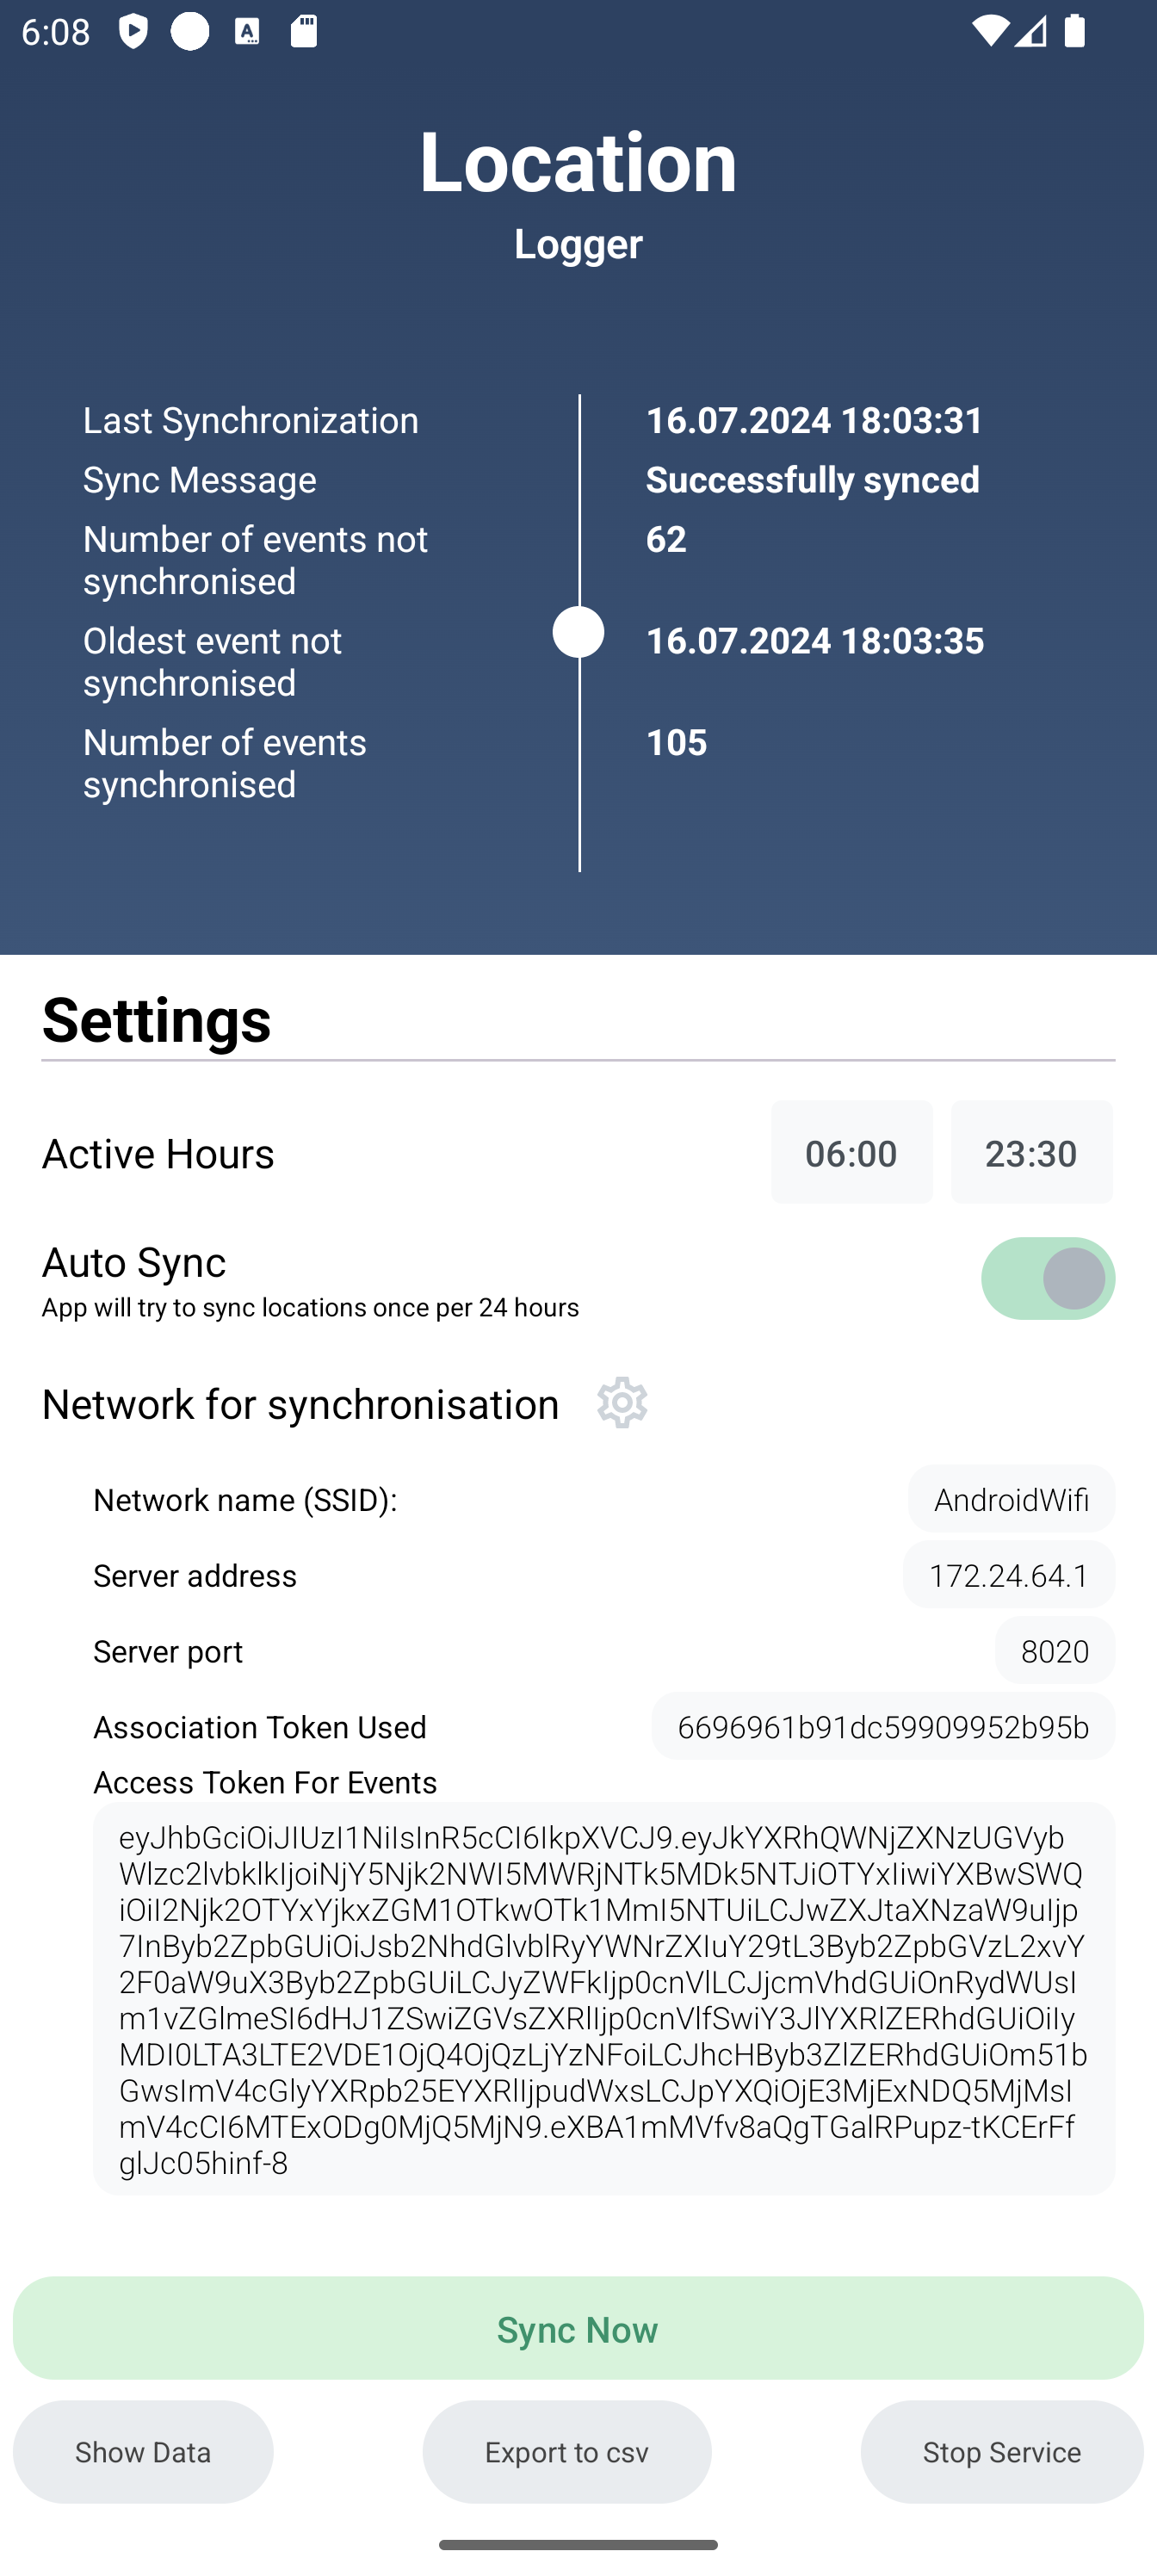
The application displays the following information:
- When the last synchronization occurred
- Information about the last synchronization
- Number of locations that have not yet been synchronized
- Oldest unsynchronized location
- Total number of locations already synchronized
In the application, it is possible to set the period during which the user wants the application to collect data. Outside this period, the app does not collect location, but it monitors whether the user is connected to the correct network in case the user has automatic data synchronisation turned on. As for automatic data synchronization, there is a UI switch that allows the user to choose whether they want such automatic synchronization. For this to work however, user needs to set default network in the settings screen. When the application finds out its device is on the correct network, it will try to synchronise.
Next, there is information about the network name, address, and port of the system.
If the user does not want data to be synchronized automatically, they have two options:
- Synchronize data with the server manually by pressing the Sync Now button.
- Or by exporting data to a CSV file - you can see a button Export to CSV at the bottom of the screen
During synchronization, the user is shown a progress bar along with the percentage of the synchronization process.
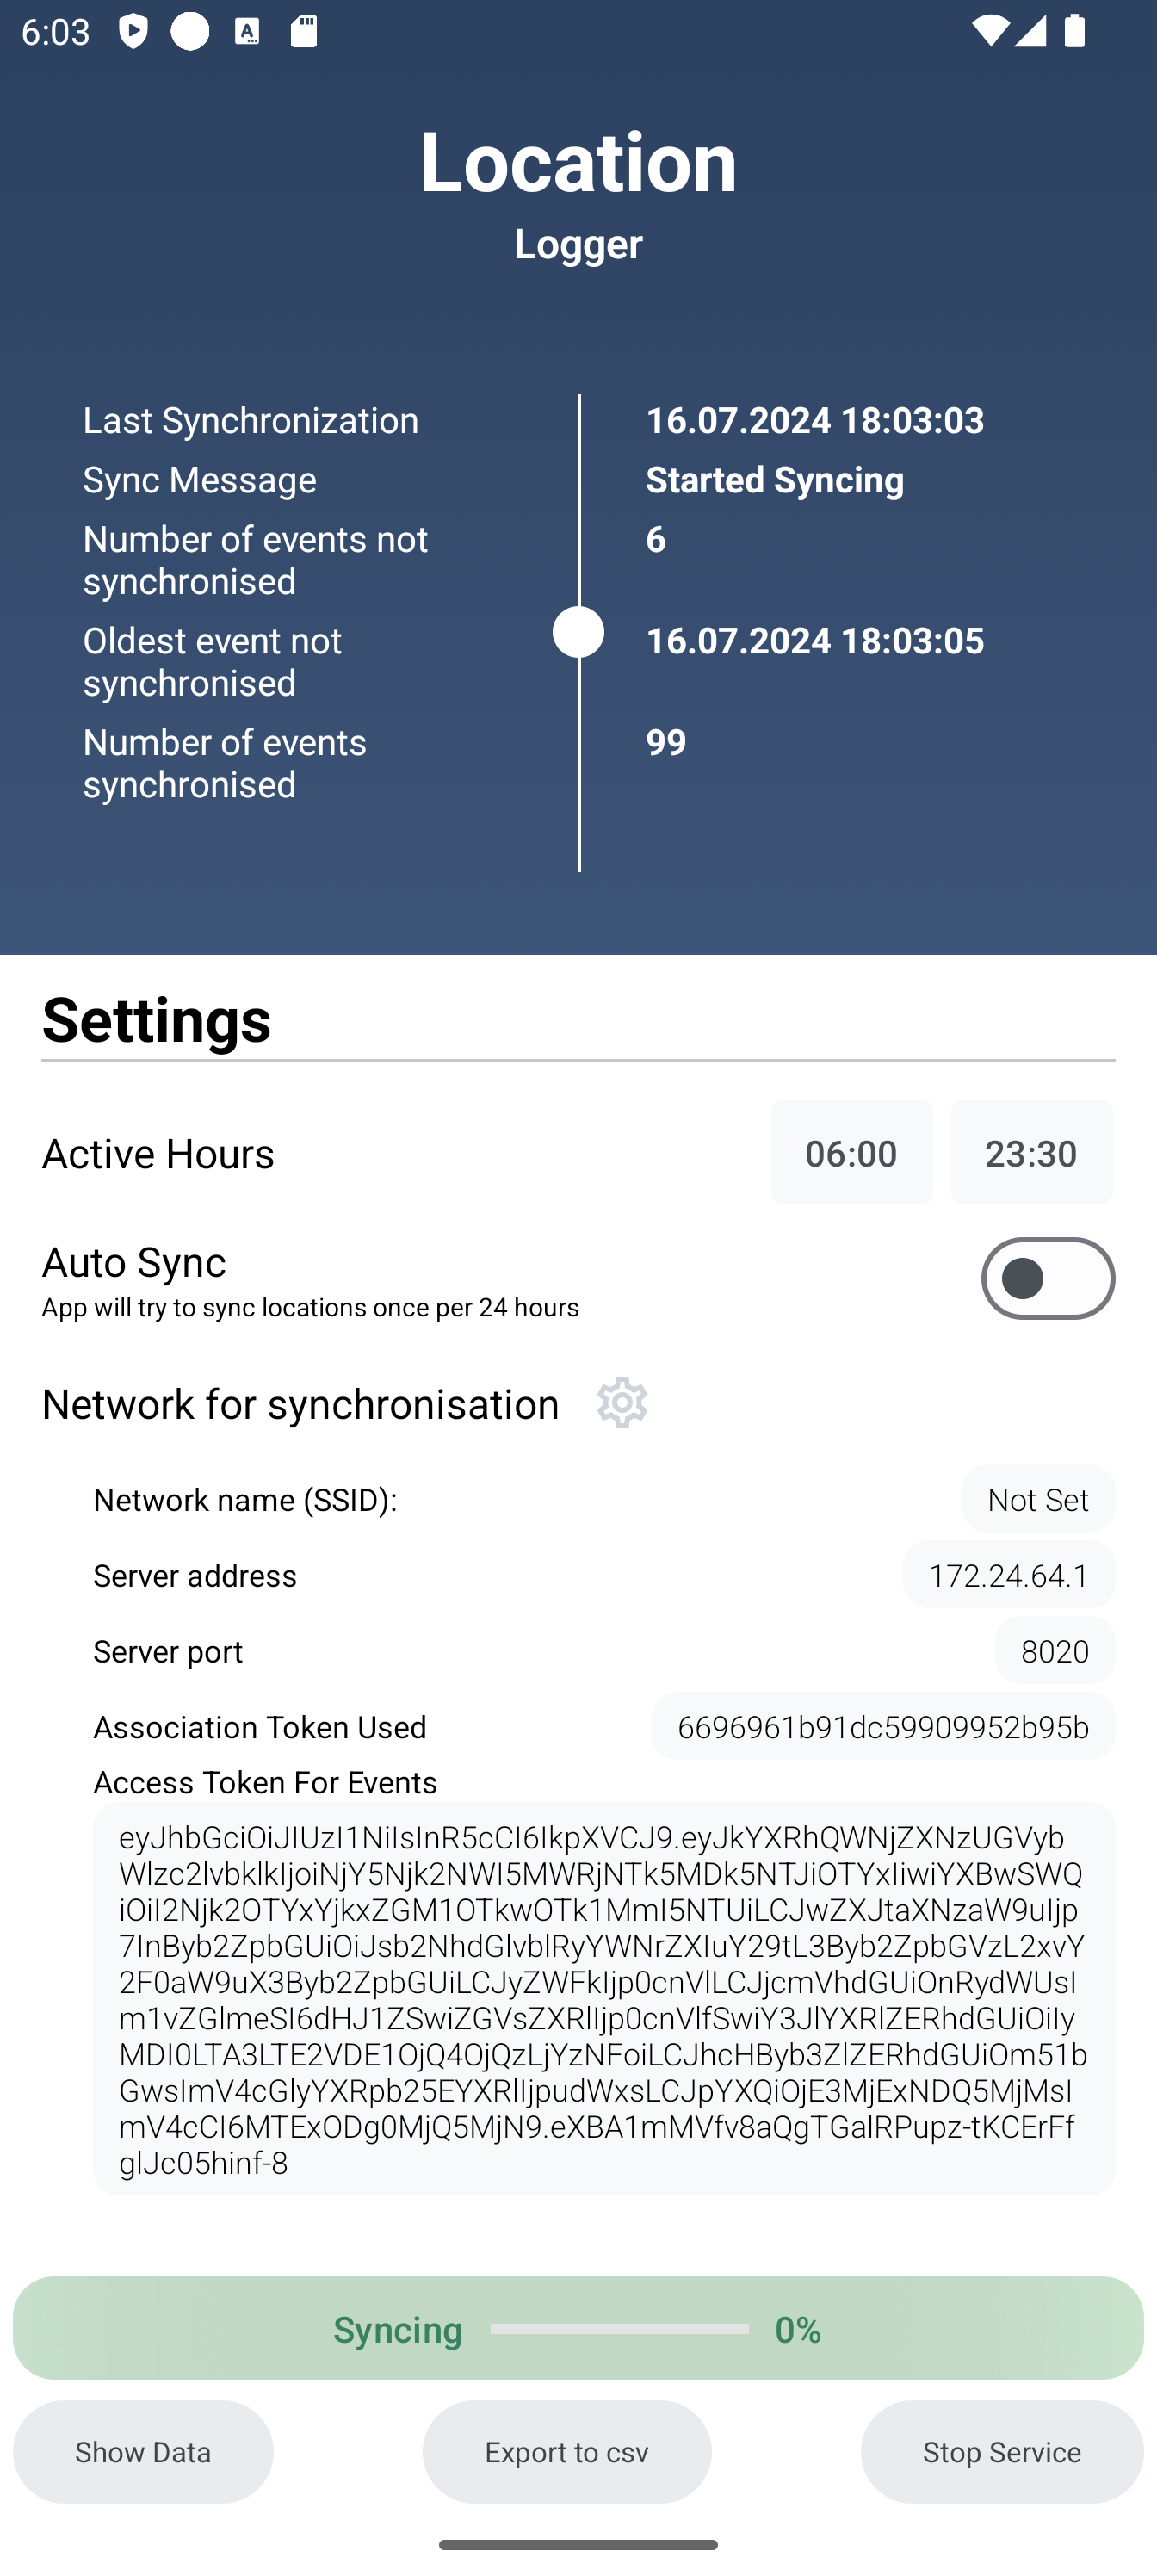
At the bottom of the main application screen, we see three horizontal buttons:
- A button to display a list of collected data.
- A button for exporting to CSV (the user is shown a screen where they can choose the location and name of the file).
- Turning on the data collection service itself. This service must be activated for data collection. Once the service (foreground service) is activated, it is still possible to change settings such as automatic synchronization or network name without needing to restart the service. Thus, the application can communicate with it and send data not only at its launch.
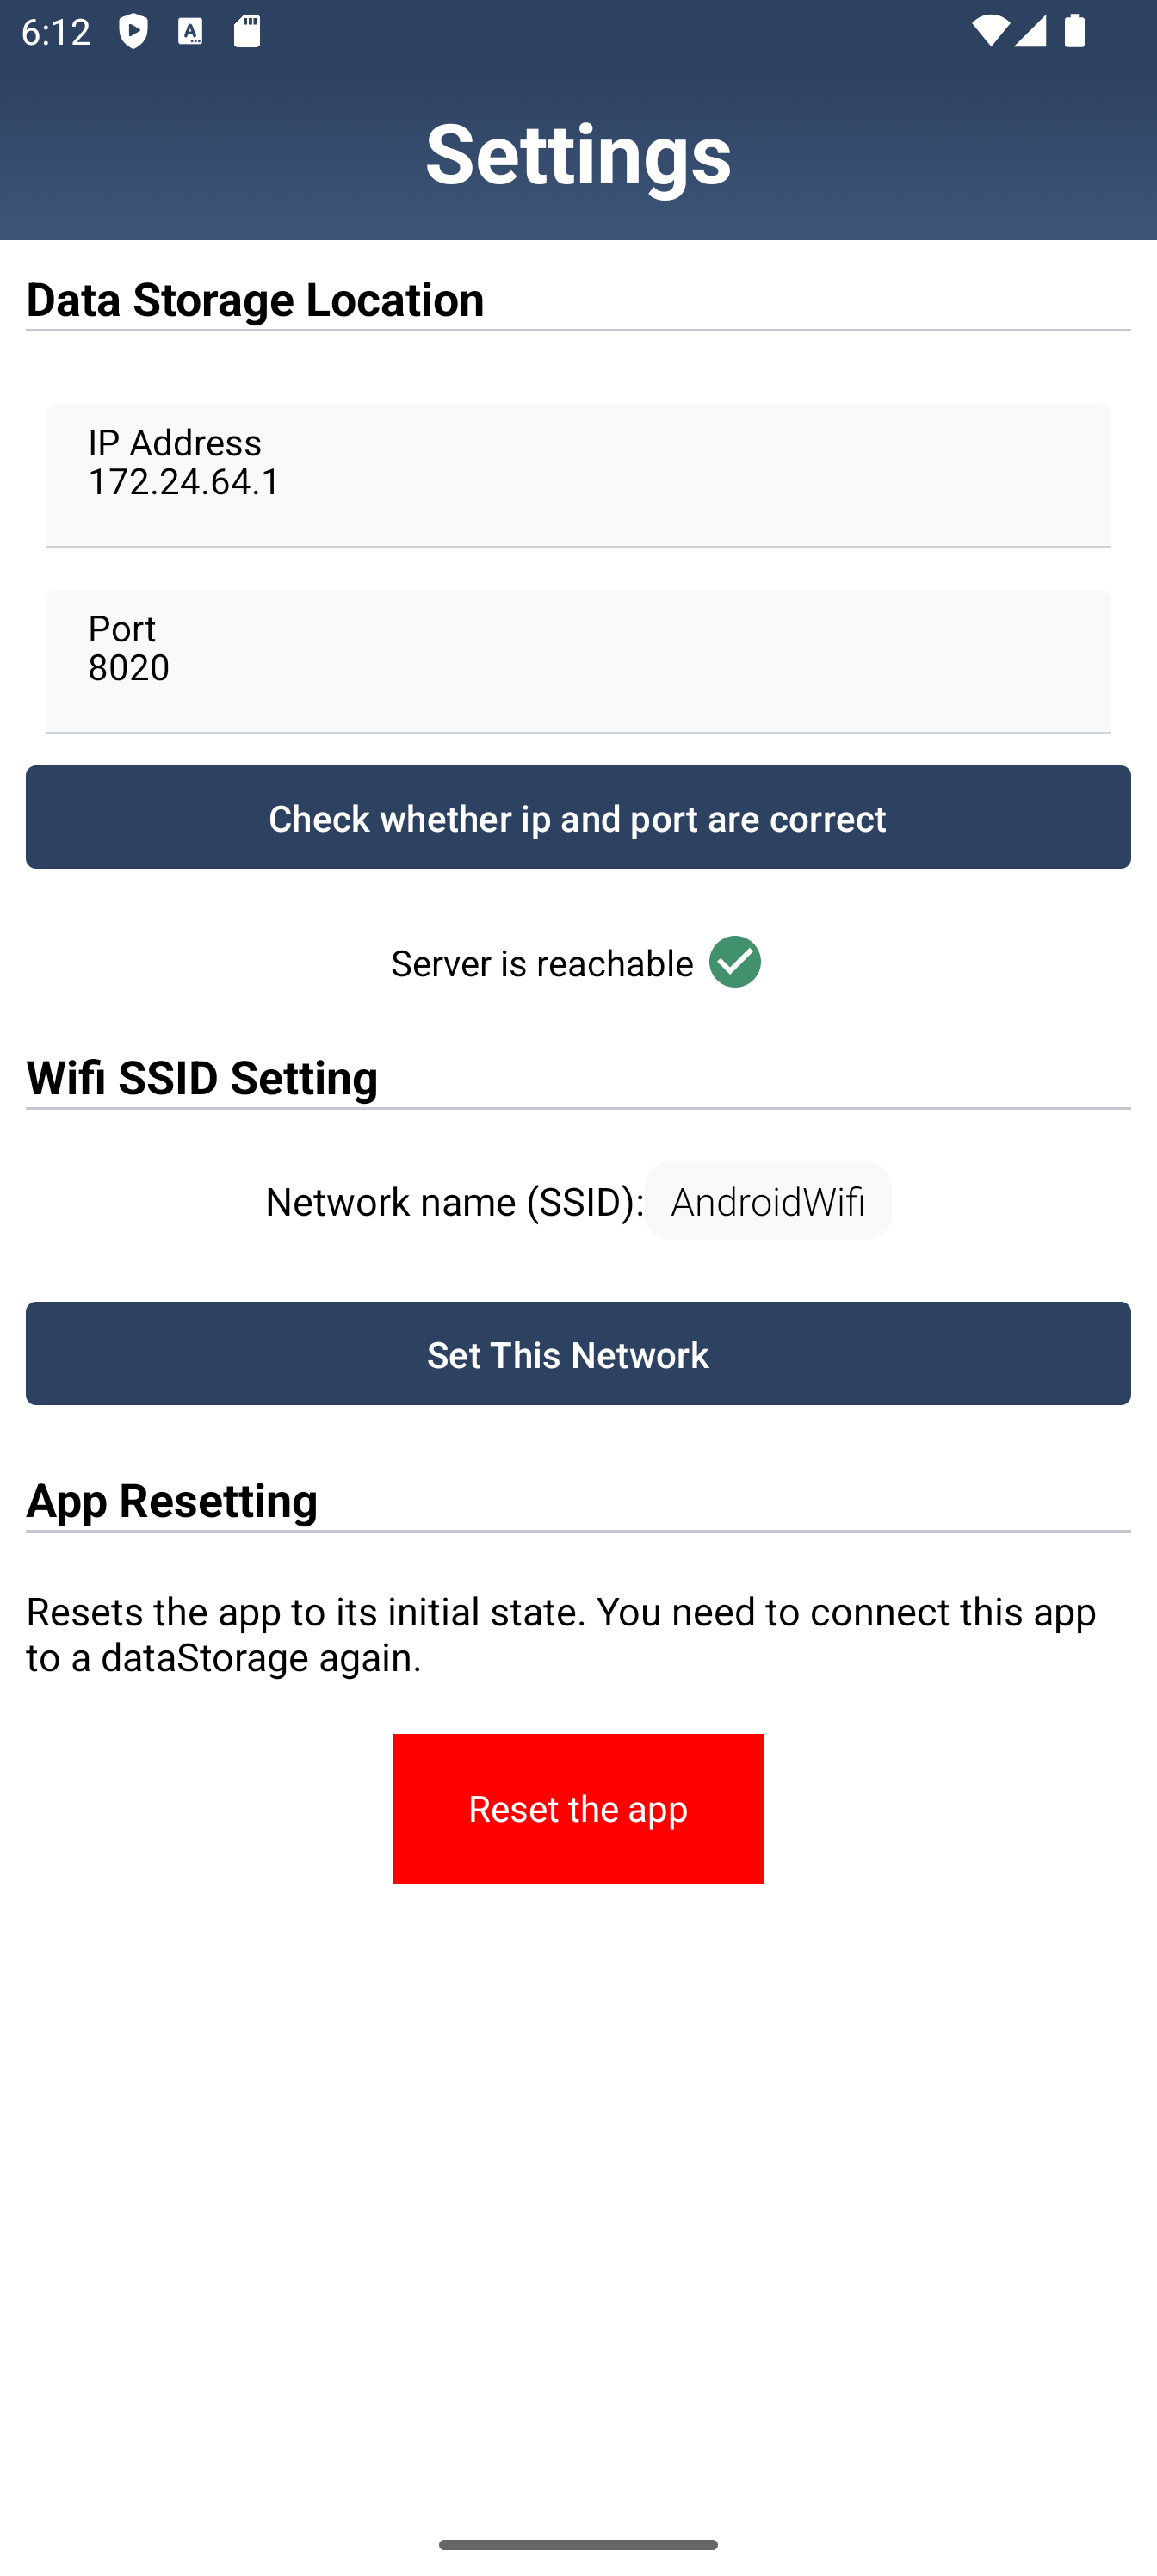
Additionally, next to Network for synchronization in the centre of the screen, there is a gray button that redirects the user to a separate settings screen where they can change the network name and the system's address/port.
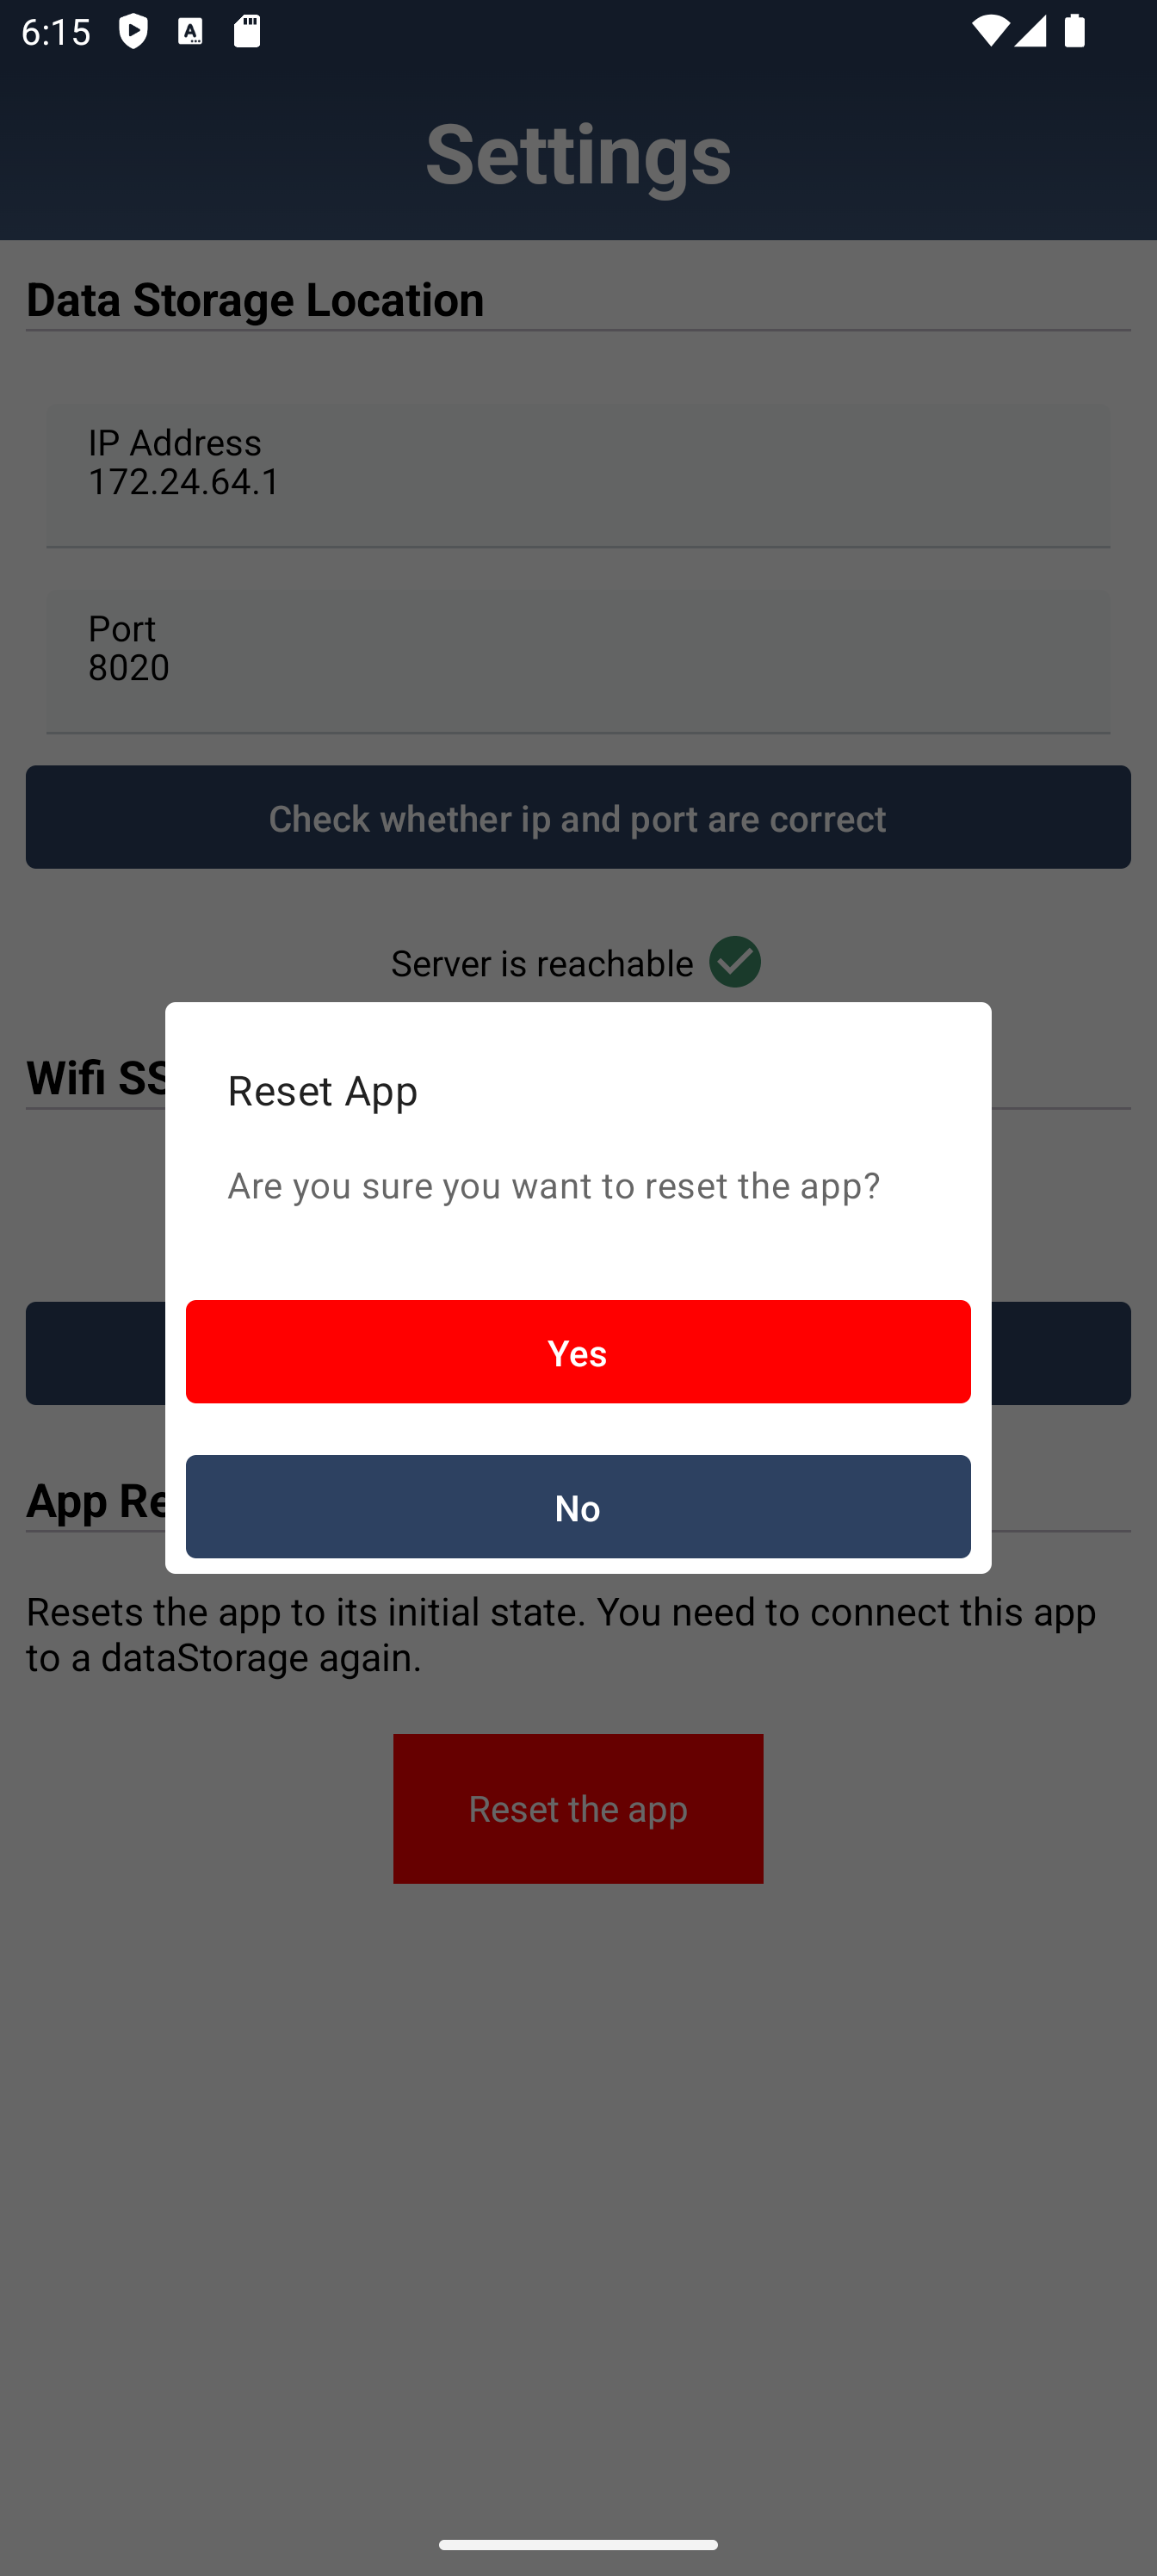
Here, it is also possible to reset the entire application to its original state.
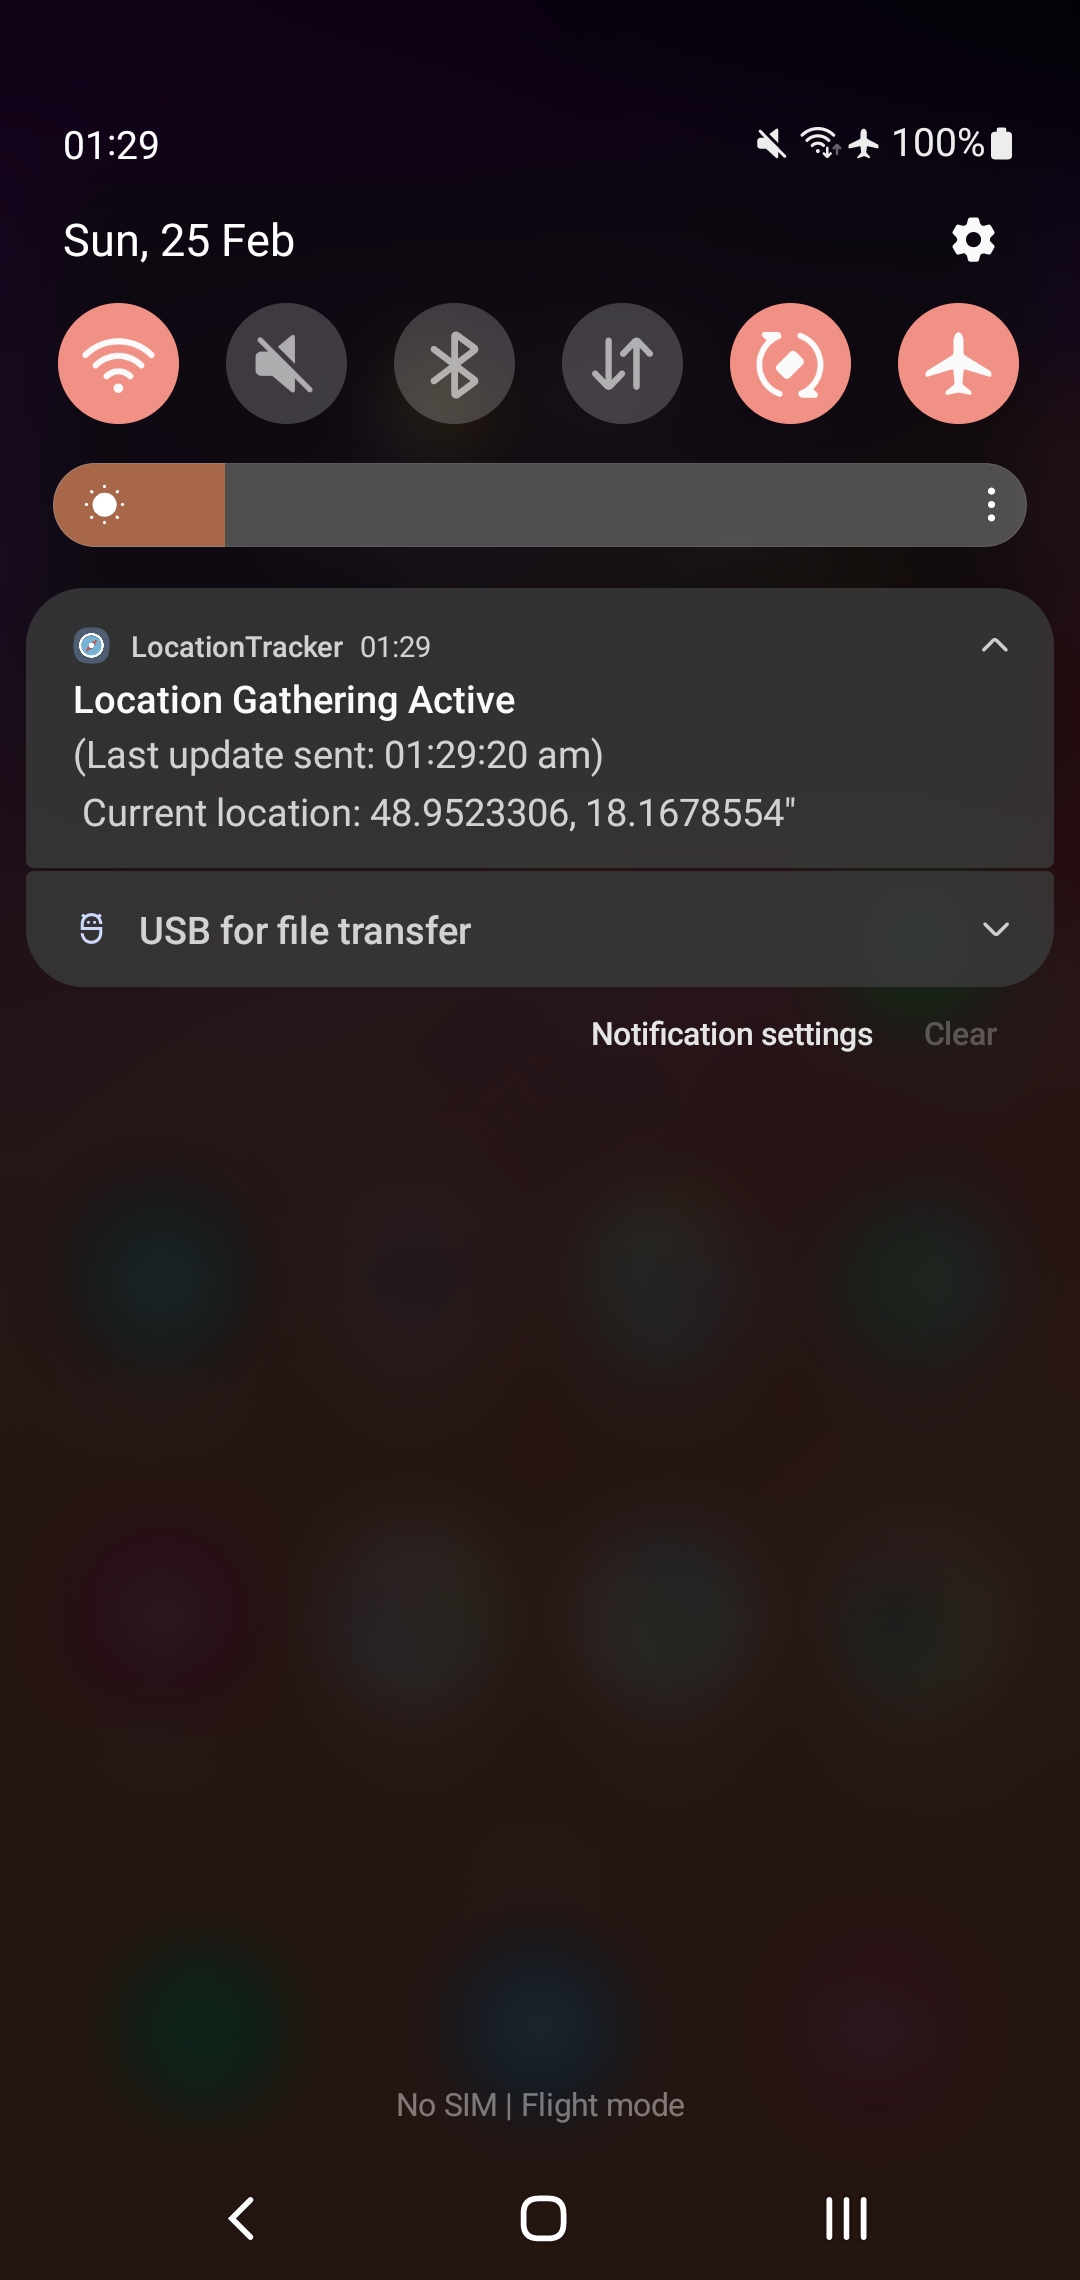
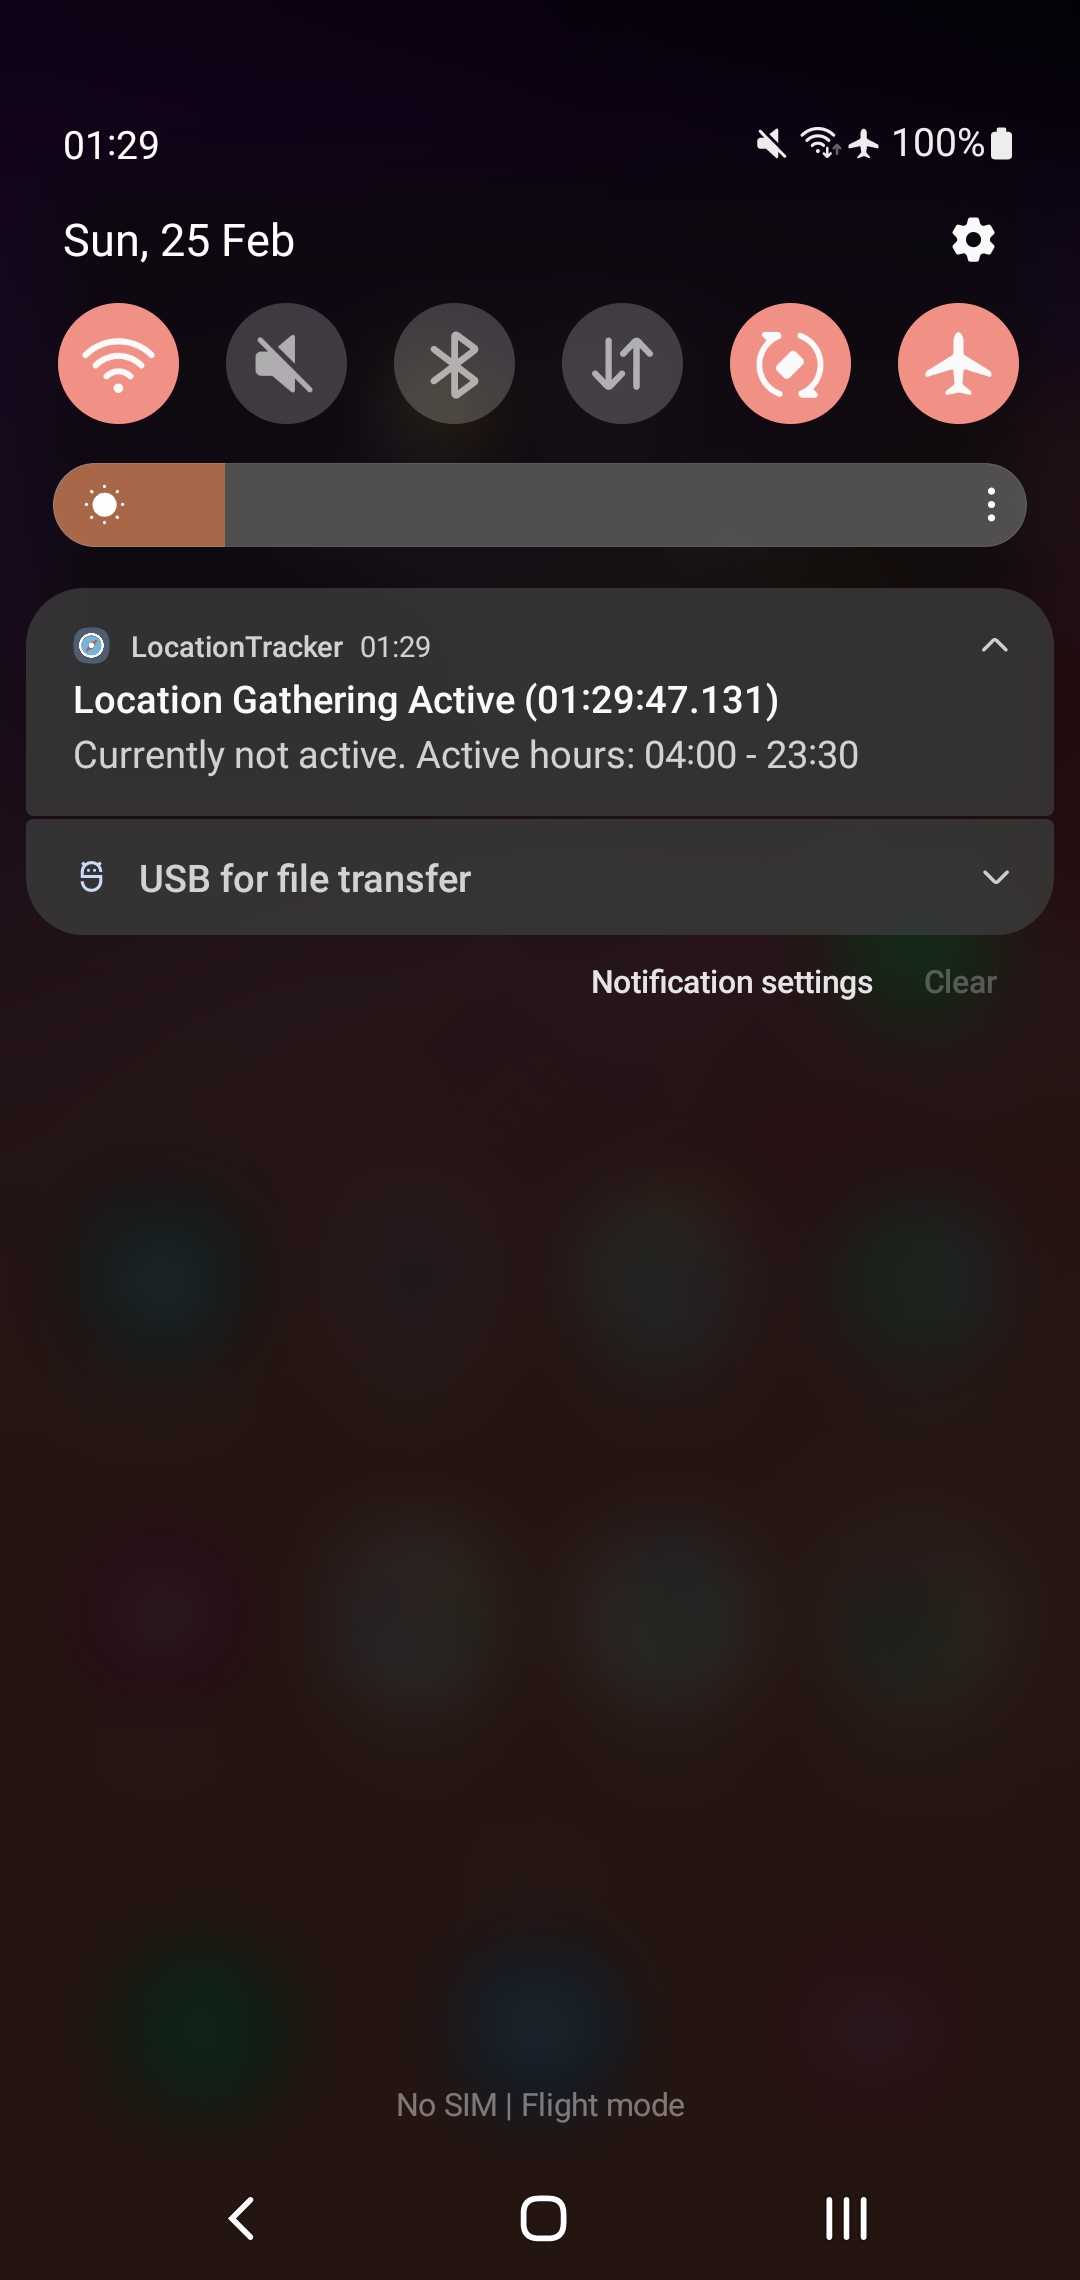
Foreground service must have a persistent notification for proper functioning, which constantly informs the user whether it is successfully active, or during inactive periods (outside the data collection time interval chosen by the user) informs when the active hours are.
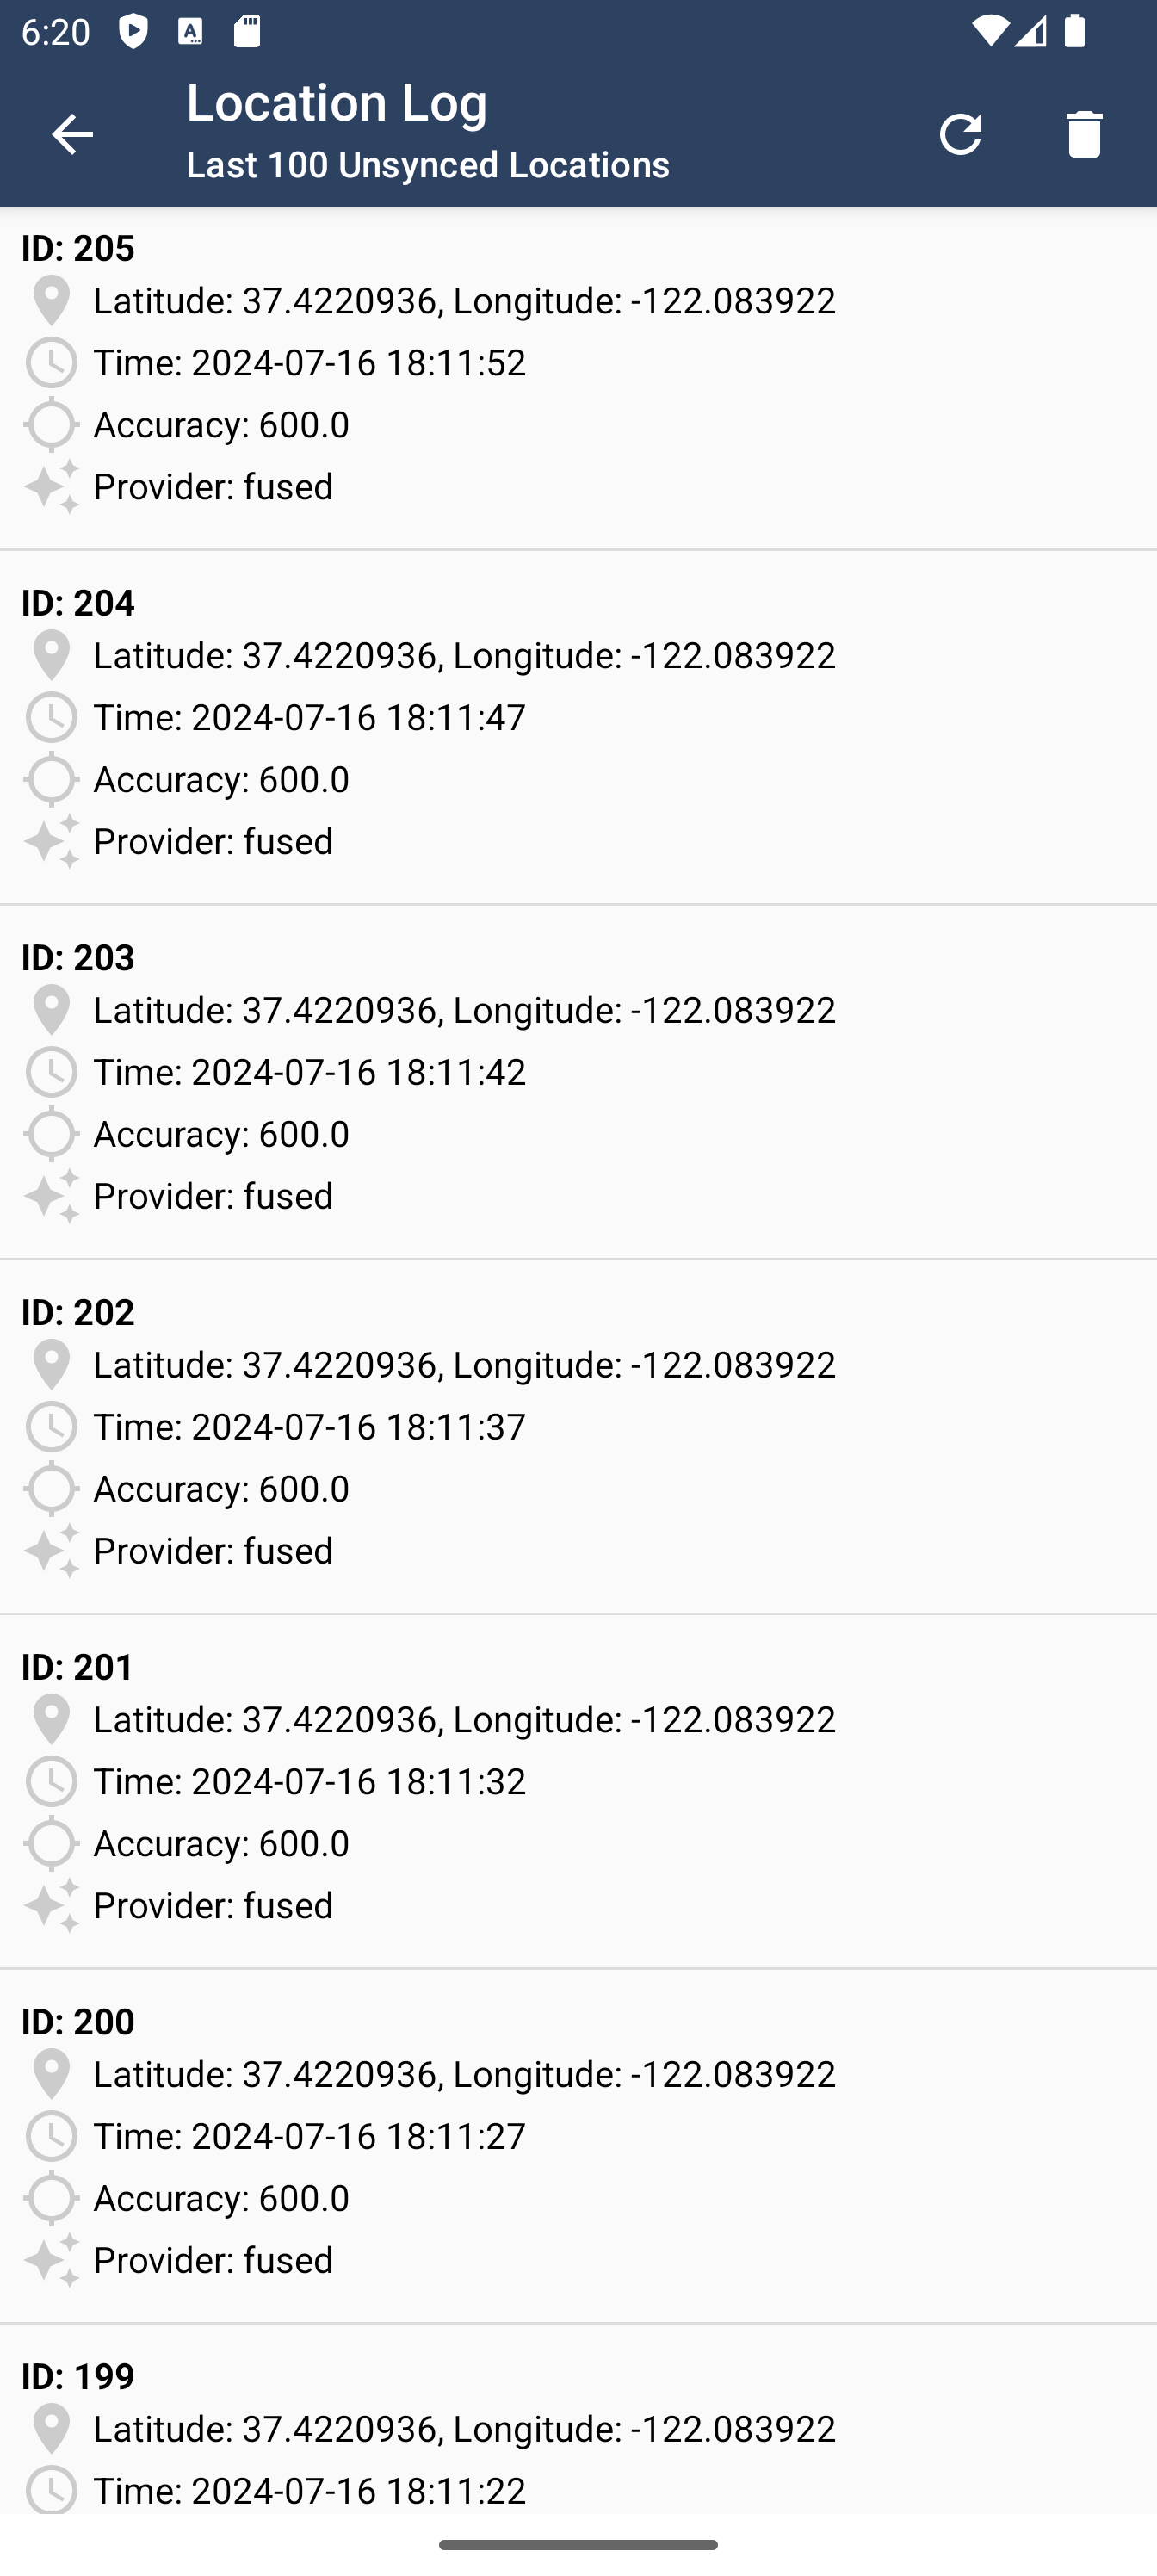
As we are coming to the end of this app tour, there is the last screen that provides a list of gathered location data. This screen can be accessed by tapping Show Data button on the main screen.
In the GitHub's repository, we have Releases page, where you can find a compiled binary of this application so that it's easy to install on your device in case you don't have Android Studio for compiling it yourself. In the release notes, we also have instructions for installing it and information about requirements. As there are multiple releases, please, always use the latest one.